
Sure! Here’s your detailed blog post for Black Cocoa Crinkle Cookies, written in a friendly, simple style, with clear step-by-step instructions and ultra close-up AI image prompts.

Why I Love This Recipe
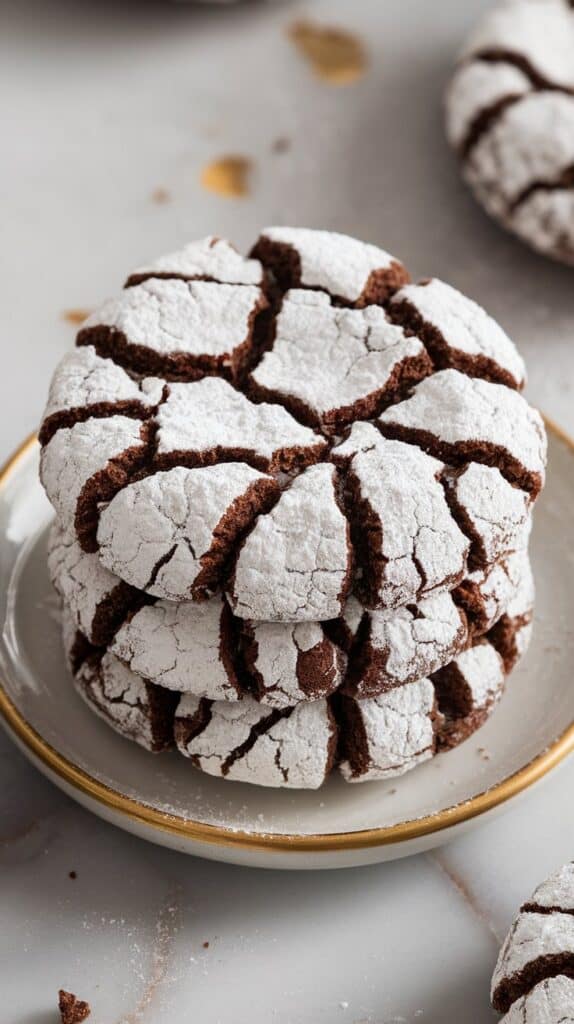
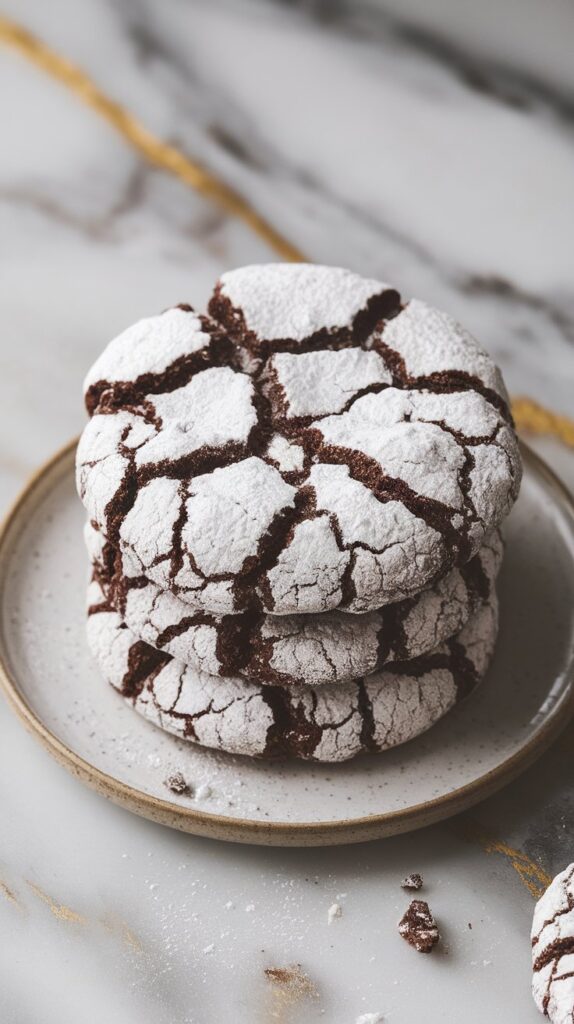
Okay, these cookies are legendary in my house.
They’re the kind of treat you bake on a cozy afternoon when you’re craving something rich, dark, and just a little dramatic.
I first made these for a holiday party, and let me tell you, people could not stop talking about them.
They’re dark as midnight, fudgy like a brownie, and the crackly powdered sugar on top makes them look like something out of a fancy bakery.
And the best part? They’re surprisingly easy.
Here’s what I love:
- That intense dark chocolate flavor from black cocoa (it’s like Oreo cookie dark).
- The contrast between the sweet powdered sugar and rich chocolate.
- They stay soft and fudgy for days.
- You only need basic pantry ingredients + black cocoa.
📊 Servings & Timing:
Makes: 20-24 cookies
Prep time: 15 minutes
Chill time: 30 minutes
Bake time: 10–12 minutes
Total time: ~1 hour
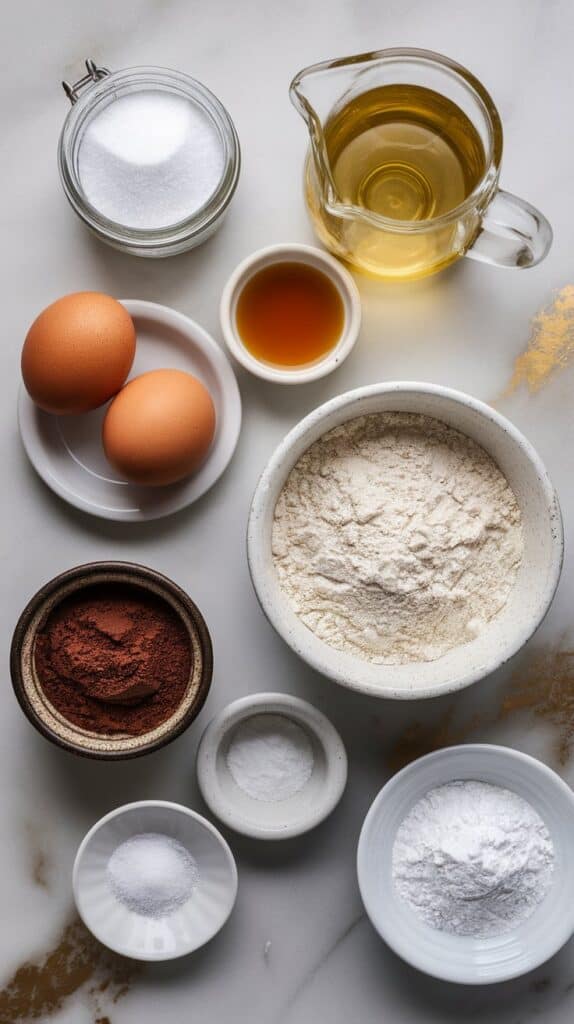
What You’ll Need
- 1 cup granulated sugar
- ½ cup vegetable oil
- 2 large eggs
- 2 teaspoons pure vanilla extract
- 1 cup all-purpose flour
- ½ cup black cocoa powder
- 1 teaspoon baking powder
- ¼ teaspoon fine sea salt
- ½ cup powdered sugar (for rolling)
Pro Tips 🌟
- Don’t skip chilling the dough—it makes rolling much easier and helps the cookies crack just right.
- Use black cocoa powder, not regular cocoa, for that deep black color and Oreo-like flavor.
- Roll generously in powdered sugar so it sticks and creates a strong crackle effect.
- Use a cookie scoop for evenly-sized cookies that bake evenly.
- Watch the bake time—you want them just set, not dry.
Tools You’ll Need
- Large mixing bowl
- Whisk & spatula
- Measuring cups and spoons
- Cookie scoop (medium)
- Baking sheet
- Parchment paper
- Small bowls for rolling sugar
Substitutions & Variations
- Swap black cocoa for dark Dutch-processed cocoa if needed (cookies will be lighter in color).
- Coconut oil instead of vegetable oil adds a light coconut flavor.
- Add mini chocolate chips for extra fudge factor.
- Use almond extract instead of vanilla for a twist.
Make Ahead Tips
- You can make the dough a day ahead and chill overnight. Just scoop and bake the next day.
🍫 Step-by-Step Instructions
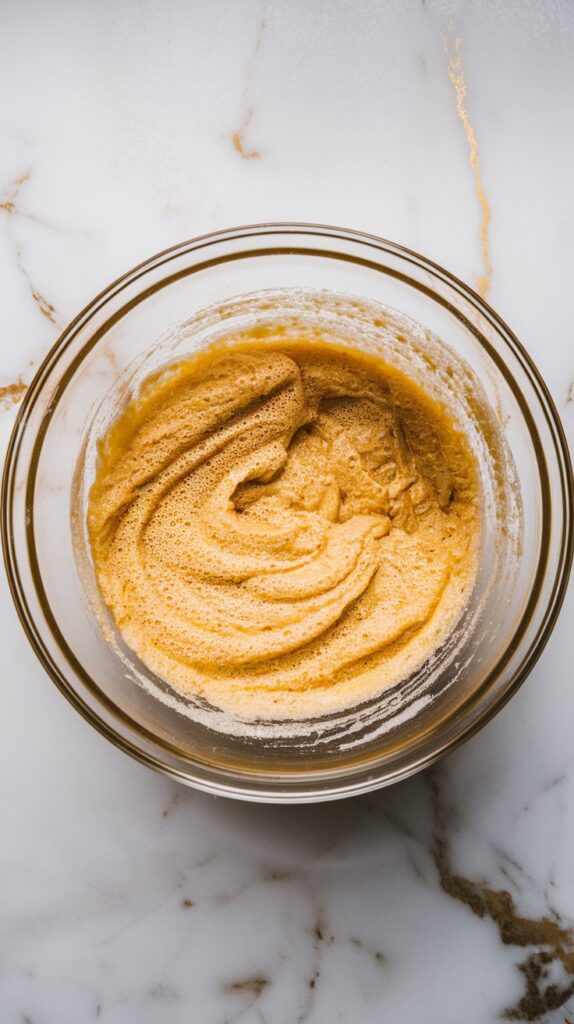
Step 1: Mix Sugar + Oil + Eggs + Vanilla
In a large bowl, whisk together 1 cup granulated sugar, ½ cup vegetable oil, 2 large eggs, and 2 tsp vanilla extract until smooth and slightly thickened.
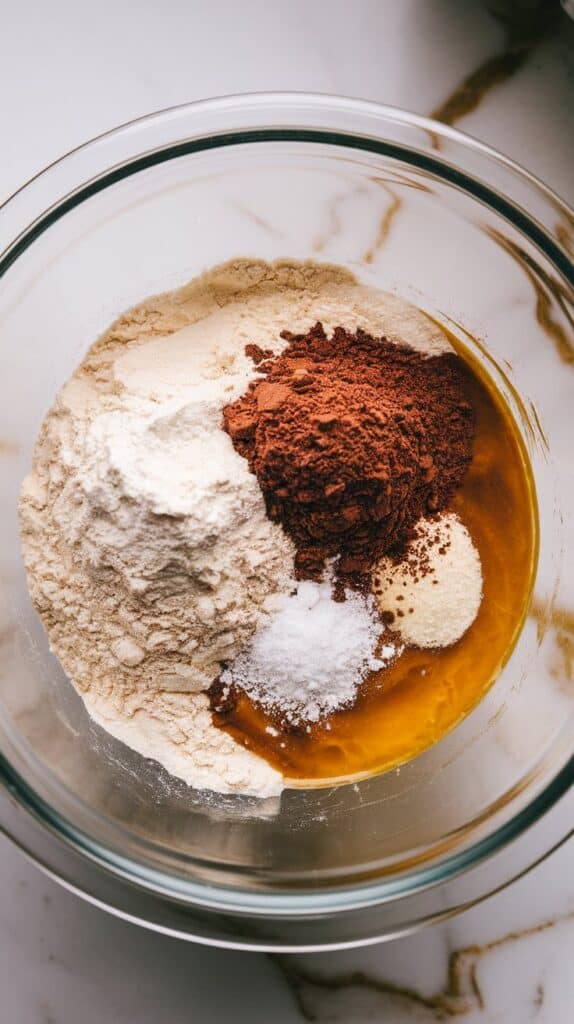
Step 2: Add Dry Ingredients
Sift in 1 cup all-purpose flour, ½ cup black cocoa powder, 1 tsp baking powder, and ¼ tsp fine sea salt. Stir with a spatula until a thick dough forms.
Step 3: Chill the Dough
Cover the bowl and chill for at least 30 minutes, or until firm.

Step 4: Preheat Oven & Prep Baking Sheet
Preheat your oven to 350°F (175°C). Line a baking sheet with parchment paper.
Step 5: Scoop & Roll in Powdered Sugar
Scoop tablespoon-sized balls of dough, roll them first in your hands, then generously coat in powdered sugar.

Step 6: Bake
Place the coated dough balls on your lined baking sheet about 2 inches apart. Bake for 10–12 minutes, until puffed and crackly.
Step 7: Cool & Enjoy
Let cool for 5 minutes on the baking sheet, then transfer to a wire rack to cool completely.
Macros (Per Cookie, Approximate)
- Calories: 115
- Protein: 1g
- Fat: 5g
- Carbs: 16g
- Sugar: 11g
Why This Recipe Works (Quick Science)
- Oil instead of butter: Keeps the cookies ultra-moist and fudgy, not cakey.
- Black cocoa powder: Has a lower fat content and gives an intense color and smooth chocolate flavor.
- Powdered sugar outside: Slows surface drying, creating those iconic crackles as the cookies expand in the oven.
- Chilling the dough: Prevents the cookies from spreading too fast and losing their shape.
Common Mistakes to Avoid
- Skipping the chill time — your cookies will spread too much and not crack properly.
- Using regular cocoa powder — you’ll miss the deep black color and Oreo-like taste.
- Under-coating with powdered sugar — the cracks won’t be as striking.
- Overbaking — these should be soft in the middle, not crisp.
What to Serve With Black Cocoa Crinkle Cookies
- A big glass of cold milk
- Hot coffee or espresso
- Peppermint tea for a festive vibe
- Fresh berries on the side for some brightness
FAQ
Q: Can I use regular cocoa powder?
A: You can, but your cookies will be brown, not black, and have a lighter chocolate taste.
Q: Can I freeze the dough?
A: Yes! Scoop into balls and freeze before rolling in powdered sugar. Bake from frozen, adding 1–2 extra minutes.
Q: Why didn’t my cookies crack?
A: Probably because your dough was too warm, or you didn’t use enough powdered sugar.
Q: How long do these stay fresh?
A: About 4–5 days in an airtight container at room temp.
Leftovers & Storage
- Store in an airtight container at room temperature for up to 5 days.
- Freeze baked cookies in a zip-top bag for up to 2 months.
- Re-crisp in the oven at 300°F for 2–3 minutes if they soften.
Ready to Bake?
I cannot wait for you to try these. They’re the kind of cookie that makes people stop mid-bite and go, “Whoa.” Let me know in the comments if you make them—or if you have questions along the way. Happy baking, friends!
