
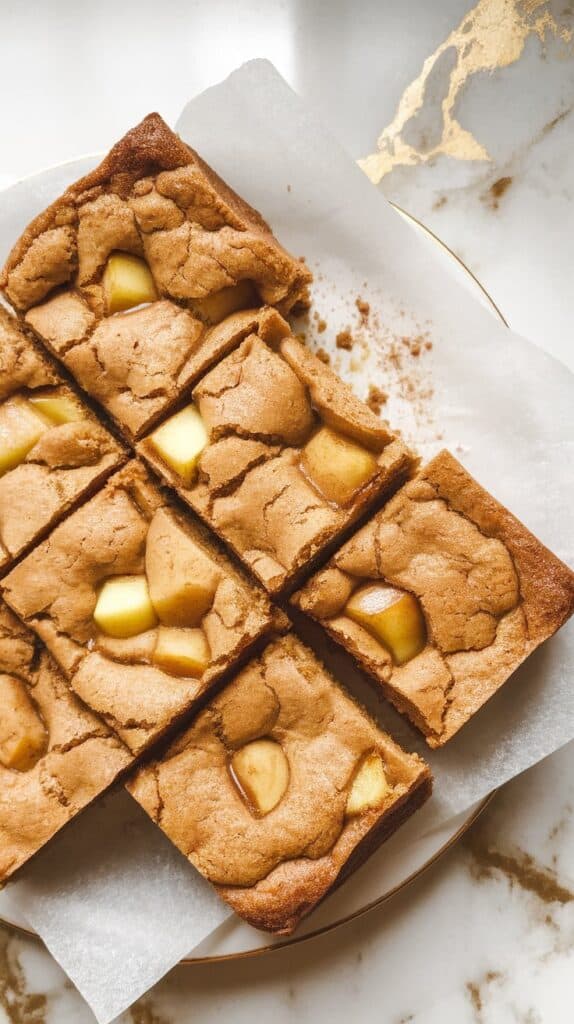
These brown butter cinnamon apple blondies are soft, chewy, and packed with cozy fall flavors.
The brown butter adds a deep, nutty flavor, while the cinnamon and apples bring warmth and sweetness.
They’re the perfect dessert for when you want something comforting but simple.
I’ve made these for weekend treats, potlucks, and just-because baking days—they never last long!

Why I Love This Recipe
This is one of my favorite blondie recipes. It hits that perfect sweet spot between nostalgic and rich without being over the top.
- The brown butter gives it an amazing nutty flavor that regular butter just can’t match
- The apples stay tender and juicy without making the bars soggy
- It comes together in one bowl (minus the butter browning part)
- It smells like a bakery while it bakes—cinnamon, apples, butter, sugar
- It’s great warm, room temp, or straight from the fridge

Makes
16 blondie squares
Time
Prep Time: 20 minutes
Cook Time: 28–32 minutes
Cool Time: 20 minutes
Total Time: 1 hour 10 minutes
Macros (Per Blondie)
- Calories: 220
- Carbs: 30g
- Protein: 2g
- Fat: 10g
- Fiber: 1g
- Sugar: 20g
Why This Recipe Works (Quick Science)
- Brown butter is butter that’s been cooked until the milk solids toast—this creates deeper flavor that regular melted butter won’t give you.
- Brown sugar helps keep the blondies soft and chewy thanks to its molasses content.
- Eggs provide structure and help bind the blondies together.
- Diced apples add moisture and flavor but are kept in small pieces so they don’t make the batter watery.
Common Mistakes
- Not watching the butter—brown butter turns to burnt butter quickly. Stir and watch it closely.
- Using too-large apple chunks—they can sink or create soggy spots. Dice them small (about pea-sized).
- Overbaking—pull them out when the edges are set but the center still looks slightly soft. They’ll firm up as they cool.
- Not cooling before slicing—if you cut too soon, they’ll fall apart. Let them rest 20 minutes at least.
What You’ll Need
- 1 cup (2 sticks) unsalted butter
- 1 ½ cups light brown sugar, packed
- 2 large eggs
- 2 teaspoons vanilla extract
- 1 ½ cups all-purpose flour
- 1 ½ teaspoons cinnamon
- ½ teaspoon baking powder
- ½ teaspoon salt
- 1 cup peeled, diced apple (about 1 medium apple, diced into pea-sized pieces)

Tools Required
- Medium saucepan
- Large mixing bowl
- Whisk
- Rubber spatula
- 8×8 inch metal baking pan
- Parchment paper
- Knife and cutting board
- Cooling rack
Pro Tips
- Use a metal pan for even baking—glass tends to make the edges over-bake
- Chill the browned butter for 5 minutes before adding sugar so it doesn’t cook the eggs
- Toss diced apples with a pinch of cinnamon before folding them in
- Line your pan with parchment and leave a bit hanging over the edges—makes lifting and slicing easier
- Want a little crunch? Add ½ cup chopped toasted pecans or walnuts
Substitutions and Variations
- Swap apples for pears for a different twist
- Use dark brown sugar for a deeper molasses flavor
- Add white chocolate chips or butterscotch chips
- Make it gluten-free with 1:1 GF flour blend
- Use pumpkin spice instead of just cinnamon for a fall vibe
Make Ahead Tips
- Brown the butter up to 3 days ahead—store it covered in the fridge and melt again before using
- You can fully bake these a day ahead. They get even chewier the next day. Just store them tightly covered.
Instructions
Step 1: Brown the Butter
Add 1 cup (2 sticks) unsalted butter to a medium saucepan. Heat over medium, stirring constantly, until the butter foams, then turns golden brown with brown specks at the bottom. This takes about 6–8 minutes. Remove from heat and let cool for 5 minutes.

Step 2: Mix in Sugar
In a large mixing bowl, add the slightly cooled browned butter and 1 ½ cups packed light brown sugar. Whisk until smooth and glossy, about 1–2 minutes.

Step 3: Add Eggs and Vanilla
Add 2 large eggs and 2 teaspoons vanilla extract to the bowl. Whisk until fully combined and smooth.

Step 4: Add Dry Ingredients
Add 1 ½ cups all-purpose flour, 1 ½ teaspoons cinnamon, ½ teaspoon baking powder, and ½ teaspoon salt. Use a rubber spatula to gently fold until just combined—don’t overmix.

Step 5: Fold in Apples
Add 1 cup of peeled, diced apples. Gently fold them into the batter until evenly distributed.

Step 6: Spread in Pan and Bake
Line an 8×8 inch metal pan with parchment. Spread batter evenly and smooth the top. Bake at 350°F (175°C) for 28–32 minutes, until the edges are golden and a toothpick comes out with just a few moist crumbs.
Leftovers and Storage
Let blondies cool completely, then store in an airtight container:
- Room temp: Up to 3 days
- Fridge: Up to 5 days
- Freezer: Wrap individually and freeze up to 2 months
They’re great cold or warmed for 10 seconds in the microwave.
What to Serve With
- A scoop of vanilla ice cream
- Hot apple cider or chai tea
- Drizzle of salted caramel sauce
- Whipped cream and toasted nuts
FAQ
Can I use salted butter?
Yes, just reduce added salt to a pinch or skip it.
Can I double this recipe?
Yes—use a 9×13 pan and bake for 32–36 minutes.
Do I need to peel the apples?
I recommend peeling, but you can leave the skins on if you don’t mind the texture.
What kind of apples should I use?
Granny Smith, Honeycrisp, or Fuji work great—any firm apple that won’t get mushy.
Can I add nuts or chocolate chips?
Absolutely. Add up to ½ cup of chopped toasted nuts or chocolate chips with the apples.
Conclusion
These brown butter cinnamon apple blondies are one of those recipes you’ll want to make again and again. They’re cozy, easy, and smell amazing while baking. Give them a try, and if you do, I’d love to hear how it went in the comments! Let me know your favorite twist or if you ran into any questions—I’m happy to help!
