
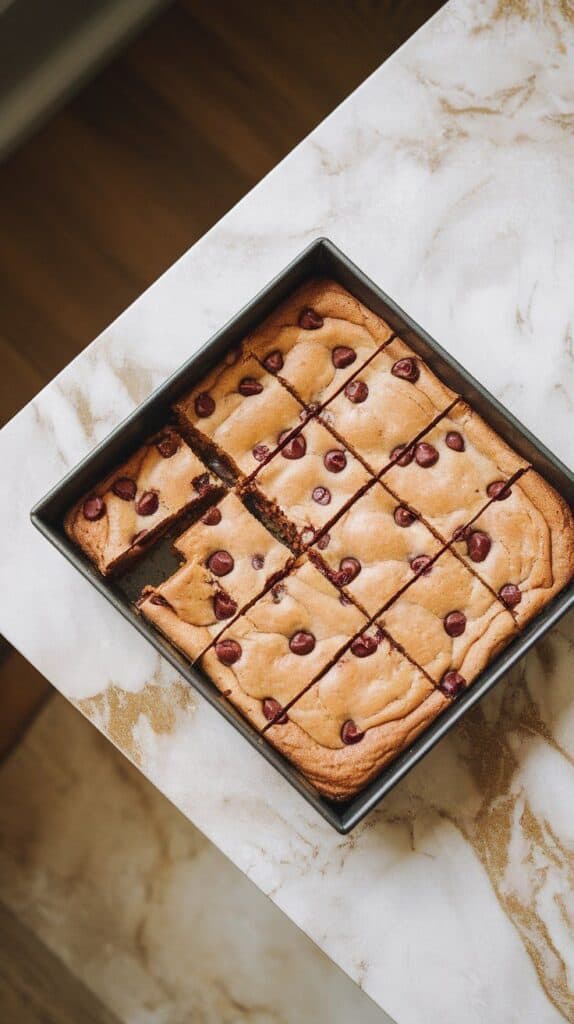
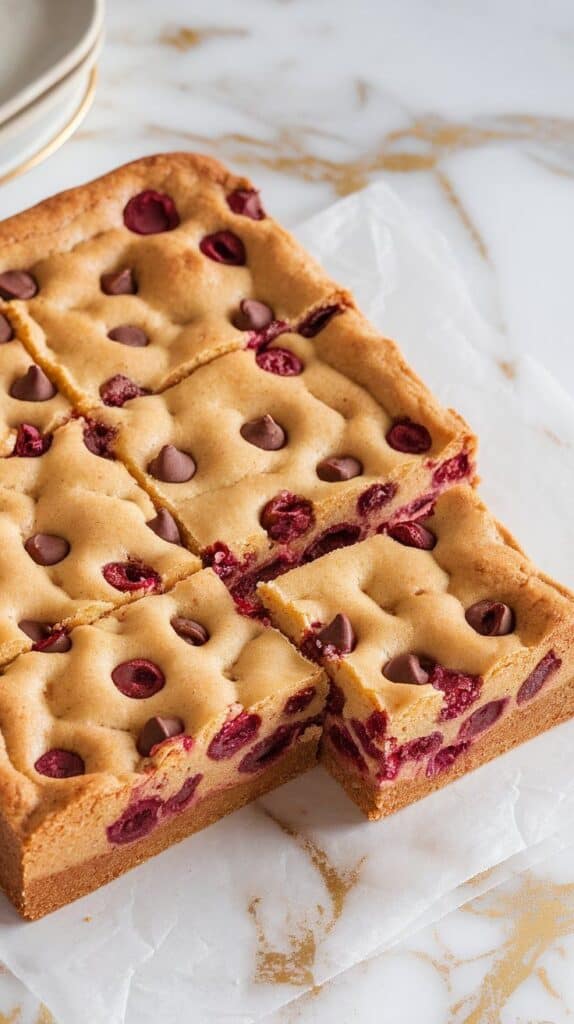
Soft, chewy, gooey, and full of cherries and melty chocolate chips.
Hey there!
Let me introduce you to your new favorite bar dessert: Cherry Chocolate Chip Blondies. These are everything you love about a classic blondie—sweet, buttery, a little caramel-y—but we’re loading them up with juicy cherries and chocolate chips. The combo is so good, it’s like a chocolate-covered cherry in blondie form.
It’s a one-bowl recipe, no mixer needed, and comes together super fast. Let’s bake.

🍒 Servings & Time
- Servings: 12 bars
- Prep Time: 15 minutes
- Bake Time: 25–28 minutes
- Total Time: About 45 minutes
❤️ Why I Love This Recipe
This recipe came out of a moment of “what can I do with these leftover cherries and half a bag of chocolate chips?” And wow—I wasn’t expecting them to be this good. The blondie base is buttery and rich, and the cherry-chocolate combo adds little pockets of sweetness and tartness in every bite.
- One bowl, no mess
- Cherries stay juicy and vibrant
- Perfect combo of chewy and gooey
- They freeze well for later
- Fancy flavor with barely any work
🔬 Why This Recipe Works (Quick Science)
- Brown sugar keeps the blondies moist and chewy
- Melted butter = rich texture and easy mixing
- Eggs bind everything and help it rise slightly
- Tossing the cherries in flour helps keep them from sinking
- Chocolate chips melt into the batter for those perfect gooey bits
🧠 Meal Plan Ideas
- Bake a pan and portion out for dessert all week
- Bring to potlucks, picnics, or casual dinner parties
- Freeze slices and reheat for emergency sweet cravings
- Serve warm with a scoop of ice cream for dessert
⚠️ Common Mistakes to Avoid
- Overbaking – they’ll turn dry instead of chewy
- Using wet cherries – pat them dry or the bars will be soggy
- Skipping parchment paper – makes them hard to lift and slice cleanly
- Overmixing the batter – leads to tough texture
🍽 What You’ll Need
Dry:
- 1¼ cups all-purpose flour
- ½ teaspoon baking powder
- ¼ teaspoon salt
Wet:
- ½ cup (1 stick) unsalted butter, melted
- 1 cup light brown sugar, packed
- 1 large egg
- 1 teaspoon vanilla extract
Add-ins:
- 1 cup fresh cherries, pitted and chopped
- ½ tablespoon flour (for tossing the cherries)
- ½ cup chocolate chips
🧰 Tools You’ll Need
- Mixing bowl
- Whisk and spatula
- 8×8-inch baking pan
- Parchment paper
- Measuring cups and spoons
- Knife and cutting board (for cherries)

🔁 Substitutions & Variations
- Cherries: Use frozen (thawed and drained) or dried cherries
- Chocolate chips: Use dark, milk, or white chocolate
- Add nuts: Chopped pecans or walnuts for crunch
- Make it gluten-free: Use a 1:1 GF flour blend
⏳ Make-Ahead Tips
- Make and freeze the whole batch—wrap slices individually
- Store baked blondies at room temp for 2–3 days or refrigerate for up to a week
- Prep your cherries ahead and keep them pitted in the fridge
👣 Step-by-Step Instructions
Step 1: Melt butter and mix with sugar
In a large bowl, whisk together melted butter and brown sugar until glossy and smooth.

Step 2: Add egg and vanilla
Whisk in the egg and vanilla extract until fully combined.

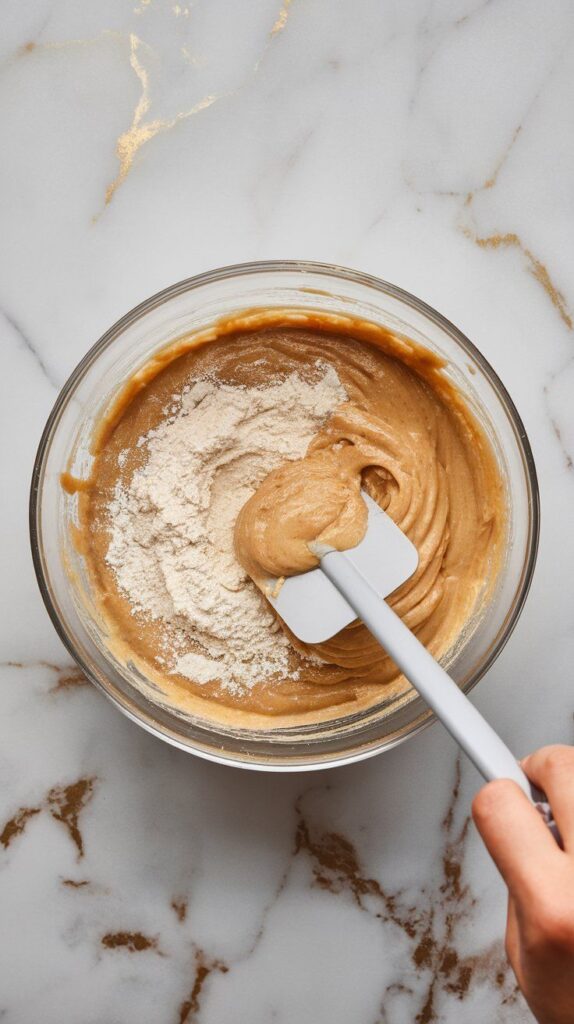
Step 3: Add dry ingredients
Stir in the flour, baking powder, and salt just until no streaks remain.
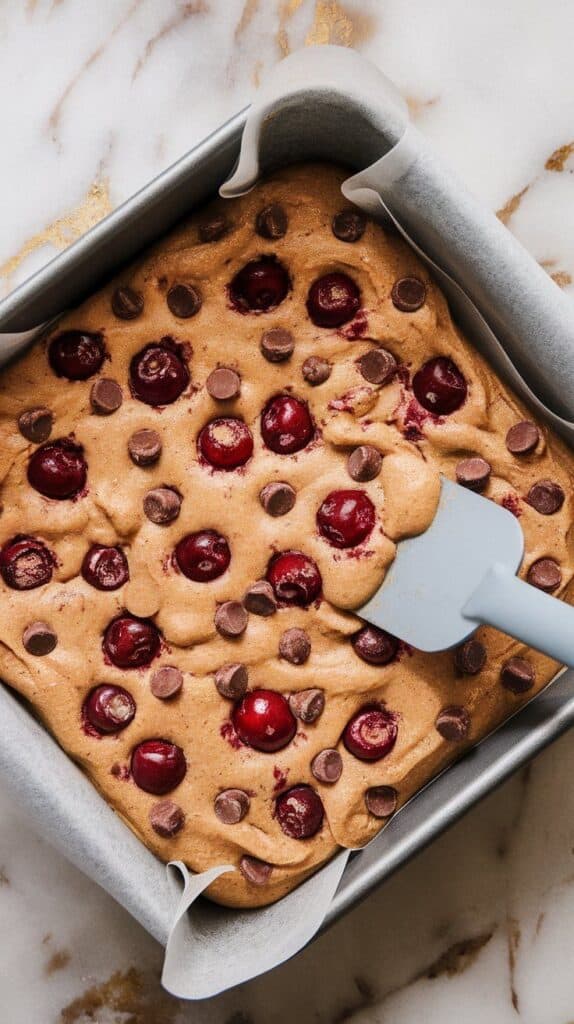
Step 4: Prep and fold in cherries
Toss the chopped cherries with ½ tablespoon flour. Fold them into the batter along with the chocolate chips.

Step 5: Pour into pan
Line an 8×8-inch baking pan with parchment. Pour the batter in and spread evenly to the edges.
Step 6: Bake
Bake at 350°F for 25–28 minutes, or until the top is golden and a toothpick comes out mostly clean (a few moist crumbs are okay!).

Step 7: Cool and slice
Let blondies cool in the pan for at least 15–20 minutes before slicing into squares.
🧊 Leftovers & Storage Tips
- Store blondies in an airtight container at room temp for 2–3 days
- Refrigerate for up to 1 week
- Freeze individually wrapped bars for up to 3 months
- Reheat in microwave for 10–15 seconds for that gooey chocolate again
🔢 Exact Macros (Per blondie, based on 12 servings)
- Calories: 210
- Protein: 2g
- Fat: 10g
- Carbs: 29g
- Fiber: 1g
- Sugar: 18g
☕ What to Serve With
- A scoop of vanilla or cherry ice cream
- Hot coffee or a latte
- A glass of cold milk
- A drizzle of chocolate or cherry syrup
- Fresh cherries on the side for extra flair
❓ FAQ
Can I use frozen cherries?
Yep! Just thaw them and pat them dry before using.
Can I make this recipe dairy-free?
Use a dairy-free butter substitute and dairy-free chocolate chips.
Can I double the recipe?
Yes—bake in a 9×13 pan and increase bake time to 30–35 minutes.
Can I use a different fruit?
Absolutely! Try raspberries, blueberries, or even dried cranberries.
Get Ready for a Gooey Good Time 🍒🍫
These Cherry Chocolate Chip Blondies are simple, sweet, and seriously satisfying. Whether you bake them for a get-together or just want something extra with your coffee, they hit the spot every time. Give them a go and let me know how they turned out—or what twist you tried! 💬🍪
