
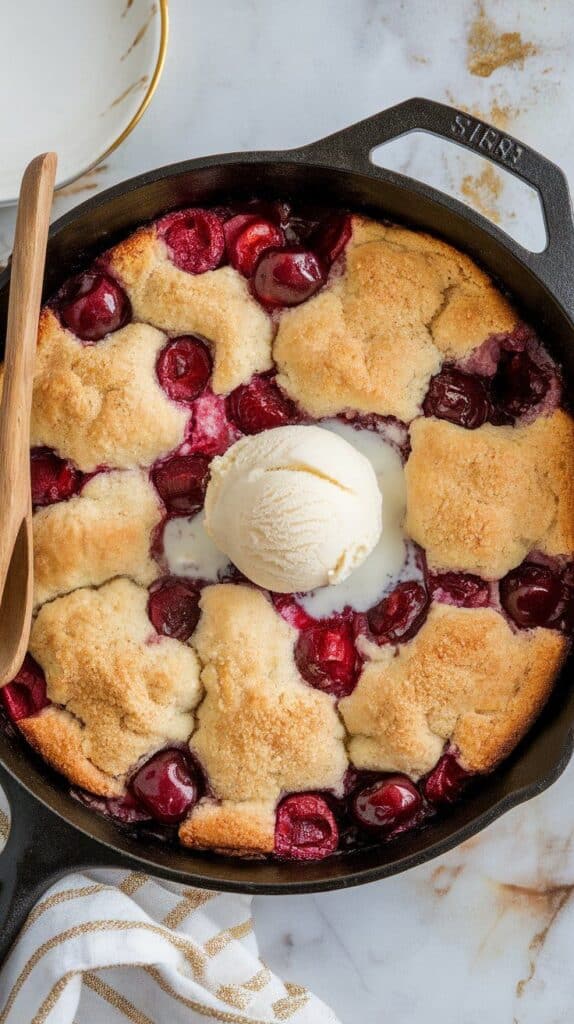
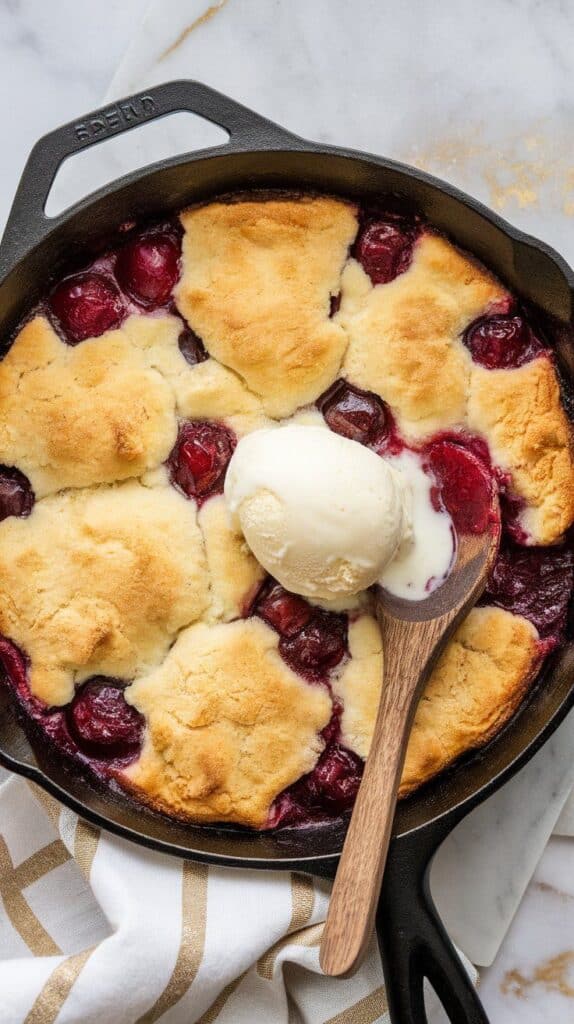
Sweet, jammy cherries baked under golden vanilla cake — all in one skillet
Hey there!
There’s just something so comforting about a warm cobbler straight from the oven. This Cherry Vanilla Skillet Cobbler is one of my all-time favorites. It’s easy, rustic, and packed with juicy cherries and that vanilla-kissed, buttery topping that bakes up golden and slightly crisp on the edges.
It comes together in one pan and tastes even better with a scoop of vanilla ice cream. If you’re craving something cozy, fruity, and simple — this one’s for you.

🍒 Servings & Time
- Servings: 6–8
- Prep Time: 15 minutes
- Bake Time: 35–40 minutes
- Total Time: About 55 minutes
❤️ Why I Love This Recipe
I made this for the first time on a rainy Sunday with a bowl of fresh cherries and no plan. I wanted something easy and warm that didn’t require rolling dough or fancy prep. This cobbler totally delivered—and then some.
- All made in one skillet (less mess!)
- The vanilla cake top is rich but not heavy
- Fresh cherries turn jammy and sweet
- It’s great warm or cold
- Makes the house smell amazing
🔬 Why This Recipe Works (Quick Science)
- Butter melted in the skillet adds richness and helps the crust get crispy edges.
- Baking powder gives the batter lift, creating a soft, tender cake top.
- Tossing cherries with sugar and cornstarch helps them bubble into a thick filling.
- Vanilla enhances the natural sweetness of the cherries.
🧠 Meal Plan Ideas
- Serve as dessert after grilled chicken or a summer dinner
- Enjoy leftovers cold with coffee for breakfast (yes, really)
- Add to a brunch spread as a sweet baked option
- Reheat and serve with yogurt or ice cream
⚠️ Common Mistakes to Avoid
- Skipping the cornstarch — your filling will be too runny
- Not preheating the skillet — affects the rise of the batter
- Overbaking — the top gets dry, and the filling thickens too much
- Using cold butter — it must be fully melted in the skillet first
🍽 What You’ll Need
Cherry Filling:
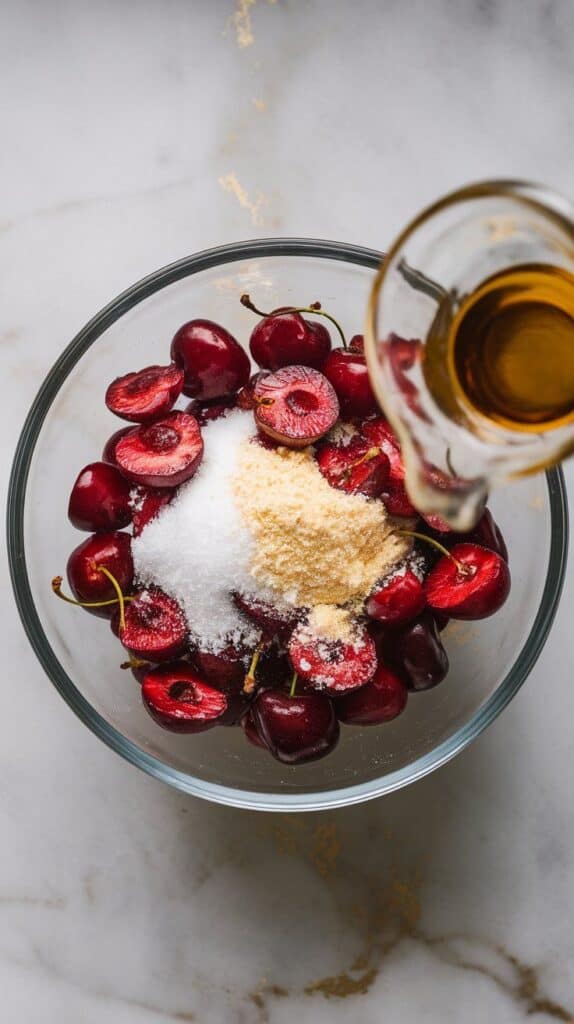
- 4 cups fresh cherries, pitted and halved
- ½ cup granulated sugar
- 1 tablespoon cornstarch
- ½ teaspoon vanilla extract
Batter:
- ½ cup unsalted butter (1 stick)
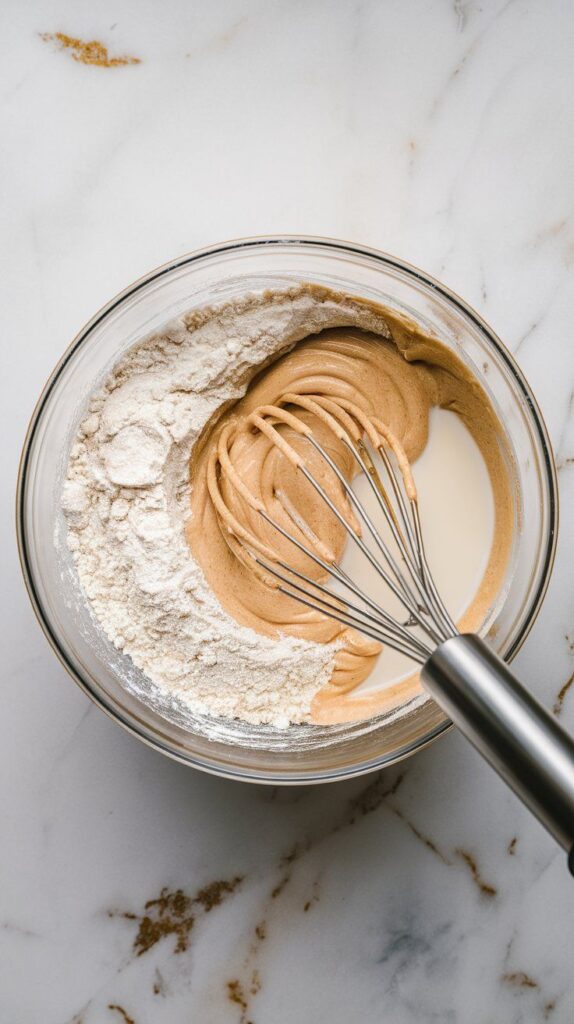
- 1 cup all-purpose flour
- ¾ cup granulated sugar
- 1 tablespoon baking powder
- ½ teaspoon salt
- 1 cup milk
- 1 teaspoon vanilla extract

🧰 Tools You’ll Need
- 10-inch cast-iron skillet (or oven-safe skillet)
- Mixing bowls
- Whisk or fork
- Measuring cups and spoons
- Wooden spoon or spatula
🔁 Substitutions & Variations
- Fruit: Use peaches, blackberries, or a mix of berries
- Butter: Swap for plant-based butter to make it dairy-free
- Milk: Use almond, oat, or coconut milk
- Flavor twist: Add almond extract instead of vanilla
⏳ Make-Ahead Tips
- Mix the cherry filling and batter ahead and keep chilled separately
- Bake just before serving for the best texture
- Leftovers reheat well in the oven or microwave
👣 Step-by-Step Instructions
Step 1: Prep the cherry filling
In a bowl, toss halved cherries with ½ cup sugar, 1 tablespoon cornstarch, and ½ teaspoon vanilla. Let it sit while you prep the batter.
Step 2: Melt butter in skillet
Place butter in the skillet and set in the oven at 350°F to melt while you mix the batter. Once melted, remove from oven.

Step 3: Make the batter
In a bowl, whisk together flour, sugar, baking powder, and salt. Add milk and vanilla and mix until smooth.
Step 4: Pour batter over melted butter
Carefully pour the batter into the hot skillet over the melted butter. Do not stir — the butter will float up around the edges.

Step 5: Add cherries on top
Spoon cherry mixture evenly over the batter — again, no stirring! Just scatter them across the top.

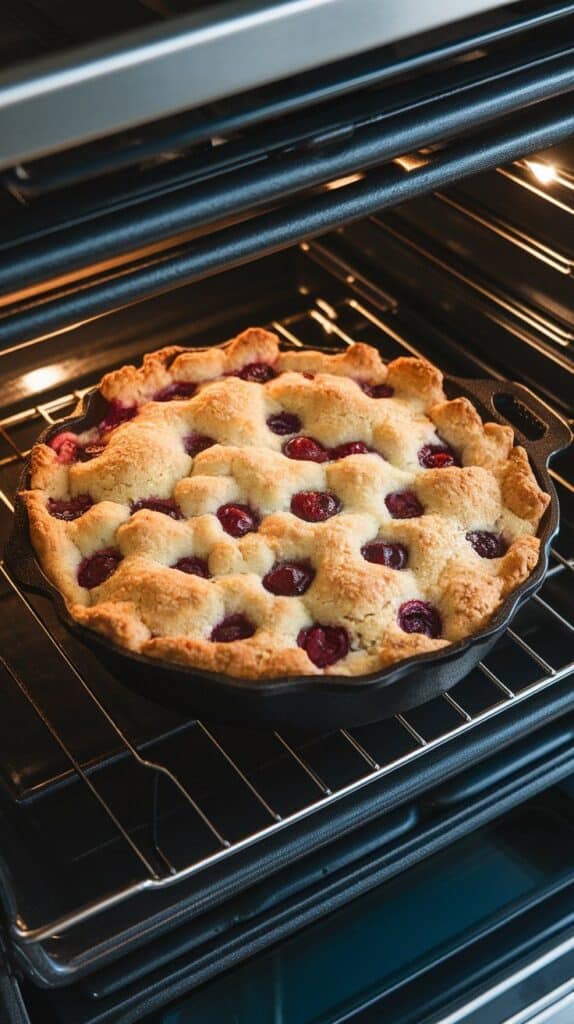
Step 6: Bake until golden and bubbly
Bake at 350°F for 35–40 minutes, or until the top is golden brown and the edges are bubbling.
Step 7: Cool slightly and serve
Let cool for about 10 minutes before serving. Best enjoyed warm with a scoop of vanilla ice cream.
🧊 Leftovers & Storage Tips
- Store leftovers covered in the fridge for 3–4 days
- Reheat in the oven at 300°F or microwave until warm
- Enjoy cold for breakfast with yogurt (trust me)
🔢 Exact Macros (Per serving, based on 8)
- Calories: 260
- Protein: 3g
- Fat: 11g
- Carbs: 39g
- Fiber: 2g
- Sugar: 25g
🍨 What to Serve With
- A big scoop of vanilla ice cream
- Whipped cream or Greek yogurt
- Fresh mint leaves
- Glass of iced tea or a dessert wine
❓ FAQ
Can I use frozen cherries?
Yes! Just thaw and drain them first so the filling isn’t watery.
What if I don’t have a cast iron skillet?
Use any oven-safe 9-inch round or square baking dish.
Can I make this gluten-free?
Yep—use a 1:1 gluten-free baking flour blend.
Can I double the recipe?
Yes! Use a larger skillet or a 9×13 baking dish and bake 5–10 minutes longer.
Cozy, Easy, and So Delicious 🍒
This Cherry Vanilla Skillet Cobbler is one of those go-to desserts that feels like a hug in a skillet. It’s simple, warm, and tastes like summer (or cozy season, honestly). Make it once, and I promise—it’ll be on repeat. Let me know if you try it, or tag me with your twist! 💬🫶
