
This gingerbread fudge is like a cozy hug in candy form.
It’s creamy, packed with warm holiday spices, and it melts in your mouth.
You don’t need a candy thermometer, and it comes together so easily.
This is one of those treats that tastes like December—sweet, spiced, and a little magical.
Perfect for gifting or just enjoying at home with a hot drink.

Why I Love This Recipe
This gingerbread fudge is one of those recipes I come back to every single year—no matter what. I love how it fills the kitchen with that cozy holiday smell of ginger, cinnamon, and molasses. But honestly? What I love most is how easy it is. No baking. No stress. Just melt, stir, chill, done. It’s my go-to when I want something festive but simple.
Here’s why it has a permanent spot in my holiday treat list:
- It’s rich, creamy, and melts in your mouth
- Has that perfect balance of warm spice and sweet
- No candy thermometer or fancy tools needed
- It makes the whole house smell like Christmas
- Everyone thinks you spent hours making it—but you didn’t
It’s the kind of treat that feels special with very little effort. Total win.
What You’ll Need
- 3 cups white chocolate chips
- 1 (14 oz) can sweetened condensed milk
- 2 tablespoons molasses
- 1½ teaspoons ground ginger
- 1 teaspoon ground cinnamon
- ¼ teaspoon ground nutmeg
- ¼ teaspoon ground cloves
- 1 teaspoon vanilla extract
- Pinch of salt

Pro Tips
- Use good quality white chocolate chips—they melt smoother and taste better.
- Don’t overheat the mixture or it can get grainy. Low and slow is key.
- Line your pan with parchment for easy fudge removal.
- Let the fudge chill fully before cutting for clean squares.
- Use a hot knife to slice perfect edges.
Tools You’ll Need
- Medium saucepan
- Rubber spatula
- 8×8 inch square baking pan
- Parchment paper
- Measuring cups and spoons
- Mixing spoon or spatula
Substitutions and Variations
- Swap molasses with maple syrup for a lighter flavor (though not as classic).
- Add chopped nuts for texture—pecans or walnuts work great.
- Sprinkle crushed gingersnaps on top before chilling for extra crunch.
- Use dark chocolate chips for a deep, rich twist (not traditional but delicious).
Make Ahead Tips
- You can make this fudge up to 2 weeks ahead.
- Store it in an airtight container in the fridge.
- You can also freeze it for up to 3 months—just wrap tightly and thaw in the fridge overnight.
Servings and Time
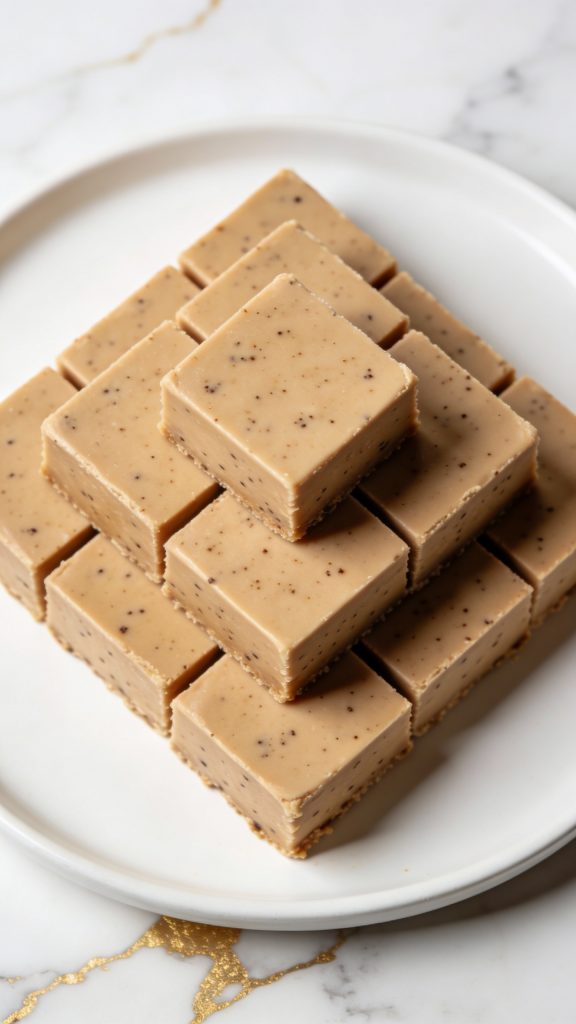
- Makes: 36 small squares
- Prep + Chill Time: 15 minutes prep, 3 hours chill
Cooking Steps
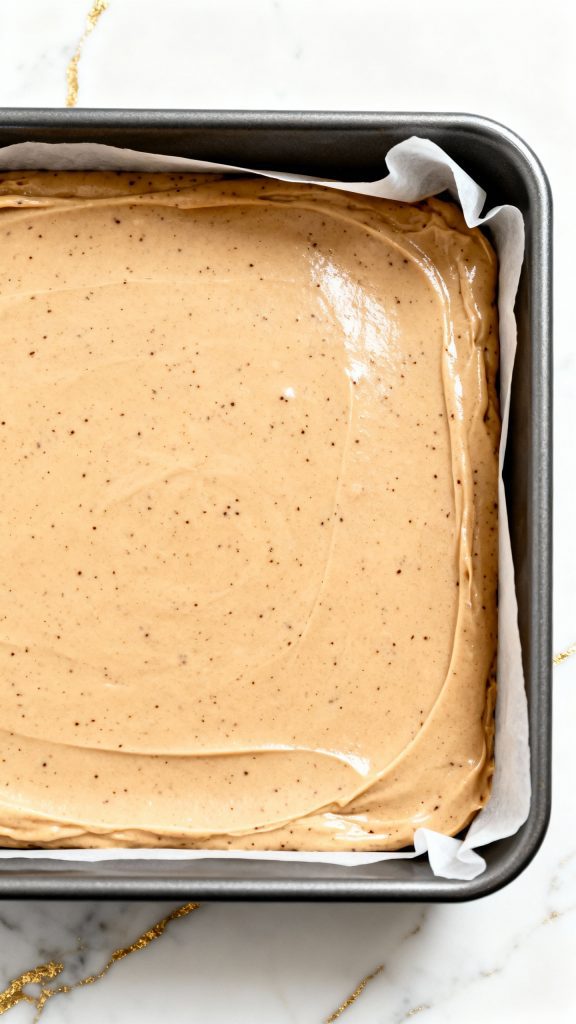
Step 1: Line the pan
Line an 8×8 inch square baking pan with parchment paper, leaving some overhang so you can lift the fudge out later.
Step 2: Combine ingredients in saucepan
In a medium saucepan over low heat, add 3 cups white chocolate chips, 1 (14 oz) can sweetened condensed milk, and 2 tablespoons molasses. Stir gently until the chips are almost melted.

Step 3: Add spices and vanilla
Once mostly melted, stir in 1½ teaspoons ground ginger, 1 teaspoon ground cinnamon, ¼ teaspoon ground nutmeg, ¼ teaspoon ground cloves, 1 teaspoon vanilla extract, and a pinch of salt. Stir until completely smooth.

Step 4: Pour into pan
Immediately pour the smooth mixture into your prepared baking pan and spread it evenly with a spatula.
Step 5: Chill
Place the pan in the fridge for at least 3 hours, or until the fudge is completely firm.
Step 6: Cut into squares
Lift the fudge out using the parchment, then slice into 36 small squares using a sharp knife.

Leftovers and Storage
- Store in the fridge in an airtight container for up to 2 weeks.
- You can freeze the fudge for up to 3 months—just use parchment and a freezer bag.
- Thaw overnight in the fridge before serving.
Why I Love This Recipe
This gingerbread fudge is my go-to when I want something fast but still special. I first made it when I needed a last-minute treat for a cookie swap—only I didn’t have time to bake. It came out so creamy, spiced, and festive that now I make it every year.
- No baking required
- Tastes like the holidays in every bite
- Super easy to make ahead
- Great for gifts or dessert platters
- Cozy, warm spice flavor that’s not too strong
Macros (Per square, approx.)
- Calories: 110
- Protein: 1g
- Fat: 5g
- Carbs: 16g
- Sugar: 15g
Why This Recipe Works (Quick Science)
White chocolate is a great base for fudge because it melts smoothly with condensed milk to create a creamy, stable texture. The molasses and spices add depth and that warm gingerbread flavor without affecting the fudge’s set. The fat from the chocolate and condensed milk keeps the texture rich and soft but firm.
Common Mistakes
- Overheating the chocolate – White chocolate burns fast. Keep the heat low.
- Skipping the parchment – Makes it hard to get clean squares out of the pan.
- Not chilling long enough – It needs at least 3 hours to fully set.
- Using imitation vanilla – It affects the taste more than you’d think. Go real if possible.
What to Serve With
- Hot chocolate or a chai latte
- A cup of black coffee for contrast
- Crushed gingersnaps or shortbread on the side
- Add it to a holiday dessert board with cookies, nuts, and fruit
FAQ
Can I use dark chocolate instead?
Yes! It won’t taste like gingerbread, but it will still be good.
Do I need a candy thermometer?
Nope. This is a no-fuss fudge—no thermometer needed.
Can I microwave it instead?
You can, but it’s easier to control on the stove. Use 30-second bursts if you go that route.
Can I double the recipe?
Yes, just use a 9×13 pan and make sure it chills longer.
Final Thoughts
This gingerbread fudge is one of those recipes that surprises people—it’s easy, no-bake, and absolutely delicious. It’s festive, flavorful, and perfect to share. Try it out, then drop a comment and let me know how it turned out or if you added your own twist!
