
This Hot Chocolate Fudge is the coziest, creamiest treat ever.
It’s rich, smooth, and packed with deep chocolate flavor.
Think of it like your favorite cup of hot cocoa—just in soft, fudgy form.
It’s perfect for the holidays, but honestly, I make it year-round when I want something sweet that’s super easy but still feels special.

Why I Love This Recipe
This fudge is a winter staple in my house. My mom used to make a big batch every December and wrap pieces up for neighbors. It tastes like memories and melts in your mouth.
- Only 6 ingredients
- No candy thermometer needed
- Comes together in minutes
- Stores beautifully for gifting or snacking
- Super chocolatey and creamy every single time
What You’ll Need
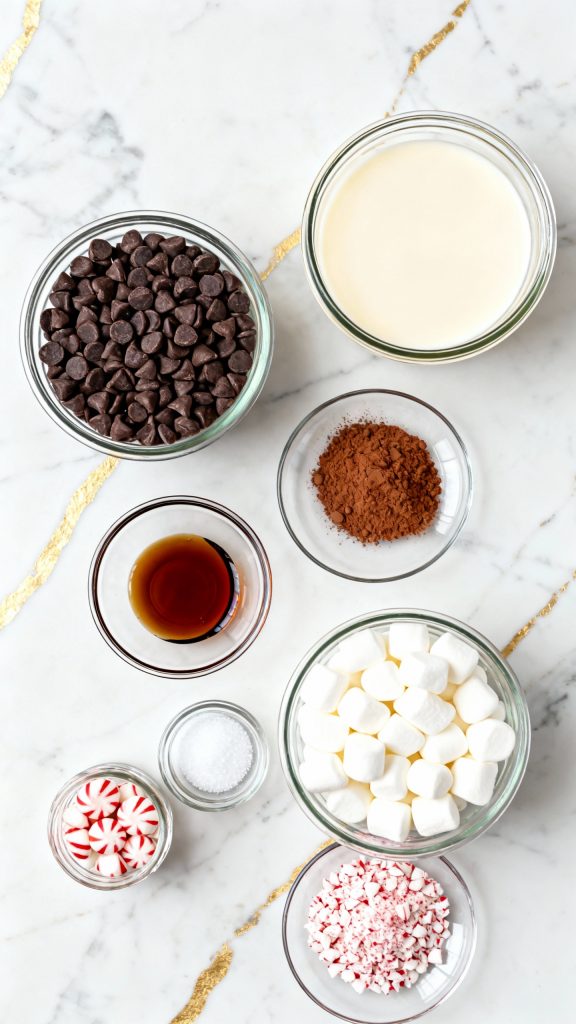
- 3 cups semi-sweet chocolate chips
- 1 (14 oz) can sweetened condensed milk
- 1/4 cup unsweetened cocoa powder
- 1/2 teaspoon vanilla extract
- 1/4 teaspoon salt
- 1 cup mini marshmallows
- Optional: crushed peppermint or chocolate shavings for topping
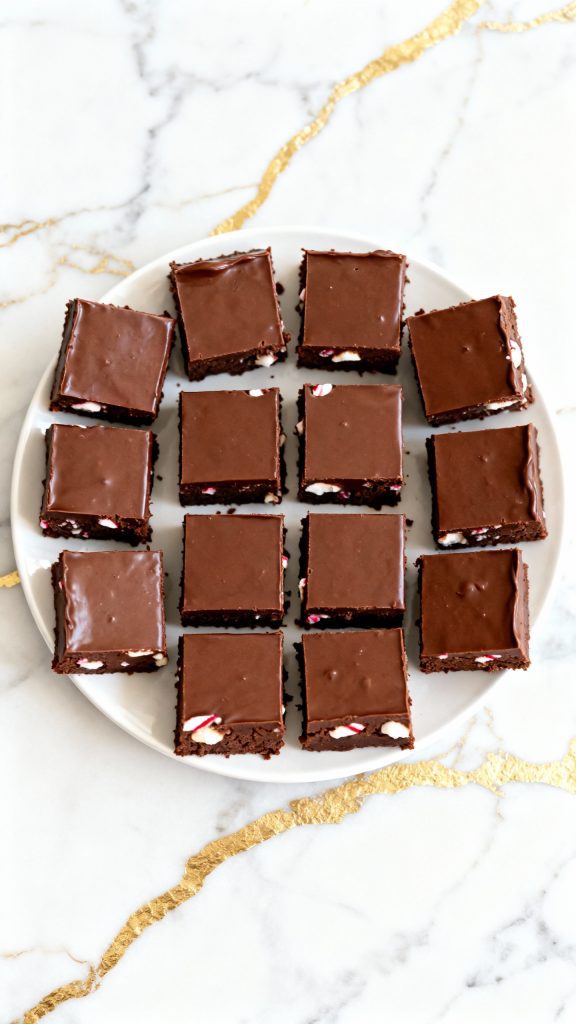
Makes
16 squares
Total Time
10 minutes prep, 2 hours chill
Macros (Per Piece)
Calories: 155
Fat: 8g
Carbs: 20g
Sugar: 17g
Protein: 2g
Why This Recipe Works (Quick Science)
Sweetened condensed milk has sugar already cooked into the milk, which helps the fudge set without needing extra boiling or a candy thermometer. The chocolate chips melt down to create the main structure, while cocoa powder bumps up the rich flavor. Mini marshmallows soften slightly into the fudge, giving it that classic hot chocolate vibe.
Common Mistakes
- Not lining the pan – Always use parchment or foil so the fudge lifts out easily
- Overheating the chocolate – Low and slow is best to keep it silky
- Skipping the salt – Just a pinch balances the sweetness and makes the chocolate pop
- Pouring it into a warm dish – Let your baking dish cool if it’s been near the stove or oven
What to Serve With
- A mug of peppermint tea or classic hot chocolate
- Crushed candy canes for texture
- Whipped cream or marshmallow fluff on the side
- A glass of cold milk
FAQ
Can I use dark chocolate chips?
Yes! It makes the fudge even richer and slightly less sweet.
How long does it last?
Up to 2 weeks in the fridge, tightly covered.
Can I freeze it?
Absolutely. Slice and freeze with parchment between layers. Thaws beautifully.
Can I add nuts?
Totally! Chopped pecans or walnuts go great here—add 1/2 cup with the marshmallows.
Make Ahead Tips
- Make a day or two ahead and store in the fridge until ready to serve.
- Wrap individual pieces in wax paper for easy sharing or gifting.
- Add toppings like crushed peppermint after it chills for a cleaner look.
Recipe + Instructions
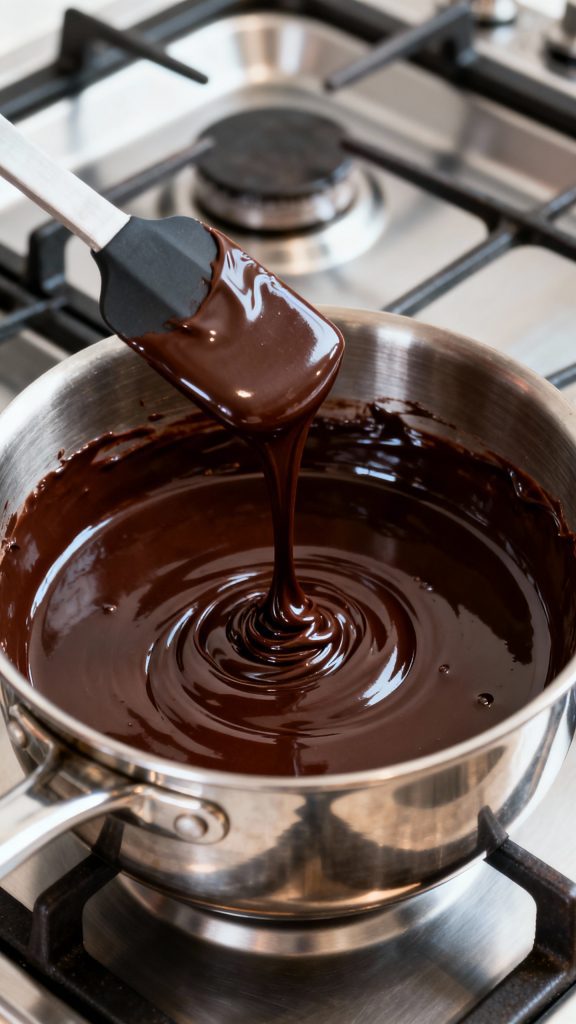
Step 1: Melt the chocolate chips and sweetened condensed milk
In a medium saucepan over low heat, add 3 cups semi-sweet chocolate chips and 1 (14 oz) can of sweetened condensed milk. Stir constantly until smooth and completely melted.
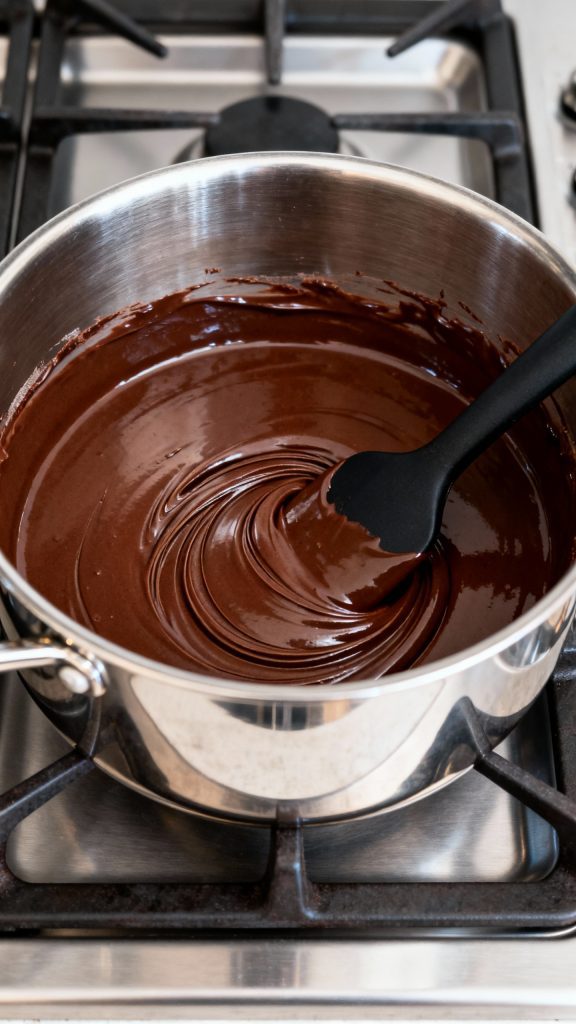
Step 2: Mix in cocoa powder, salt, and vanilla
Add 1/4 cup unsweetened cocoa powder, 1/4 tsp salt, and 1/2 tsp vanilla extract to the melted chocolate mixture. Stir well until fully combined and smooth.
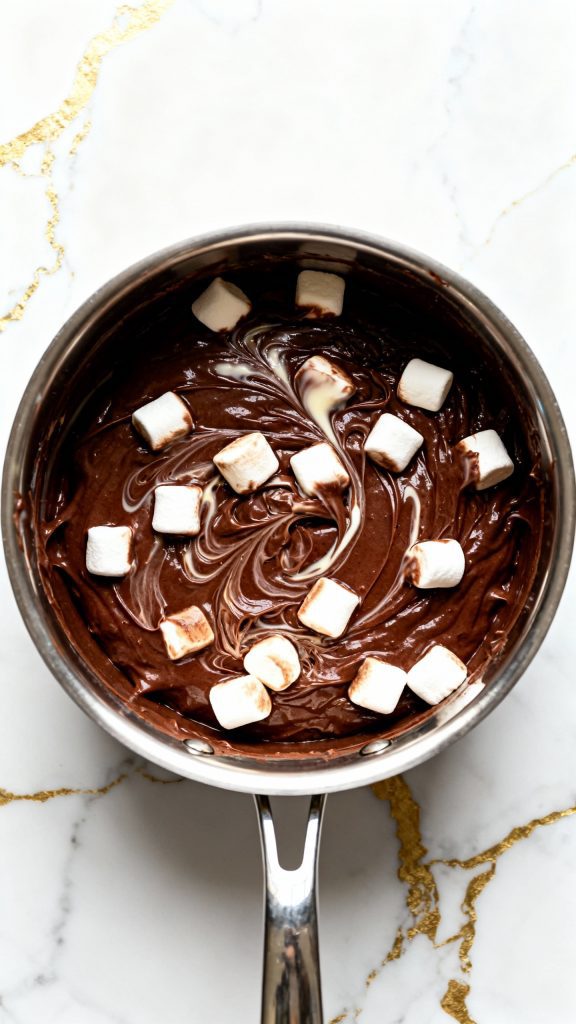
Step 3: Fold in the mini marshmallows
Remove the pan from heat. Gently fold in 1 cup mini marshmallows until evenly distributed. Some will melt slightly, some will stay whole.
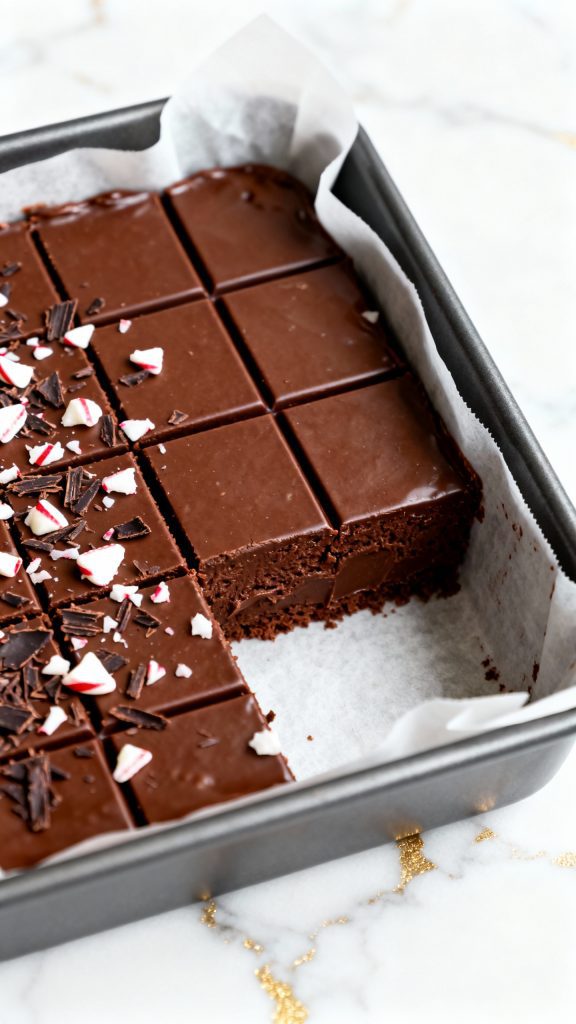
Step 4: Pour into lined pan and chill
Line an 8×8 pan with parchment. Pour the fudge mixture in and smooth the top. Add optional crushed peppermint or chocolate shavings now if desired. Chill in the fridge for at least 2 hours, or until firm.
Step 5: Slice and serve
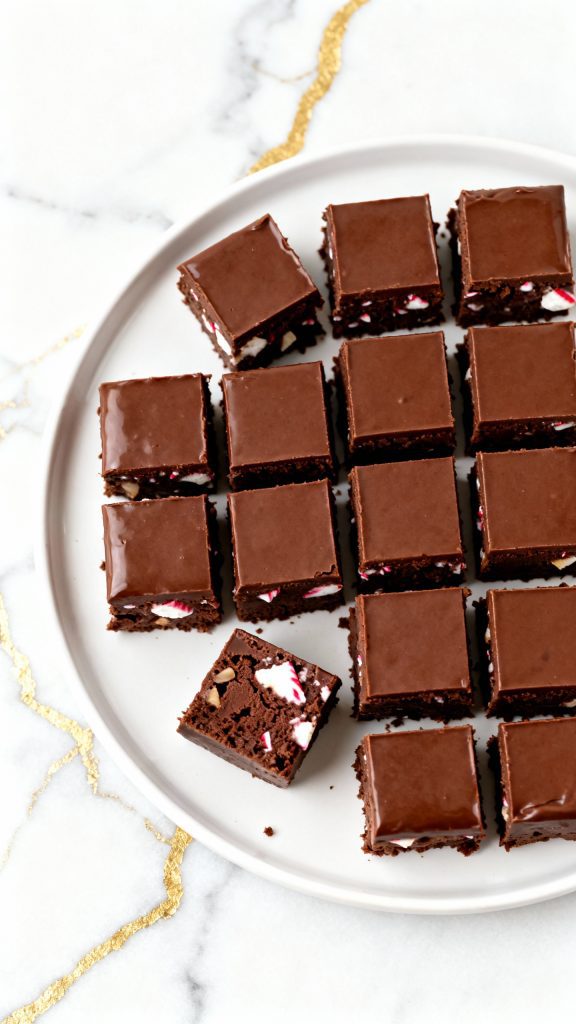
Once set, lift the fudge out using the parchment. Cut into 16 small squares and serve on a round plate.
Leftovers + Storage
- Store in an airtight container in the fridge for up to 2 weeks
- Freeze in layers with parchment for up to 3 months
- Bring to room temp before eating for softest texture
Conclusion
This Hot Chocolate Fudge is pure comfort in every bite. It’s quick, rich, and a little nostalgic. Try it out, and let me know in the comments how yours turned out or if you added any fun twists!
