
Cranberry bread is one of those cozy, fall-winter recipes that makes your kitchen smell amazing and your taste buds super happy.
This one is super moist, not too sweet, and packed with bursts of tart fresh cranberries.
Perfect with coffee, for brunch, or just because you want something homemade.
I’ve made this bread so many times, especially around the holidays, and it always disappears fast.

Why I Love This Recipe
I’ve been baking this cranberry bread for years, usually when the weather turns cool and the cranberries hit the stores. It’s become one of my go-to comfort bakes. Here’s why I keep coming back to it:
- Super moist texture from the oil and orange juice
- Tart and sweet combo thanks to the fresh cranberries and sugar
- No mixer needed, just a bowl and spoon
- Great for gifting – wrap it in parchment and a little twine and you’re good
- Freezes beautifully so you can always have a slice ready

Servings and Cook Time
- Makes: 1 loaf (8 slices)
- Prep Time: 15 minutes
- Bake Time: 55–60 minutes
- Total Time: 1 hour 15 minutes
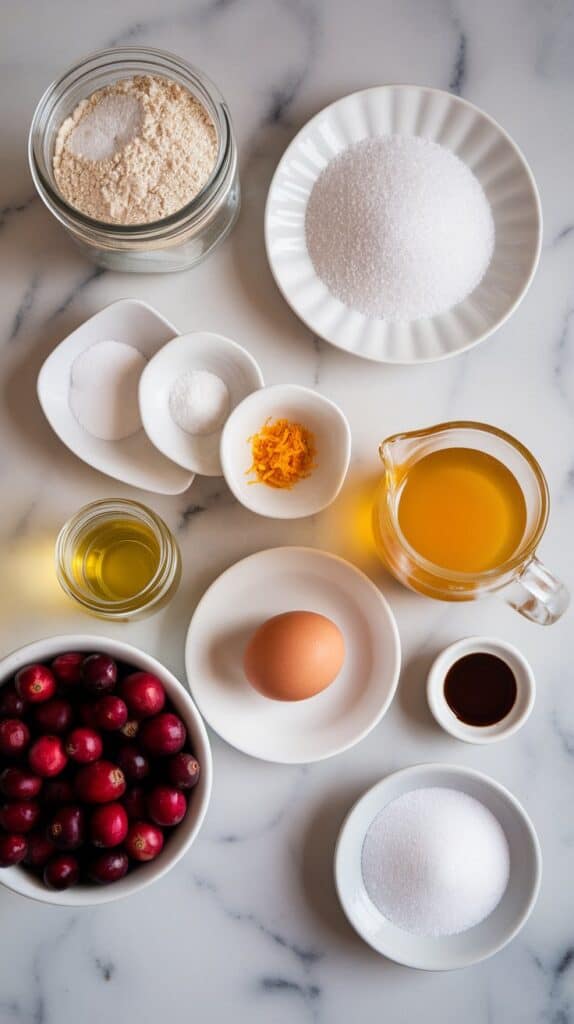
What You’ll Need
- 2 cups all-purpose flour
- 1 cup granulated sugar
- 1 ½ teaspoons baking powder
- ½ teaspoon baking soda
- ½ teaspoon salt
- 1 tablespoon orange zest
- ¾ cup orange juice (fresh or bottled)
- ½ cup neutral oil (like canola or vegetable)
- 1 large egg
- 1 ½ cups fresh cranberries (whole)
- 1 teaspoon vanilla extract
- Optional: 2 tablespoons coarse sugar for topping
Pro Tips
- Toss cranberries in a bit of flour before folding in – it helps them stay suspended in the batter.
- Don’t overmix once the flour goes in – it keeps the bread tender.
- Check for doneness at 55 minutes with a toothpick; ovens vary.
- Use fresh orange juice and zest if possible – it really makes a difference.
- Let it cool completely before slicing so it doesn’t fall apart.
Tools You’ll Need
- Large mixing bowl
- Whisk
- Silicone spatula or wooden spoon
- Measuring cups and spoons
- Zester or microplane
- 9×5 inch loaf pan
- Parchment paper (optional)
- Cooling rack
Substitutions and Variations
- Swap orange juice for apple cider for a fall twist
- Use frozen cranberries (don’t thaw them first!)
- Add ½ cup chopped nuts like walnuts or pecans for crunch
- Sub white whole wheat flour for half the all-purpose for a little fiber boost
- Use melted butter instead of oil for a richer flavor
Make Ahead Tips
- Bake, cool, and wrap the loaf tightly in plastic and foil. It keeps in the fridge for 4–5 days or freeze up to 3 months.
- You can also measure out the dry ingredients ahead of time and store them in a jar or container to speed things up later.
Step-by-Step Instructions
Step 1: Preheat Oven and Prep the Pan
Preheat your oven to 350°F (175°C). Grease a 9×5 loaf pan and line with parchment paper if you want easy removal.
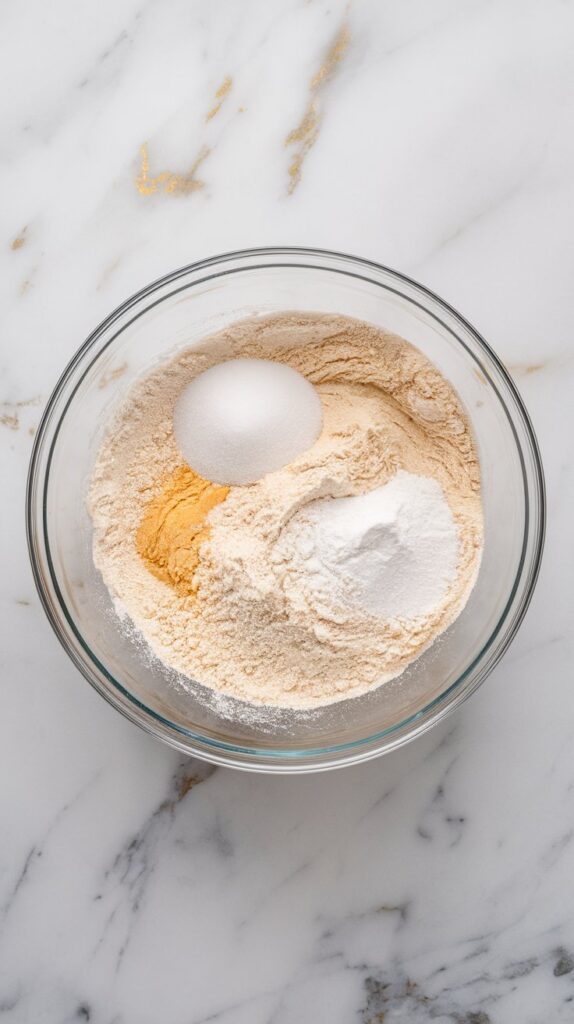
Step 2: Mix Dry Ingredients
In a large mixing bowl, whisk together 2 cups all-purpose flour, 1 cup sugar, 1 ½ teaspoons baking powder, ½ teaspoon baking soda, and ½ teaspoon salt.
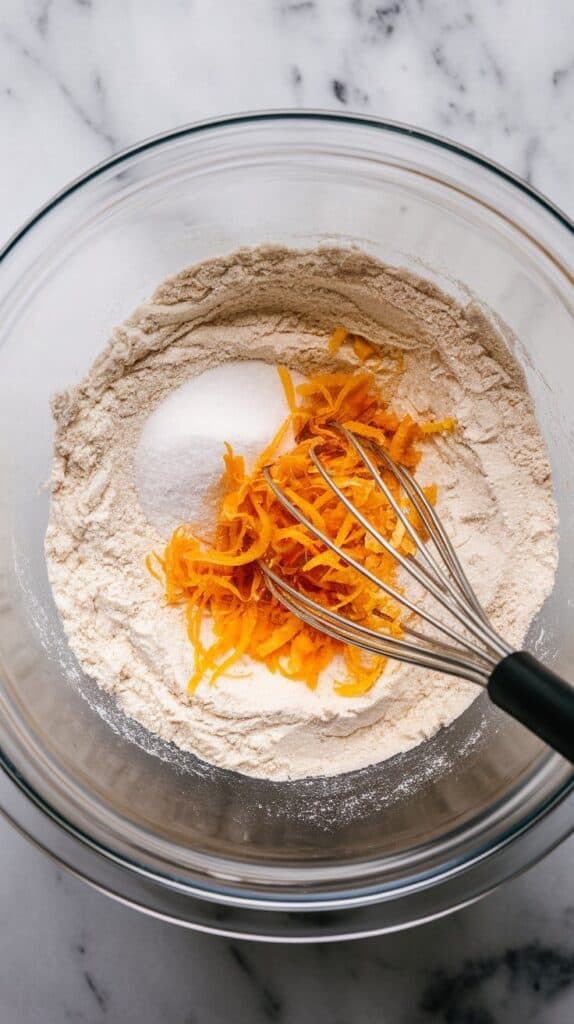
Step 3: Add Orange Zest
Stir in 1 tablespoon fresh orange zest into the dry mix.
Step 4: Combine Wet Ingredients
In a separate bowl, whisk together ¾ cup orange juice, ½ cup neutral oil, 1 large egg, and 1 teaspoon vanilla extract until fully blended.
Step 5: Mix Wet Into Dry
Pour the wet ingredients into the bowl with the dry ingredients and gently fold everything together using a spatula, just until no dry flour remains.
Step 6: Add Cranberries
Toss 1 ½ cups fresh cranberries in 1 teaspoon flour (optional), then fold them gently into the batter.
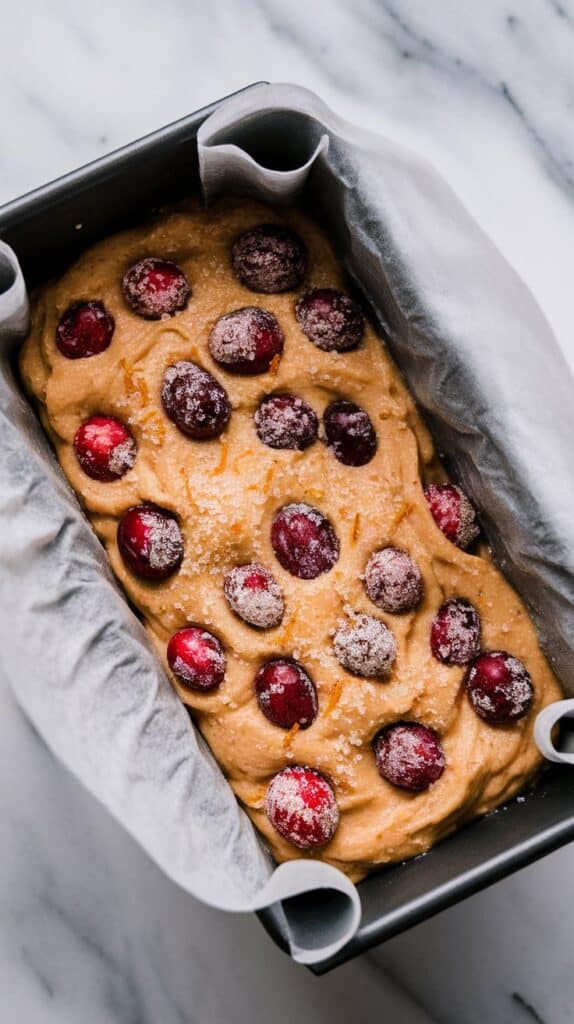
Step 7: Pour Into Pan
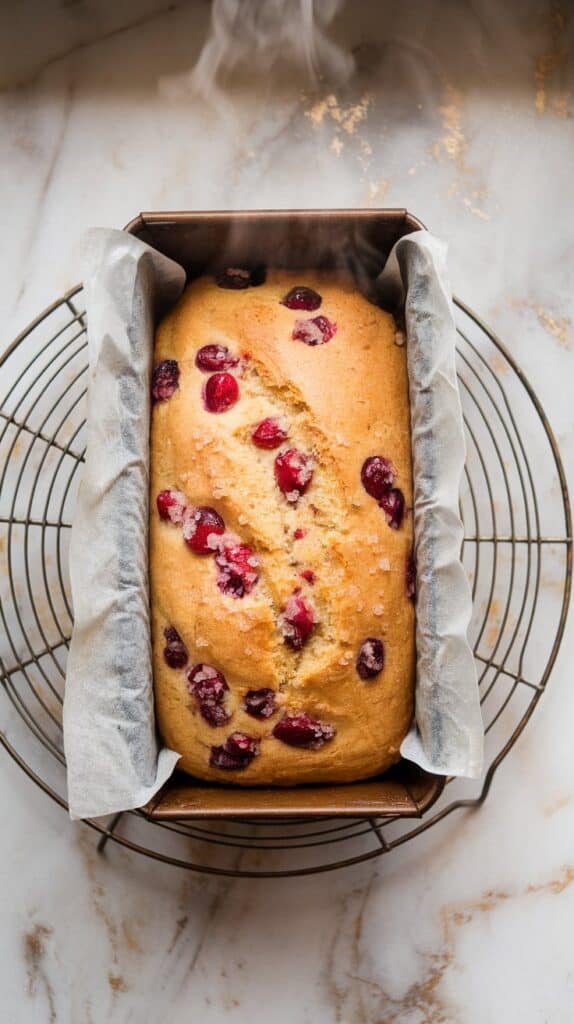
Pour the batter into your greased loaf pan. If you want, sprinkle the top with 2 tablespoons coarse sugar for a crunchy top.
Step 8: Bake
Bake in the center of the oven at 350°F for 55–60 minutes. It’s done when a toothpick comes out clean or with a few crumbs.
Step 9: Cool
Let the loaf cool in the pan for 10 minutes, then transfer to a wire rack to cool completely before slicing.
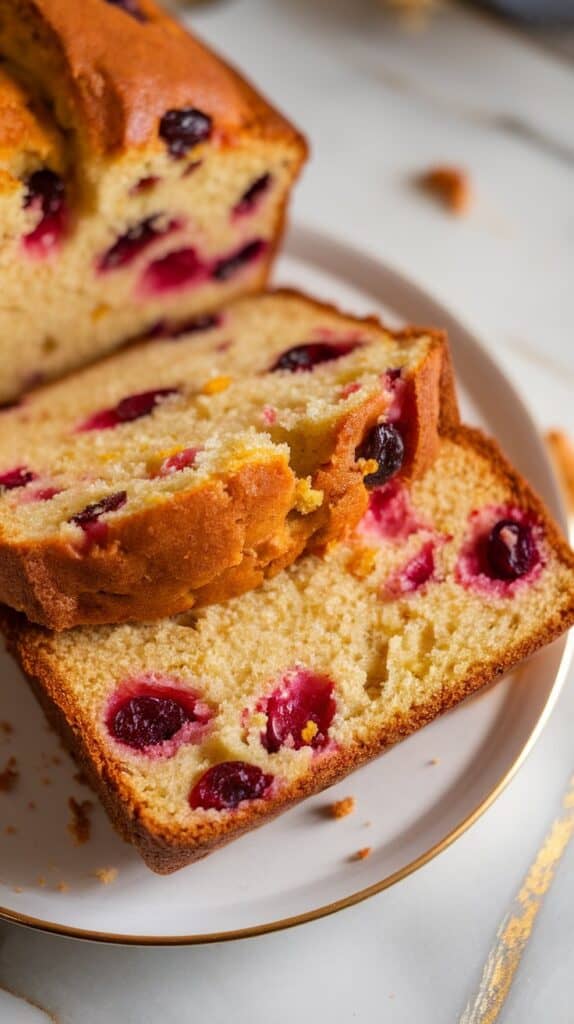
Step 10: Slice and Serve
Once cool, slice the cranberry bread and serve on a plate or wrap it up to share.
Leftovers and Storage
Wrap leftover slices tightly in plastic or foil and store at room temperature for 2 days, or refrigerate up to 5 days. You can also freeze slices for up to 3 months – just thaw on the counter or microwave for 20–30 seconds.
Macros Information (per slice, approx. 1/8 loaf)
- Calories: 270
- Protein: 3g
- Fat: 10g
- Carbs: 42g
- Fiber: 1g
- Sugar: 21g
Why This Recipe Works (Quick Science)
This bread stays super moist thanks to the oil and orange juice combo – oil coats the flour and prevents too much gluten from forming, while the acid in the orange juice reacts with the baking soda for a tender, fluffy texture. Using fresh cranberries adds moisture bursts and natural tartness that balances the sugar.
Common Mistakes
- Overmixing the batter – it makes the bread tough
- Not checking cranberries – pick out soft or mushy ones before using
- Baking too long – check at 55 minutes, even if your oven usually takes longer
- Cutting it too soon – the bread needs to cool or it’ll crumble when slicing
What to Serve With
- Hot coffee or spiced tea
- A scoop of vanilla yogurt on the side
- Toasted with butter for breakfast
- As part of a holiday brunch board with cheeses and nuts
FAQ
Can I use dried cranberries?
Yes, but soak them in warm water for 10 minutes so they don’t dry out the bread.
Can I double the recipe?
Absolutely – just use two loaf pans and rotate them halfway through baking.
Can I make muffins instead?
Yep! This recipe makes about 12 muffins. Bake at 350°F for 18–22 minutes.
Why are my cranberries all at the bottom?
Tossing them in a bit of flour helps them stay suspended in the batter. Also, don’t overmix.
Can I use frozen cranberries?
Yes, no need to thaw – just stir them in straight from the freezer.
