
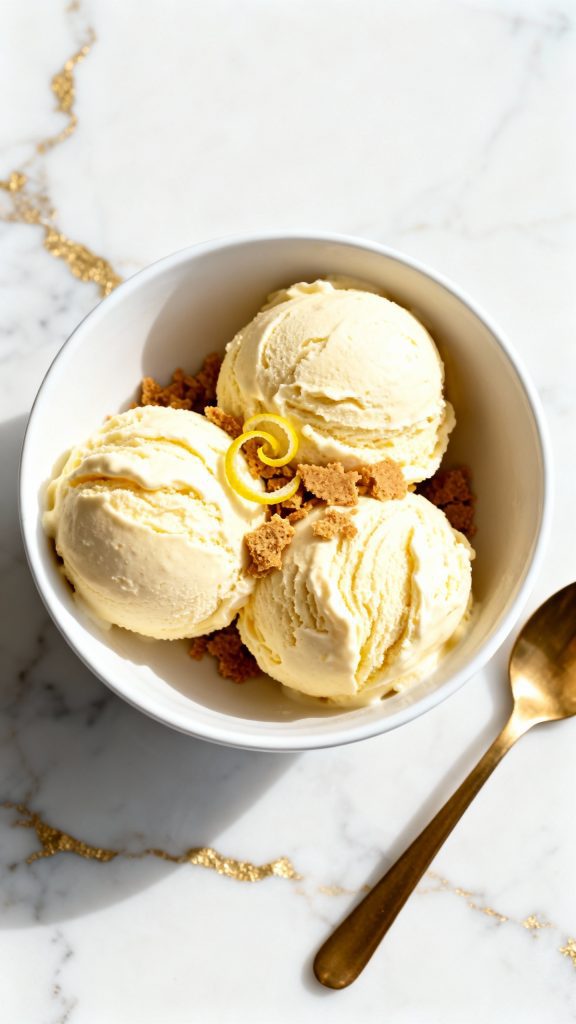
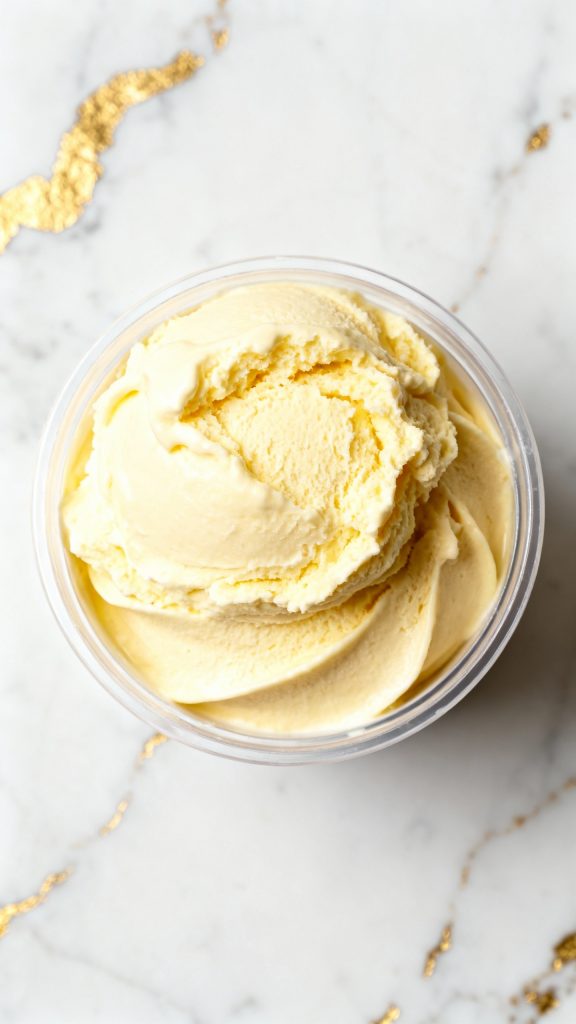
This ice cream is smooth, creamy, tangy, and packed with protein. It tastes like dessert but feels like a win.
I’ve tested this recipe a bunch of times to get it just right—and trust me, it hits the spot whether you’re refueling after a workout or just want something cold and sweet without the sugar crash. Throw it all in a blender, freeze, spin, and boom—dessert is done.

Why I Love This Recipe
A few years ago, I was deep into trying high-protein recipes that didn’t taste like chalk. I missed real desserts. This recipe came out of me trying to make something I’d actually want to eat every day. It’s now a regular in my freezer.
- The lemon is refreshing and bright.
- The cheesecake flavor is rich but still light.
- It’s high in protein without tasting “healthy.”
- The texture is super creamy, not icy.
- You can switch up the flavor with a few tweaks.
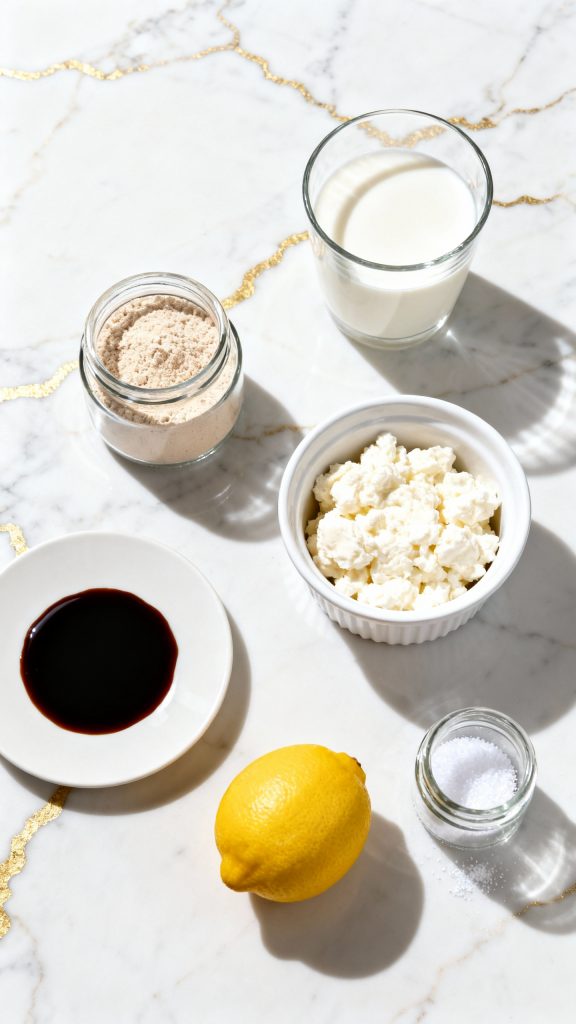
What You’ll Need
- 1 scoop (30g) vanilla whey protein powder
- 1 tablespoon (7g) sugar-free cheesecake pudding mix
- 1/2 cup (120g) low-fat cottage cheese
- 1/2 cup (120g) unsweetened almond milk
- 1 tablespoon (15g) lemon juice (fresh is best)
- 1 teaspoon lemon zest
- 1/2 teaspoon vanilla extract
- 1-2 teaspoons sweetener of choice (optional, to taste)
- Pinch of salt
Pro Tips
- Blend until completely smooth—cottage cheese should be invisible.
- Chill the mixture for a few minutes before freezing for a smoother spin.
- If your Creami mix-in setting isn’t enough, re-spin with a splash of almond milk.
- Add a crushed graham cracker after spinning for texture.
- Freeze in Ninja Creami container only—don’t swap it out.
Tools Needed
- Ninja Creami machine
- Blender
- Measuring cups & spoons
- Ninja Creami pint container
- Spoon or small spatula
Substitutions and Variations
- Use Greek yogurt instead of cottage cheese (for slightly less creaminess)
- Swap vanilla protein with lemon or cheesecake flavor
- Add 1 tablespoon crushed graham crackers for a crust vibe
- For non-dairy: use plant-based protein and non-dairy pudding mix
Make Ahead Tips
- You can freeze the base up to a week before spinning.
- Always level the top flat in the pint so it spins evenly.
Recipe and Instructions (Makes 1 serving | Takes: 5 min prep + 24 hr freeze)
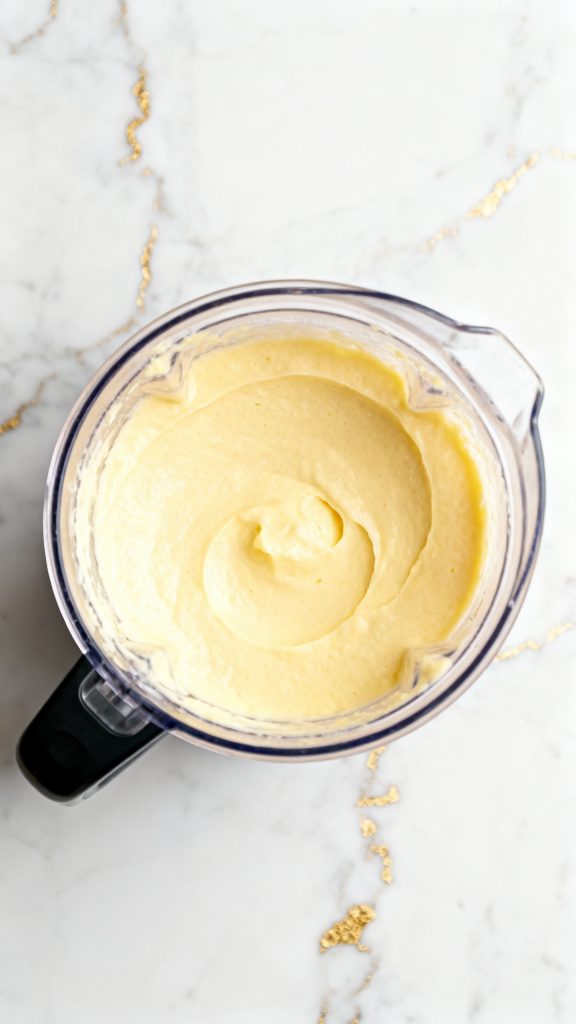
Step 1: Add All Ingredients to Blender
Add all the ingredients into a high-speed blender:
- 1 scoop (30g) vanilla whey protein powder
- 1 tablespoon (7g) sugar-free cheesecake pudding mix
- 1/2 cup (120g) low-fat cottage cheese
- 1/2 cup (120g) unsweetened almond milk
- 1 tablespoon (15g) lemon juice
- 1 teaspoon lemon zest
- 1/2 teaspoon vanilla extract
- 1–2 teaspoons sweetener of choice (optional, to taste)
- Pinch of salt
Blend on high until the mixture is completely smooth and creamy. Make sure there are no lumps—especially from the cottage cheese. The final mix should be silky and pourable, ready to freeze in your Ninja Creami pint container.
Step 2: Pour Into Ninja Creami Pint and Freeze
Pour the mixture into the Ninja Creami pint container. Make sure the top is leveled off flat. Snap the lid on tight and freeze for 24 hours
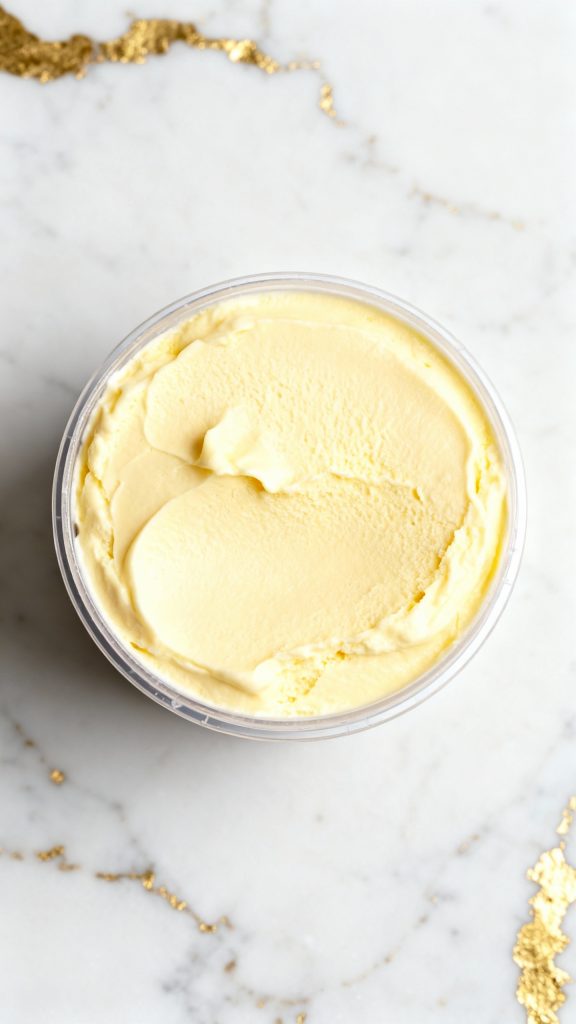
Step 3: Spin in Ninja Creami
After 24 hours, take the pint out of the freezer. Lock it into your Ninja Creami, select the “Lite Ice Cream” or “Smoothie Bowl” setting and spin once. If crumbly, add a splash (1–2 tablespoons) of almond milk and re-spin
Step 4: Optional Re-spin with Almond Milk
If needed, pour 1–2 tablespoons of almond milk into the pint and spin again using the “Re-spin” function. The final texture should be creamy and scoopable
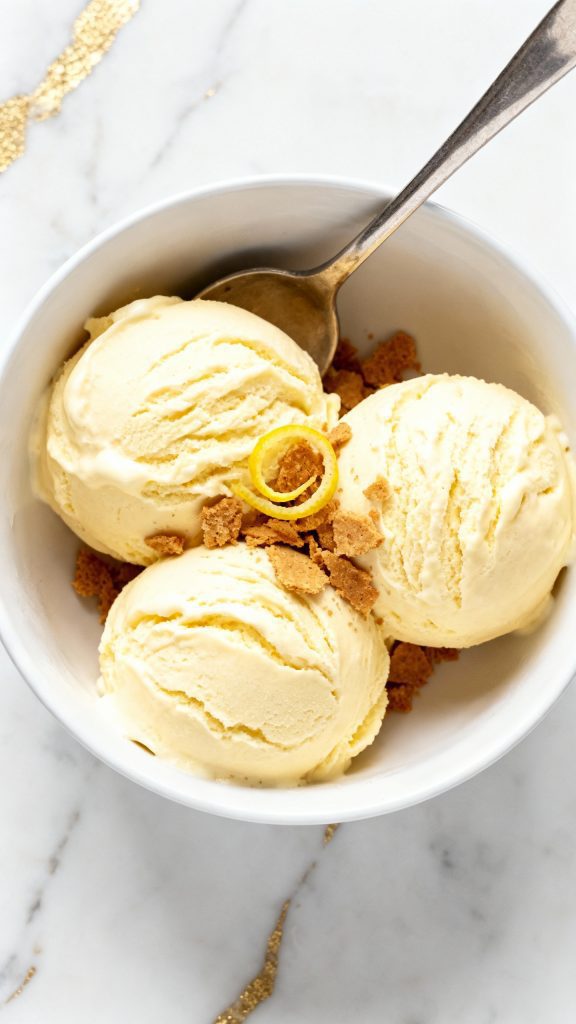
Step 5: Serve
Leftovers and Storage
Once spun, it’s best eaten fresh. If you have leftovers, level it flat again and re-freeze. You’ll need to re-spin with almond milk to restore texture.
Macros (Approximate)
Per Serving:
- Calories: 220
- Protein: 28g
- Carbs: 8g
- Fat: 5g
- Fiber: 1g
- Sugar: 3g
Why This Recipe Works (Quick Science)
The sugar-free pudding mix contains xanthan gum and thickeners, which help prevent ice crystals and give that creamy, scoopable texture. Cottage cheese adds creaminess and protein, and the whey protein helps with volume and structure. Lemon juice adds brightness without thinning the texture too much.
Common Mistakes
- Not blending enough – you must blend till smooth or it’ll be grainy.
- Overfilling the pint – stay under the fill line or the Creami might jam.
- Forgetting to level the top – this helps it spin evenly.
- Skipping re-spin – sometimes you need that second spin for the perfect texture.
What to Serve With
- Top with crushed graham cracker or a tiny bit of whipped cream
- Pair with a lemon protein bar for a sweet snack plate
- Serve with fresh berries on the side
FAQ
Can I use a different protein powder?
Yes, but results vary. Whey works best. Plant-based protein may need more liquid.
Do I need the pudding mix?
It really helps texture. You can try xanthan gum as a backup (1/4 tsp), but it won’t taste quite the same.
What if I don’t like cottage cheese?
You won’t taste it! But if you’re still unsure, use Greek yogurt.
Can I double the recipe?
Nope—only one serving per pint. Make two separate batches if needed.
Final Thoughts
This lemon cheesecake protein ice cream is everything: creamy, tangy, sweet, and full of protein. It feels like a treat but fuels like a champ. Once you try it, you’ll be making it all the time. Let me know how yours turns out in the comments or if you have any questions—I’m always happy to help!
