
If you love creamy desserts that feel fancy but are secretly easy, this one’s for you. This No-Bake Pistachio Cheesecake is smooth, lightly nutty, and perfectly sweet. No oven. No stress. Just mix, chill, and slice.
It’s the kind of dessert that looks like you worked all day, but really you just let the fridge do the job. I’ve made this for family dinners, birthdays, and random Tuesday nights when I wanted something special. It never lasts long.
Servings: 8 slices
Chill Time: 4 hours
Prep Time: 20 minutes
Total Time: About 4 hours 20 minutes
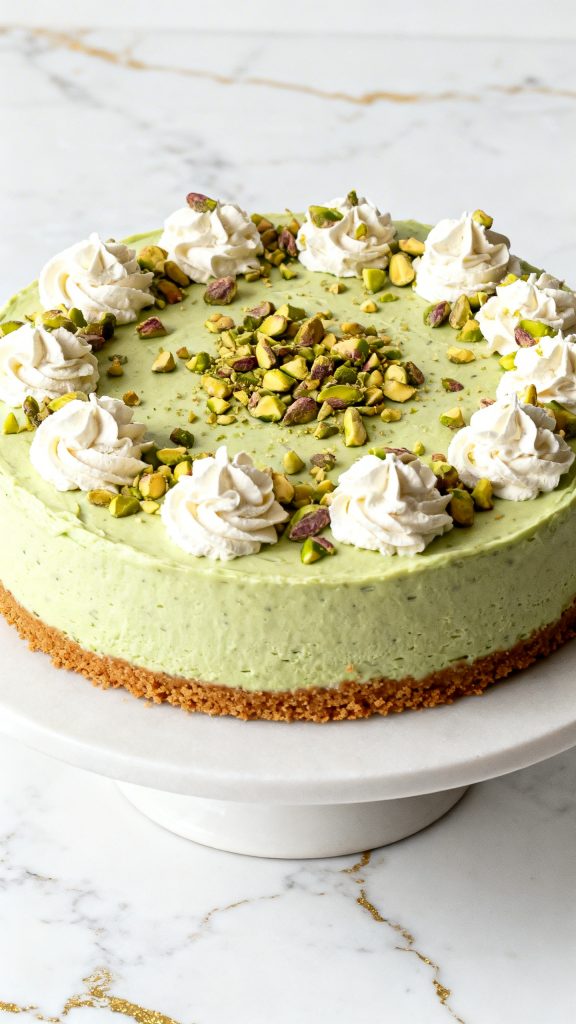
Right after you make it, here’s how your finished cheesecake should look:

Why I Love This Recipe
I still remember the first time I made this. I didn’t want to turn on the oven in the summer, but I wanted something that felt bakery-level. I had a box of pistachio pudding mix sitting in the pantry, and I figured—why not?
The result? Creamy. Cool. Light. And that soft green color makes it feel extra special.
Here’s why I keep coming back to it:
- It’s no-bake, which means no cracking or water baths.
- The texture is silky and smooth.
- The pistachio flavor is sweet and nutty without being too strong.
- It slices beautifully after chilling.
- It looks impressive but takes very little effort.
What You’ll Need
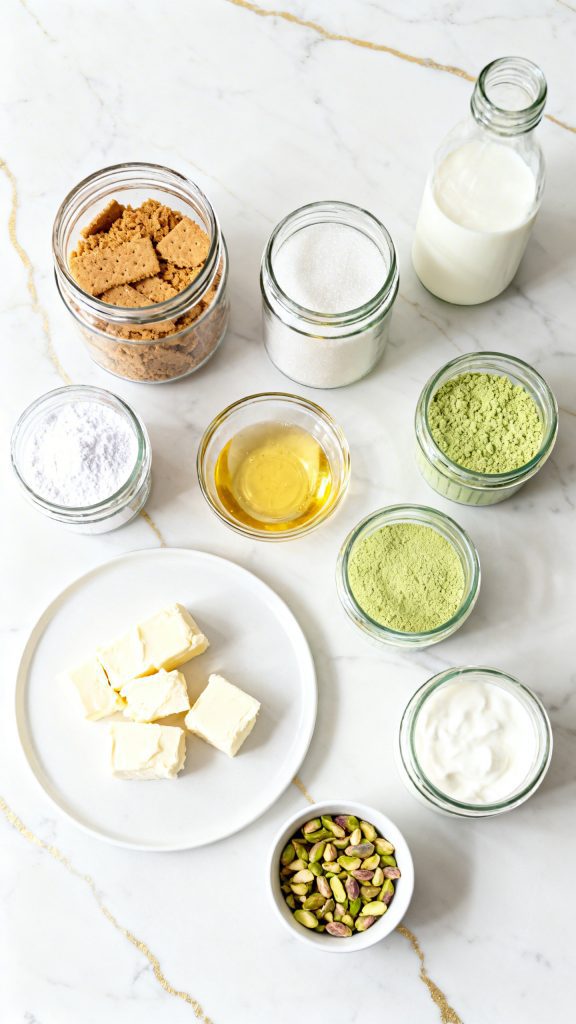
- 1 ½ cups graham cracker crumbs
- ⅓ cup granulated sugar
- ½ cup unsalted butter, melted
- 16 ounces cream cheese, softened
- 1 cup powdered sugar
- 1 (3.4 ounce) box instant pistachio pudding mix (dry powder)
- 1 cup cold whole milk
- 1 teaspoon vanilla extract
- 1 cup heavy whipping cream
- ¼ cup chopped pistachios (for topping)
- Extra whipped cream for garnish (optional)
Tools You’ll Need
- 9-inch springform pan
- Large mixing bowl
- Medium mixing bowl
- Electric hand mixer
- Rubber spatula
- Measuring cups and spoons
Why This Recipe Works (Quick Science)
This cheesecake sets without baking because of two things: whipped cream and pudding mix.
The heavy whipping cream traps air when whipped. That air makes the filling light and fluffy. The instant pudding mix thickens when mixed with milk. Together, they create structure and stability once chilled.
The cream cheese adds richness and helps everything firm up in the fridge. After a few hours, it slices like a dream.
The Recipe & Instructions
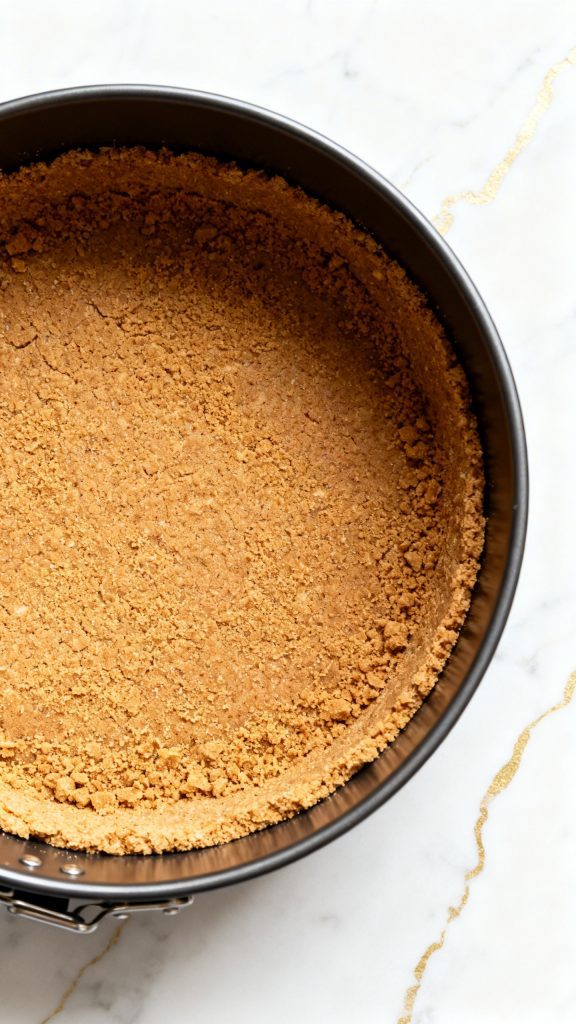
Step 1: Make the Crust
In a medium bowl, mix together 1 ½ cups graham cracker crumbs and ⅓ cup granulated sugar. Pour in ½ cup melted unsalted butter. Stir until the crumbs look like wet sand.
Press the mixture firmly into the bottom of a 9-inch springform pan. Use the bottom of a glass to pack it down tightly. Place it in the fridge to chill while you make the filling.
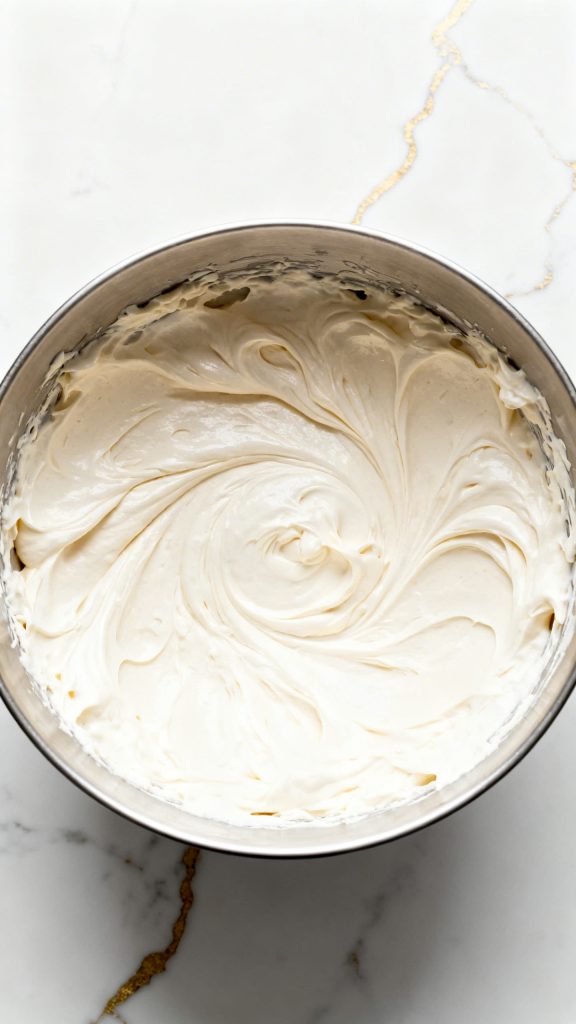
Step 2: Beat the Cream Cheese Base
In a large bowl, beat 16 ounces softened cream cheese with 1 cup powdered sugar using an electric hand mixer. Mix until completely smooth. Add 1 teaspoon vanilla extract and mix again.
Make sure there are no lumps.
Step 3: Mix the Pistachio Layer
In a separate bowl, whisk together 1 (3.4 ounce) box dry pistachio pudding mix and 1 cup cold whole milk. Whisk for about 2 minutes until slightly thickened.
Let it sit for 2 minutes to thicken more.
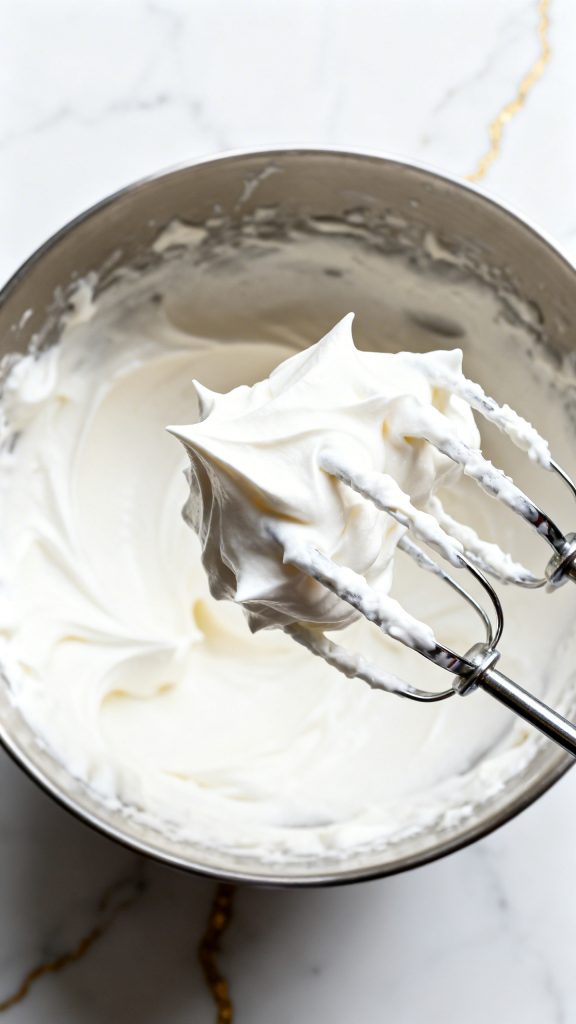
Step 4: Whip the Cream
In another bowl, beat 1 cup heavy whipping cream until stiff peaks form. The whipped cream should hold its shape when you lift the beaters.
Step 5: Combine Everything
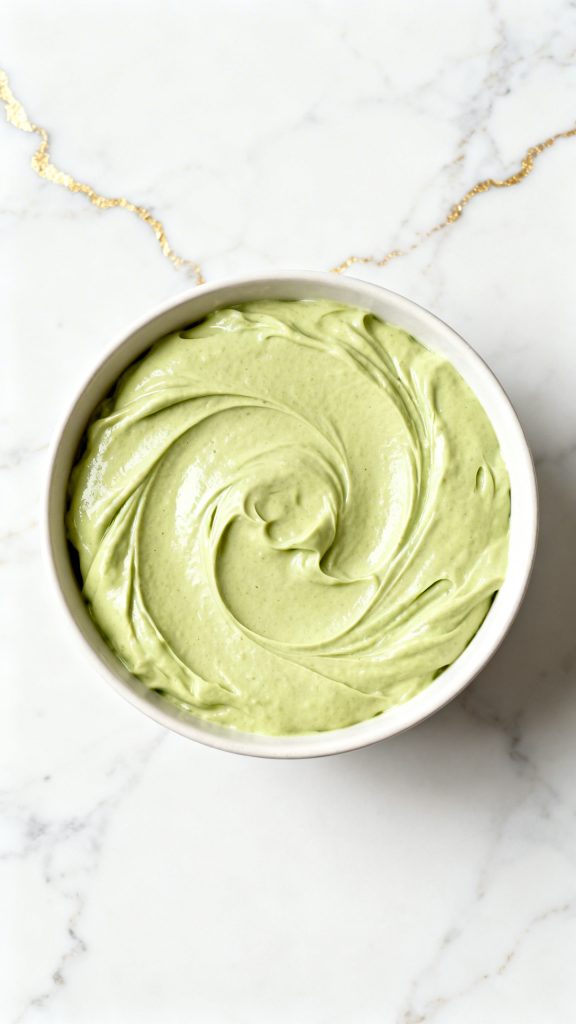
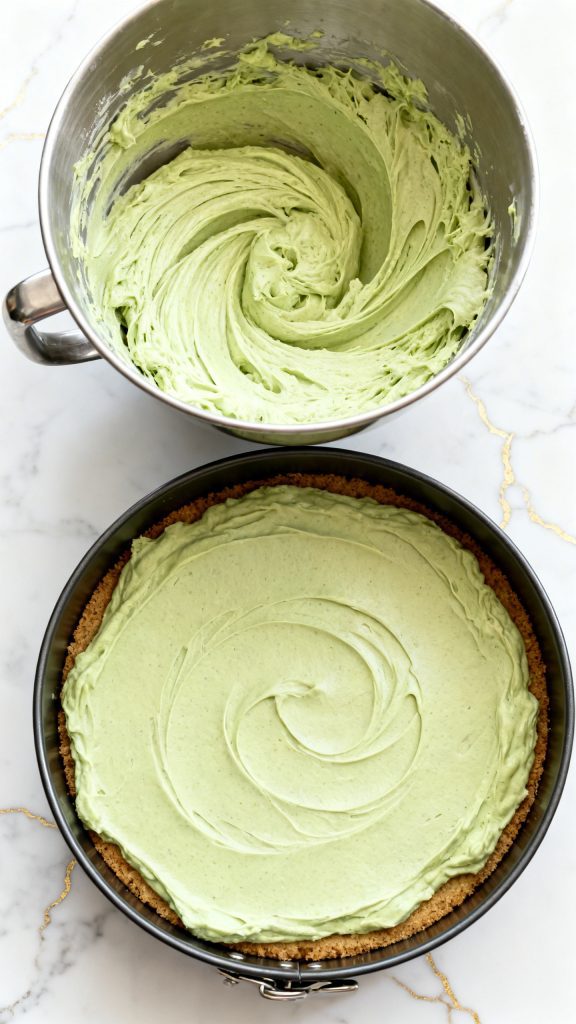
Fold the thickened pistachio pudding mixture into the cream cheese mixture. Then gently fold in the whipped cream until fully combined and smooth. The filling should be pale green and fluffy.
Spread the filling evenly over the chilled crust.
Step 6: Chill and Decorate
Refrigerate the cheesecake for at least 4 hours, or until fully set.
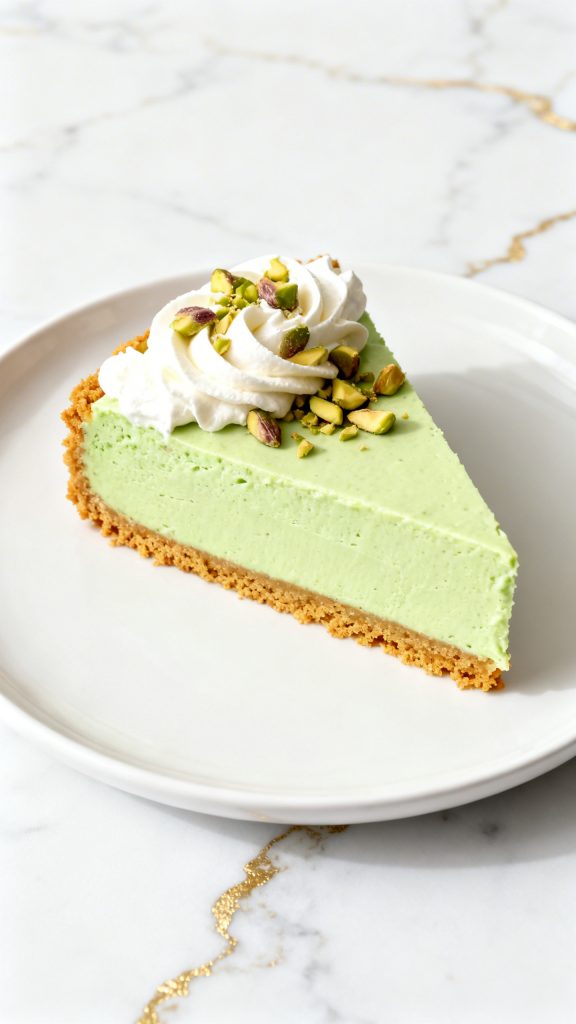
Before serving, top with ¼ cup chopped pistachios and extra whipped cream if desired.
Macros Information (Per Slice, Approximate)
- Calories: 420
- Fat: 30g
- Carbohydrates: 32g
- Sugar: 22g
- Protein: 6g
Common Mistakes
- Not softening the cream cheese. Cold cream cheese makes lumps.
- Not whipping the cream enough. Soft peaks won’t hold the shape.
- Skipping chill time. It needs at least 4 hours to fully set.
- Not pressing the crust firmly. A loose crust will crumble when slicing.
Substitutions and Variations
- Use chocolate graham crackers for a chocolate-pistachio twist.
- Swap pistachio pudding for vanilla and add ½ cup finely chopped pistachios for a more natural flavor.
- Add a thin layer of chocolate ganache on top before chilling.
- Use store-bought whipped topping instead of whipping cream if needed.
Make Ahead Tips
This cheesecake is perfect for making the day before. It actually slices even better after sitting overnight in the fridge.
What to Serve With
- Fresh strawberries or raspberries
- Hot coffee or espresso
- Iced tea
- A small scoop of vanilla ice cream
Leftovers and Storage
Store leftovers covered in the refrigerator for up to 4 days.
You can freeze slices individually for up to 1 month. Wrap tightly and thaw in the fridge overnight.
FAQ
Can I freeze the whole cheesecake?
Yes. Wrap it tightly and freeze for up to 1 month. Thaw in the fridge before serving.
Can I use low-fat cream cheese?
You can, but the texture may be slightly softer.
Does it taste strongly like pistachio?
It’s mild and sweet with a light nutty flavor.
Can I make it without a springform pan?
Yes, but lining a regular pan with parchment will help you lift it out cleanly.
Pro Tips
- Chill your mixing bowl before whipping the cream. It whips faster.
- Use a hot knife (run under warm water and dry) for clean slices.
- Press the crust up slightly along the edges for a bakery-style look.
- Let the cheesecake sit at room temperature for 10 minutes before slicing.
Final Thoughts
This No-Bake Pistachio Cheesecake is creamy, simple, and always a hit. It feels special but doesn’t require fancy skills. That’s my favorite kind of dessert.
If you make it, I’d love to hear how it turned out for you. Leave a comment and share your experience or any questions you have.
