
These red velvet cheesecake cookies are soft, rich, and stuffed with a creamy cheesecake center. They’re like a mashup of red velvet cake and cheesecake, but in cookie form.
They look super fancy, but I promise—they’re easy to make and totally worth it. If you’re into red velvet anything, you’re going to love these.

Why I Love This Recipe
This recipe came from a baking day where I couldn’t decide between cookies and cheesecake, so I just smashed the two together—and it worked. I made them for a family get-together, and everyone asked for the recipe. These cookies come out perfect every time.
- That surprise cheesecake center is so fun
- They’re soft, chewy, and rich—not dry at all
- You can make the dough ahead of time
- They look like bakery cookies but are easy to make at home
Servings: 12 large cookies
Total Time: 1 hour (including chilling time)
Prep Time: 20 minutes
Chill Time: 30 minutes
Bake Time: 10–12 minutes
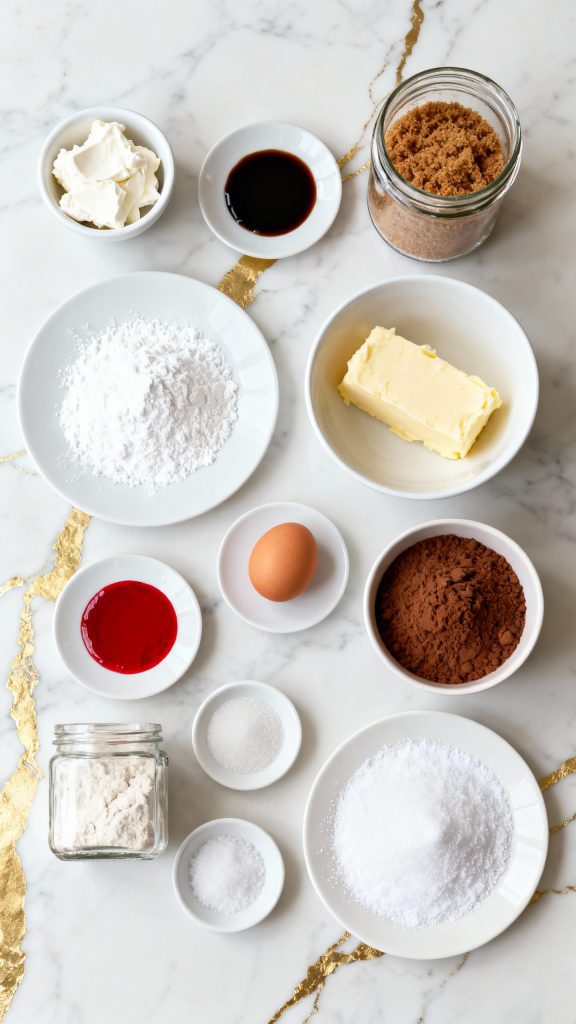
What You’ll Need
For the Cheesecake Filling
- 6 oz cream cheese, softened
- ¼ cup powdered sugar
- ½ tsp vanilla extract
For the Cookie Dough
- ½ cup (1 stick) unsalted butter, softened
- ¾ cup brown sugar, packed
- ¼ cup granulated sugar
- 1 large egg
- 1 tsp vanilla extract
- 1 tbsp red food coloring
- 1 ⅓ cups all-purpose flour
- ¼ cup unsweetened cocoa powder
- ½ tsp baking soda
- ¼ tsp salt
Optional Topping
- 2 tbsp powdered sugar for dusting
Pro Tips
- Chill the dough so it’s easier to work with and doesn’t spread too much in the oven
- Use gloves when mixing the red food coloring if you’re doing it by hand—unless you want red hands
- Freeze the cream cheese filling before stuffing so it doesn’t leak out
- Don’t overbake! They’ll keep cooking a bit after you take them out
- Let them cool fully so the cheesecake center sets up nicely
Tools You’ll Need
- Hand mixer or stand mixer
- Mixing bowls
- Measuring cups and spoons
- Rubber spatula
- Baking sheet
- Parchment paper
- Cookie scoop or spoon
- Plastic wrap
- Wire rack
Substitutions and Variations
- Swap red food coloring for natural beet powder for a dye-free version
- Add white chocolate chips into the dough for extra sweetness
- Use gluten-free flour blend to make it gluten-free
- Leave out cocoa powder for a more “red sugar cookie” style
Make Ahead Tips
- You can make the dough and cheesecake filling up to 2 days in advance and keep them refrigerated
- Freeze unbaked stuffed cookie dough balls and bake straight from the freezer—just add 2 extra minutes to the bake time
Red Velvet Cheesecake Cookies Recipe
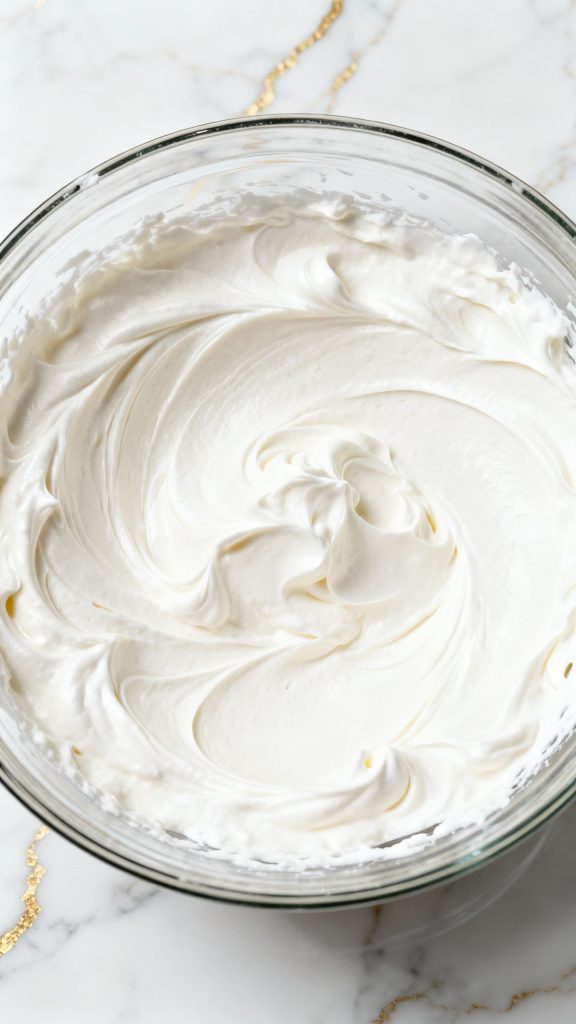
Step 1: Make the Cheesecake Filling
In a small bowl, mix 6 oz softened cream cheese, ¼ cup powdered sugar, and ½ tsp vanilla extract until smooth. Scoop into 12 small dollops and freeze for 30 minutes.
Step 2: Cream the Butter and Sugars
In a large bowl, beat ½ cup softened butter, ¾ cup packed brown sugar, and ¼ cup granulated sugar together until light and fluffy.
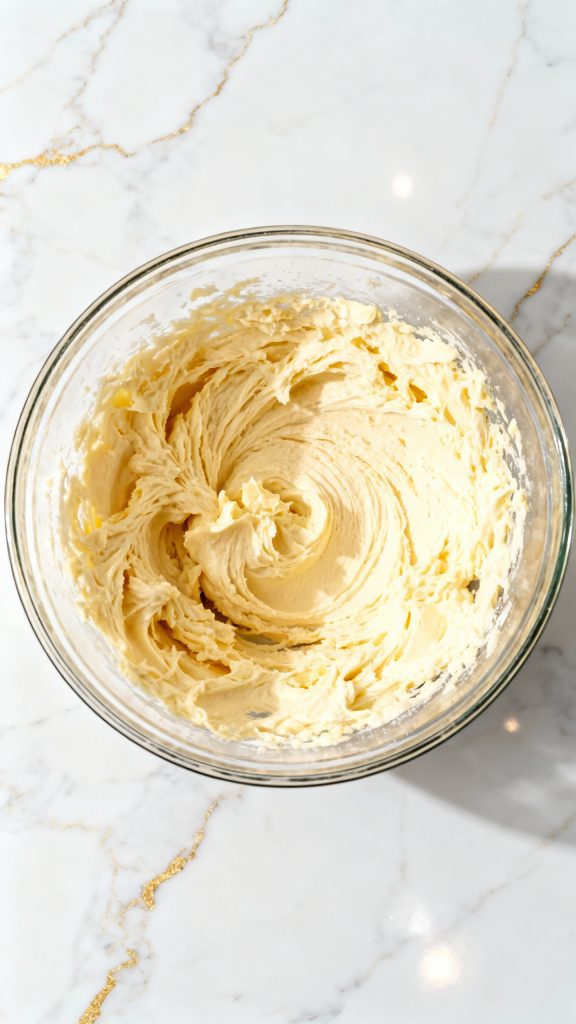
Step 3: Add Wet Ingredients
Beat in 1 large egg, 1 tsp vanilla extract, and 1 tbsp red food coloring until fully combined.
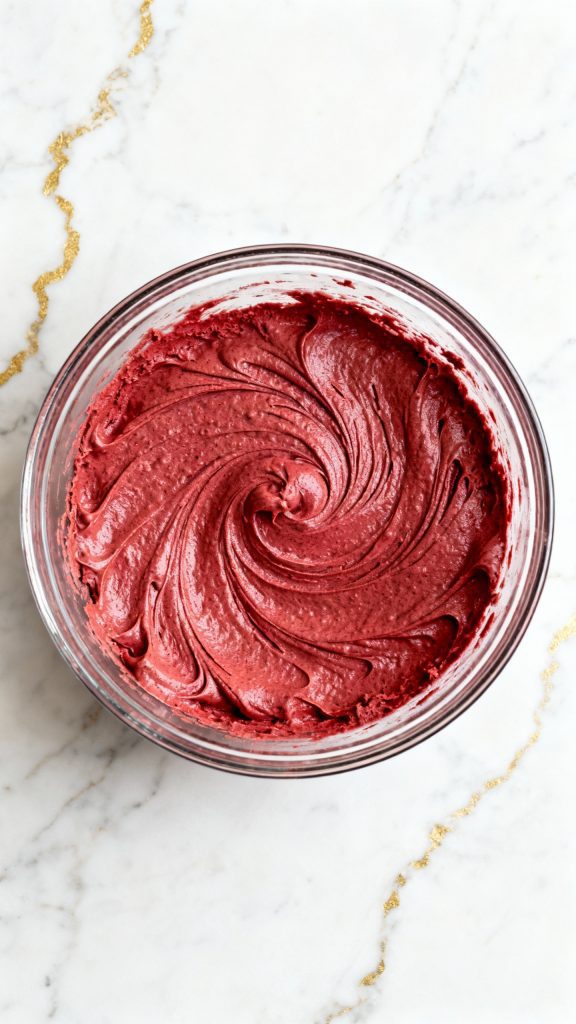
Step 4: Add Dry Ingredients
Sift together 1 ⅓ cups all-purpose flour, ¼ cup cocoa powder, ½ tsp baking soda, and ¼ tsp salt, then add to the wet ingredients and mix just until combined.

Step 5: Chill the Dough
Cover dough with plastic wrap and chill for 30 minutes so it firms up.
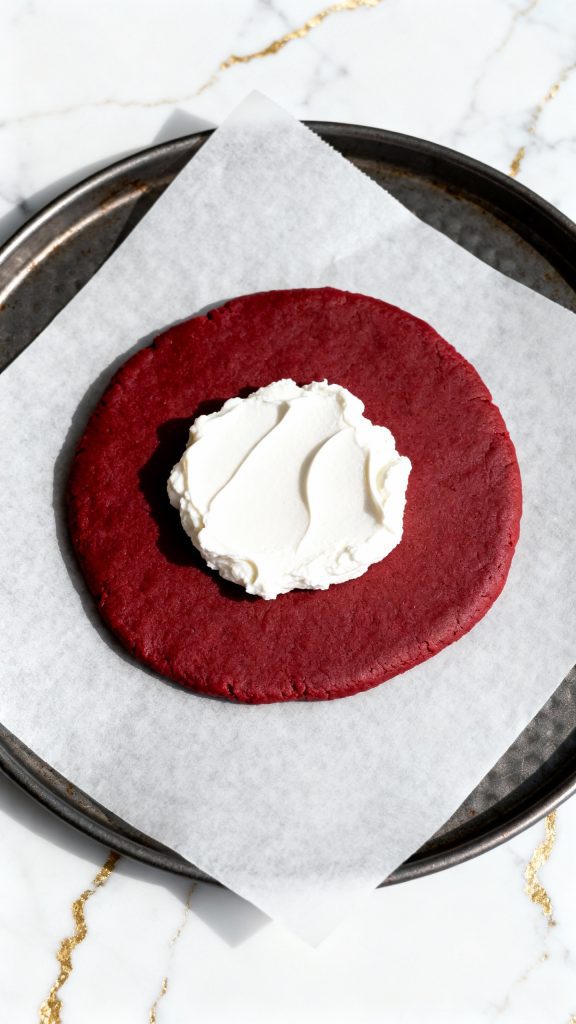
Step 6: Assemble the Cookies
Scoop a tablespoon of cookie dough, flatten it, place a frozen cheesecake ball in the center, then cover with another flattened tablespoon of dough. Seal edges and roll into a ball.
Step 7: Bake
Place cookies on a baking sheet lined with parchment and bake at 350°F for 10–12 minutes. They should be set on the edges but soft in the center.
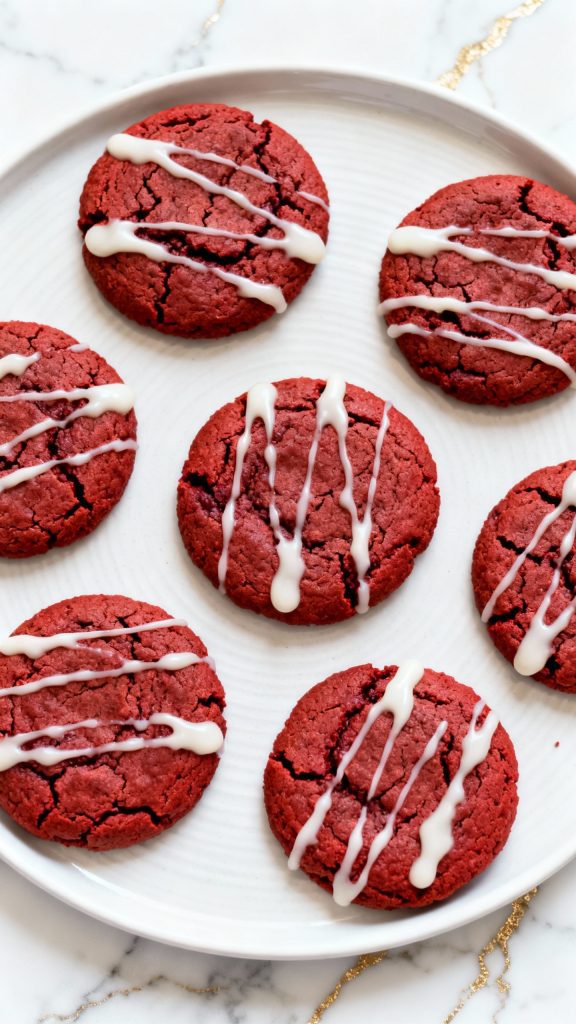
Step 8: Glaze
Let the cookies cool on the pan for 5 minutes, then transfer to a wire rack to cool completely. Whisk powdered sugar with a small splash of milk or cream until smooth and pourable, then drizzle lightly over the cookies for a clean, glossy finish.
Step 9: Serve

Leftovers & Storage
- Store in an airtight container in the fridge for up to 5 days
- You can also freeze them for up to 2 months
- Warm them in the microwave for 10 seconds for that soft center again
Macros (Per Cookie, Approximate)
- Calories: 280
- Protein: 3g
- Fat: 14g
- Carbs: 35g
- Sugar: 22g
Why This Recipe Works (Quick Science)
- Chilling the dough helps the fat solidify so the cookies don’t spread too much while baking
- Cocoa powder reacts with the acidity in the cream cheese and food coloring, giving it that classic red velvet flavor
- The cream cheese center stays soft because it’s insulated by the cookie dough
Common Mistakes
- Skipping the chilling time makes the dough too soft to shape
- Not sealing the dough around the filling can cause it to leak
- Overbaking will make them dry—pull them out when they look slightly underdone
What to Serve With
- A glass of cold milk or hot cocoa
- A scoop of vanilla ice cream for extra indulgence
- Coffee or espresso for a grown-up treat
FAQ
Can I use store-bought cookie dough?
You can, but it won’t taste quite the same. Homemade is worth it here.
What kind of food coloring should I use?
Gel food coloring gives a deeper red without needing too much liquid.
Can I make these smaller?
Yes! Just use less dough and filling, and bake for 8–9 minutes instead.
Do they need to be refrigerated?
Yes, because of the cream cheese filling, store them in the fridge.
Final Thoughts
Red velvet cheesecake cookies are a fun twist on two classic desserts. They’re easy to make, crazy delicious, and guaranteed to impress. If you try these, leave a comment and tell me how they turned out or ask me anything you need help with. Happy baking!
