
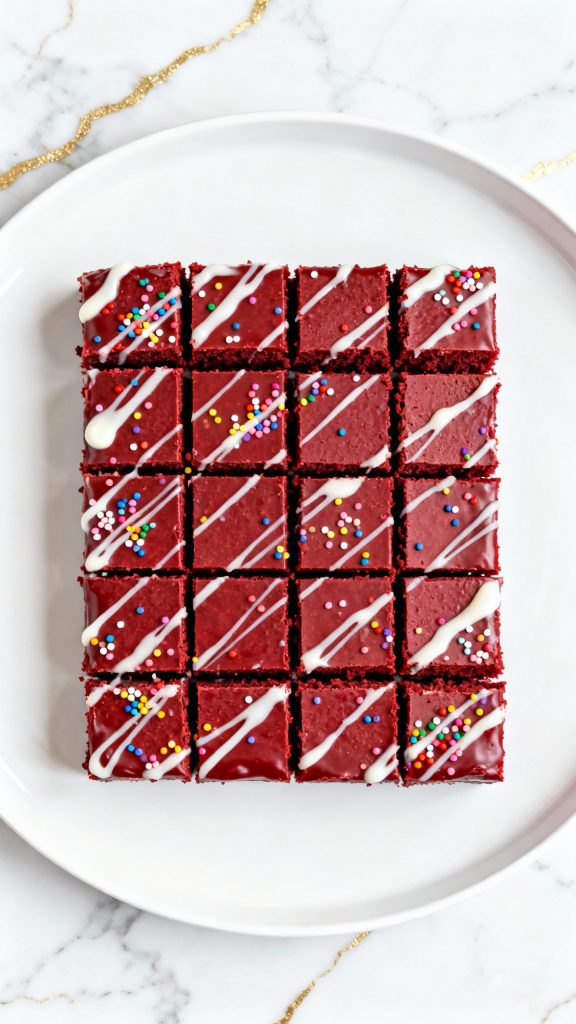
This dreamy Red Velvet Fudge is rich, creamy, and as beautiful as it is delicious.
It’s perfect for holidays, parties, or anytime you want to make something a little extra special.
The velvety texture combined with the mild cocoa flavor and the signature deep red color make it absolutely irresistible.
This recipe takes about 15 minutes of active prep, plus 4 hours to chill.
It makes 16 generous squares of fudge.

Why I Love This Recipe
I first made this red velvet fudge for a family holiday party, and it quickly became a tradition. It’s the kind of dessert that gets people talking — not just about how pretty it looks, but how smooth and satisfying every bite is. Plus, it only takes a few ingredients and can be made without a candy thermometer!
- It tastes like a creamy red velvet cake in fudge form
- You don’t need any fancy tools or baking experience
- The texture is smooth, soft, and melts in your mouth
- It’s a beautiful treat for gifts or special occasions
- It holds up well at room temperature for parties
What You’ll Need
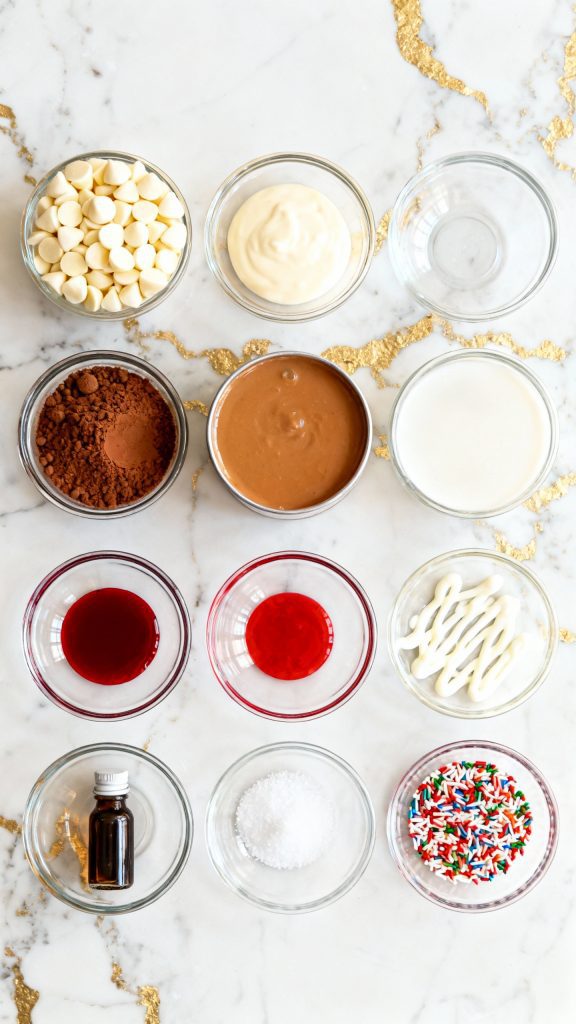
- 3 cups white chocolate chips
- 1 can (14 oz) sweetened condensed milk
- 1 tbsp unsweetened cocoa powder (sifted)
- 1 tsp red gel food coloring
- 1 tsp vanilla extract
- Pinch of salt
- Optional: white chocolate drizzle or sprinkles for topping
Tools Required
- Medium saucepan
- Silicone spatula
- 8×8 square baking dish
- Parchment paper
- Small sieve (for sifting cocoa)
- Measuring spoons
- Mixing bowls
Why This Recipe Works (Quick Science)
The sweetened condensed milk helps create a smooth, creamy base that doesn’t crystallize. White chocolate melts easily and stabilizes the fudge, while cocoa powder adds that mild chocolate flavor we associate with red velvet. Red gel food coloring blends well without watering down the mixture.
Common Mistakes
- Using liquid food coloring: It can change the texture. Always use gel.
- Overheating the chocolate: White chocolate burns fast. Melt on low and stir constantly.
- Not lining the pan: Parchment paper makes removing the fudge a breeze.
- Skipping the chill time: The fudge needs several hours to fully set.
Substitutions and Variations
- Swap white chocolate chips with chopped white chocolate bars for smoother results
- Use dark chocolate chips for a red velvet swirl fudge
- Add crushed cookies or sprinkles for extra crunch and fun
- Top with cream cheese frosting drizzle for a red velvet cake-style vibe
Make Ahead Tips
You can make this fudge up to 5 days in advance. Store it in an airtight container in the fridge until ready to serve.
Let’s Make Red Velvet Fudge!
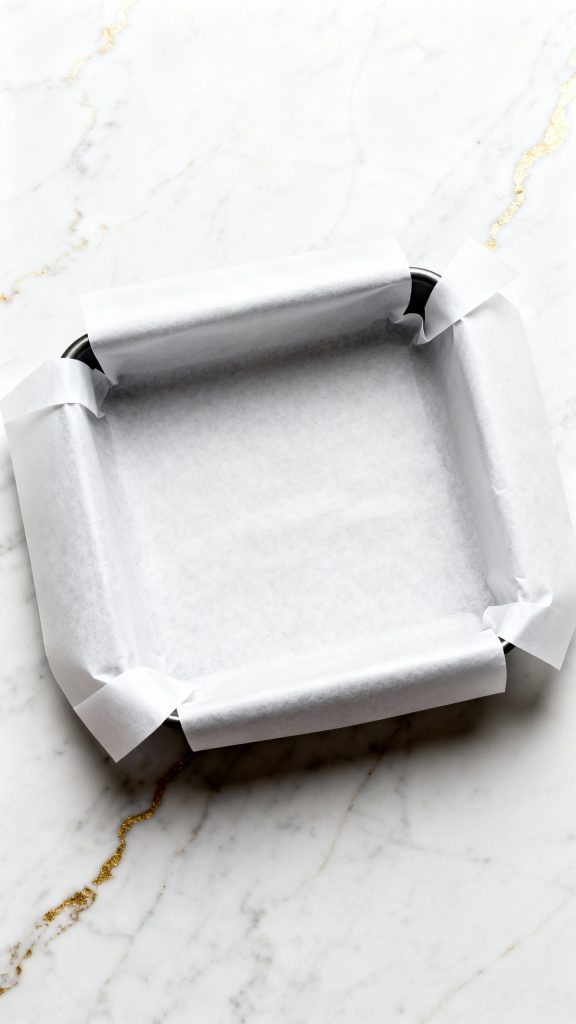
Step 1: Line the Pan
Line an 8×8 square baking dish with parchment paper, leaving some overhang for easy lifting.
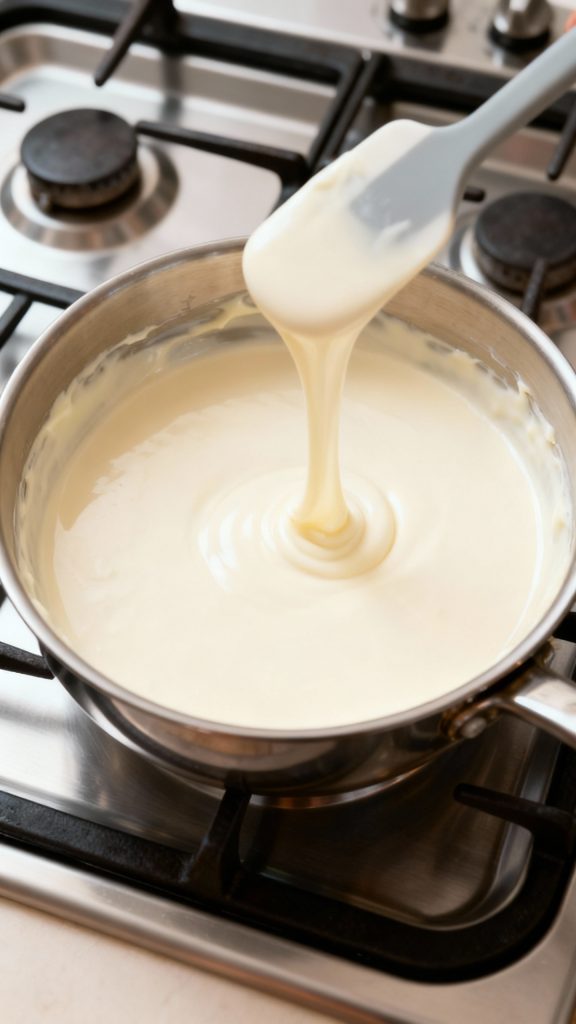
Step 2: Add White Chocolate and Sweetened Condensed Milk
Add 3 cups white chocolate chips and 1 can (14 oz) sweetened condensed milk to a medium saucepan over low heat.
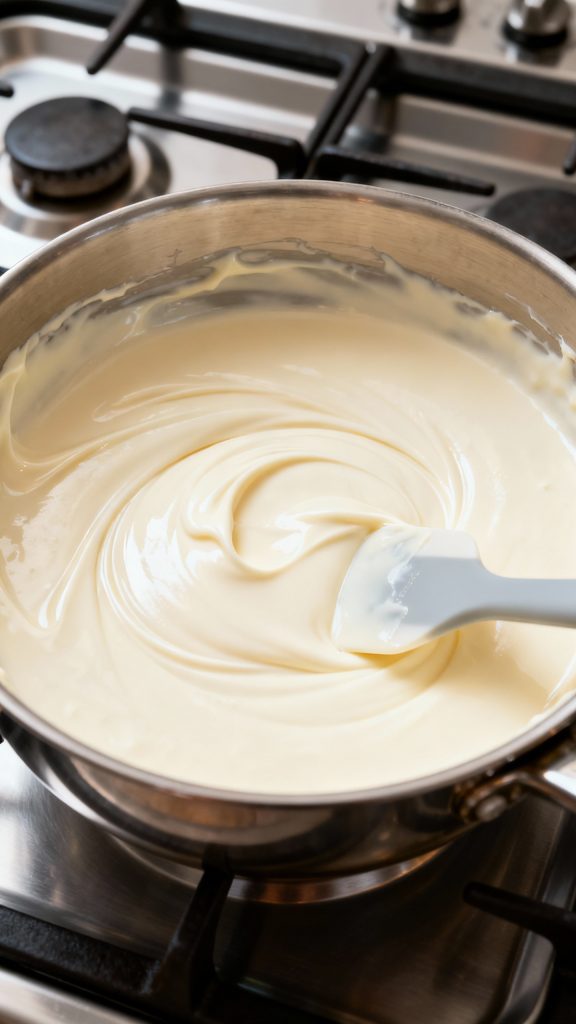
Step 3: Stir Until Smooth
Stir constantly with a silicone spatula until the mixture is completely melted and smooth.
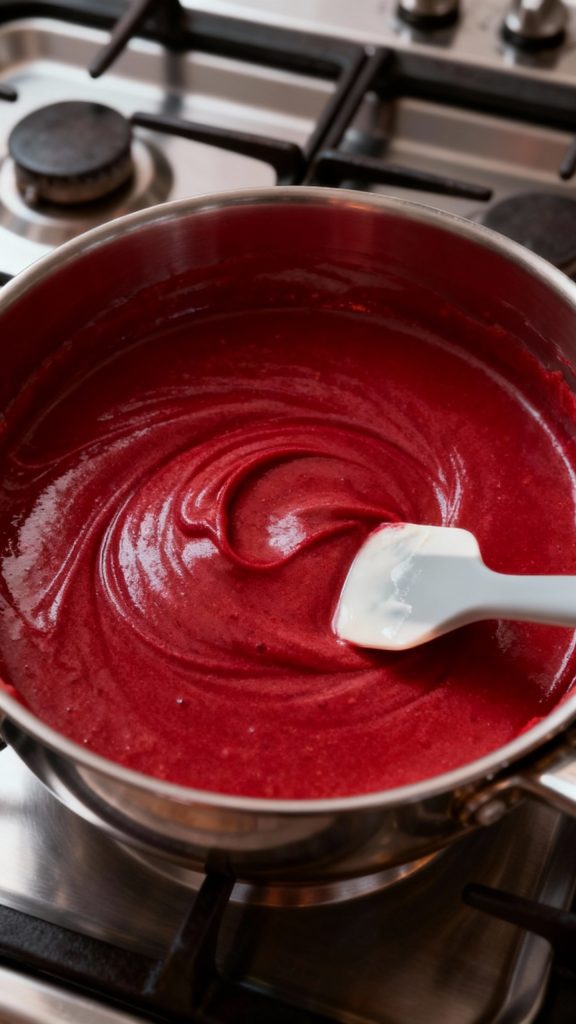
Step 4: Add Cocoa, Vanilla, Salt, and Food Coloring
Remove from heat. Stir in 1 tbsp sifted cocoa powder, 1 tsp vanilla extract, pinch of salt, and 1 tsp red gel food coloring until fully combined and evenly red.
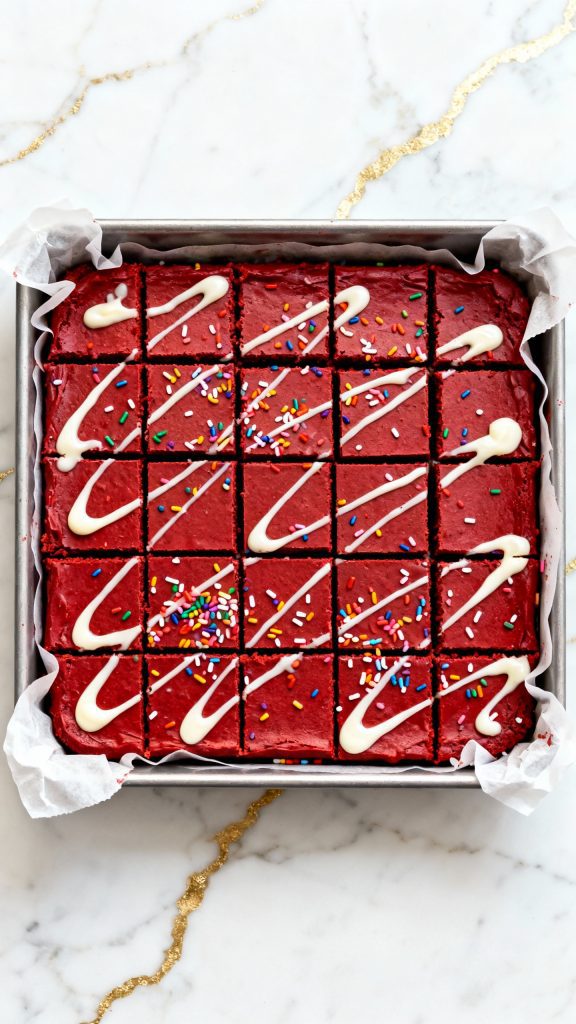
Step 5: Pour Into Pan
Pour the mixture into the parchment-lined pan and spread evenly with a spatula.

Step 6: Add Toppings (Optional)
Drizzle with melted white chocolate or top with sprinkles while still warm.
Step 7: Chill
Refrigerate for at least 4 hours, or until firm.
Step 8: Slice and Serve
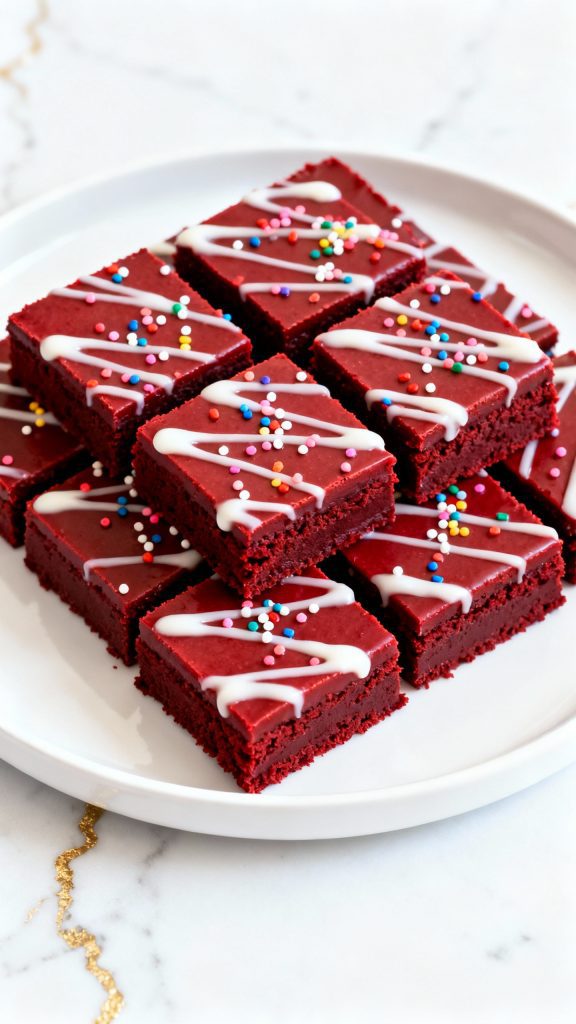
Lift the fudge out of the pan using parchment edges. Cut into 16 squares and serve.
Pro Tips
- Use a silicone spatula to get every bit of fudge out of the pan
- Let the fudge sit at room temp 5 minutes before slicing for smoother cuts
- Sift the cocoa to avoid any clumps in the batter
- Don’t rush the chilling—it really needs to firm up
- Store wrapped squares in wax paper for easy gifting
Macros Information (Per Serving, based on 16 pieces)
- Calories: 210
- Protein: 2g
- Carbs: 27g
- Sugars: 25g
- Fat: 11g
- Fiber: 0g
Leftovers and Storage
Store leftover fudge in an airtight container in the fridge for up to 7 days. You can also freeze it for up to 2 months. Just wrap individual pieces in wax paper, then place them in a freezer-safe bag.
What to Serve With
- A mug of hot cocoa or coffee
- A scoop of vanilla ice cream
- Crushed peppermint or holiday sprinkles for a seasonal twist
- On a dessert board with cookies, fruits, and other treats
FAQ
Can I use a microwave instead of a stove?
Yes, microwave the chocolate and milk in 30-second bursts, stirring in between until smooth.
Can I use milk chocolate instead of white?
You can, but the red color won’t be as vibrant and the flavor will be stronger.
Why does my fudge look oily or grainy?
This happens if it overheats or if the chocolate separates. Stir constantly and use low heat.
Can I double this recipe?
Yes! Just use a 9×13 dish instead of an 8×8.
Final Thoughts
Red Velvet Fudge is a treat that brings beauty and bold flavor together in one bite. Whether you’re sharing it at a party or keeping it all to yourself (no shame!), it’s an easy recipe that feels fancy but is totally doable. Give it a try, and don’t forget to leave a comment with your thoughts or any questions you have. I’d love to hear how it turns out for you!
