
These red velvet pancakes are rich, fluffy, and perfect when you want something a little extra.
They taste like cake for breakfast but still feel like good old pancakes.
I made these for a cozy weekend brunch and couldn’t believe how easy they were — and how good they looked on the plate.
A little cocoa, that signature red color, and a drizzle of cream cheese glaze? Yes, please.

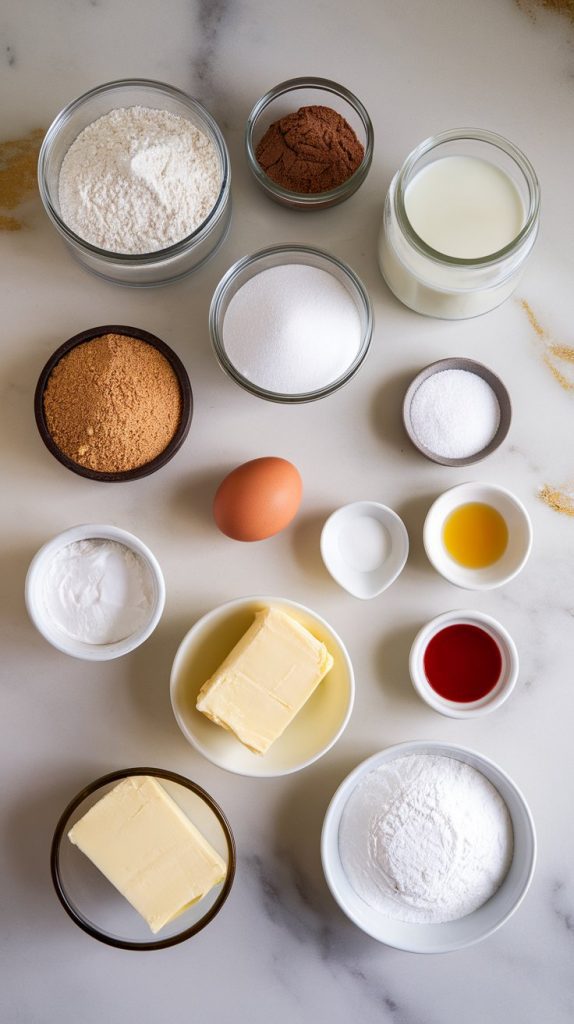
What You’ll Need
- 1 cup all-purpose flour
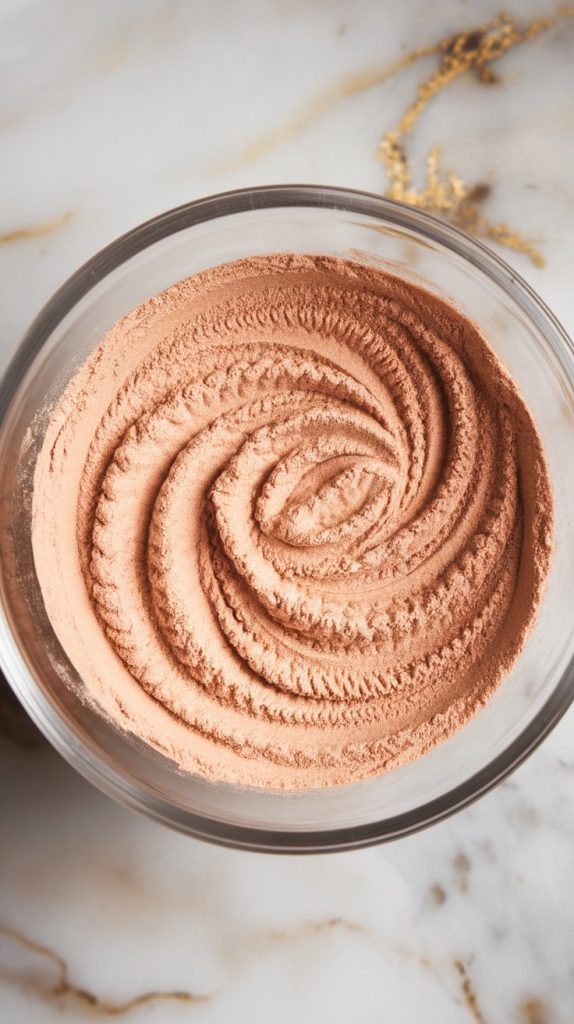
- 2 tablespoons unsweetened cocoa powder
- 1 tablespoon sugar
- 1 tablespoon brown sugar
- 1 teaspoon baking powder
- ½ teaspoon baking soda
- ¼ teaspoon salt
- ¾ cup buttermilk
- 1 large egg
- 2 tablespoons melted butter
- 1 teaspoon vanilla extract
- 1 teaspoon white vinegar
- 1½ teaspoons red food coloring
- Cooking spray or extra butter for the pan
Optional Cream Cheese Glaze:
- 2 oz cream cheese, softened
- ¼ cup powdered sugar
- 1 tablespoon milk
- ½ teaspoon vanilla extract
Why I Love This Recipe
I first made these red velvet pancakes on Valentine’s Day when I wanted something more exciting than plain pancakes. I wasn’t sure how they’d turn out, but they were better than I expected—light, flavorful, and totally photogenic.
- You get that chocolatey red velvet flavor in every bite
- The texture is soft and fluffy with crispy edges
- You can dress them up with glaze, berries, or syrup
- They feel indulgent but are super simple to make
Servings: Makes 6–8 medium pancakes (Serves 3–4)
Cook Time: 20 minutes
Macros (Per Pancake – Approximate)
- Calories: 190
- Protein: 4g
- Carbs: 23g
- Fat: 9g
- Sugar: 8g
- Fiber: 1g
Why This Recipe Works (Quick Science)
The vinegar and baking soda react to give you that classic red velvet rise. Buttermilk adds tang and tenderness, while cocoa powder brings depth. The red food coloring gives it that signature color — and the cream cheese glaze adds a sweet, creamy contrast.
Common Mistakes
- Using too much food coloring: A little goes a long way. More than 2 teaspoons can make the batter bitter.
- Overmixing: This will make your pancakes tough. Stir just until the flour disappears.
- Skipping the vinegar: It’s what makes red velvet taste like red velvet.
- Cooking too hot: Medium heat is key. Too hot and the outside burns before the inside cooks.
What to Serve With
- Cream cheese glaze or a dusting of powdered sugar
- Fresh strawberries or raspberries
- Hot coffee or chai tea
- Crispy bacon or sausage on the side
FAQ
Can I use regular milk instead of buttermilk?
Yes, but it won’t be quite as tender. Add 1 tsp vinegar to regular milk and let it sit for 5 minutes to mimic buttermilk.
Do I have to use red food coloring?
Nope! The pancakes will taste just as good without it — they just won’t be red.
Can I make these gluten-free?
You can use a 1:1 gluten-free flour blend. The texture might be slightly different but still tasty.
How do I store leftovers?
Let them cool completely and store in the fridge for up to 3 days or freeze for longer.
Pro Tips
- Use a cookie scoop or measuring cup for evenly sized pancakes
- Wipe the skillet between batches so butter doesn’t burn
- Make the glaze ahead so it’s ready to drizzle
- Let the batter rest for 5 minutes before cooking — it helps it thicken and rise better
- Keep cooked pancakes warm in a low oven while you finish the batch
Tools Needed
- Mixing bowls (2)
- Whisk
- Measuring spoons and cups
- Non-stick skillet or griddle
- Spatula
- Small saucepan or microwave-safe bowl (for glaze)
Substitutions and Variations
- Swap buttermilk for dairy-free milk + 1 tsp lemon juice
- Use maple syrup instead of cream cheese glaze
- Add mini chocolate chips to the batter for extra richness
- Turn them into pancake “tacos” filled with whipped cream and fruit
Make Ahead Tips
You can make the batter (without baking soda) the night before and store covered in the fridge. Stir in the baking soda just before cooking. The glaze can also be made ahead and stored in the fridge — just warm slightly before using.
How to Make Red Velvet Pancakes
Step 1: Mix the Dry Ingredients
In a medium bowl, whisk together 1 cup all-purpose flour, 2 tablespoons cocoa powder, 1 tablespoon sugar, 1 tablespoon brown sugar, 1 teaspoon baking powder, ½ teaspoon baking soda, and ¼ teaspoon salt.
Step 2: Mix the Wet Ingredients
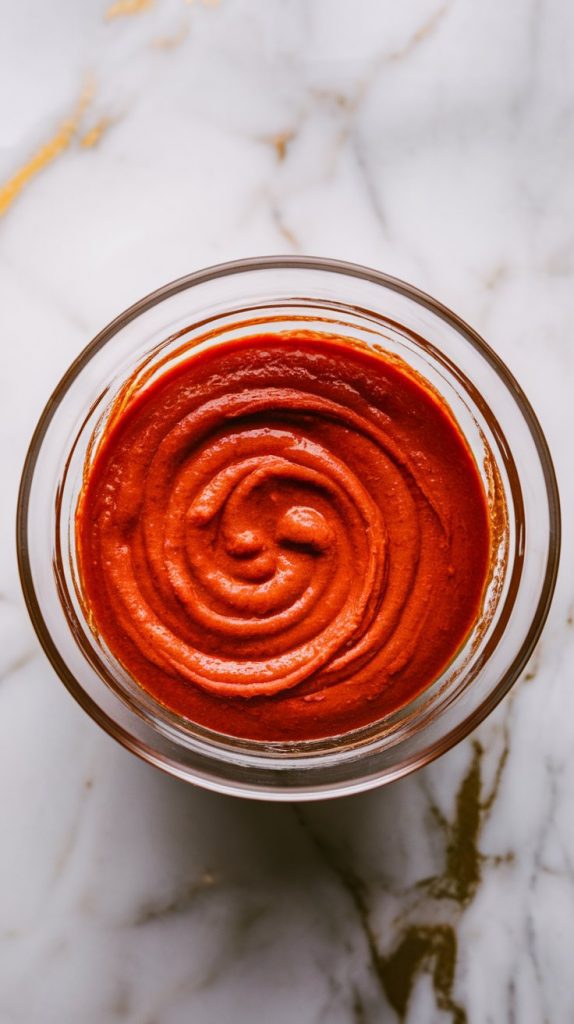
In a separate bowl, whisk together ¾ cup buttermilk, 1 large egg, 2 tablespoons melted butter, 1 teaspoon vanilla extract, 1 teaspoon white vinegar, and 1½ teaspoons red food coloring until smooth and evenly colored.
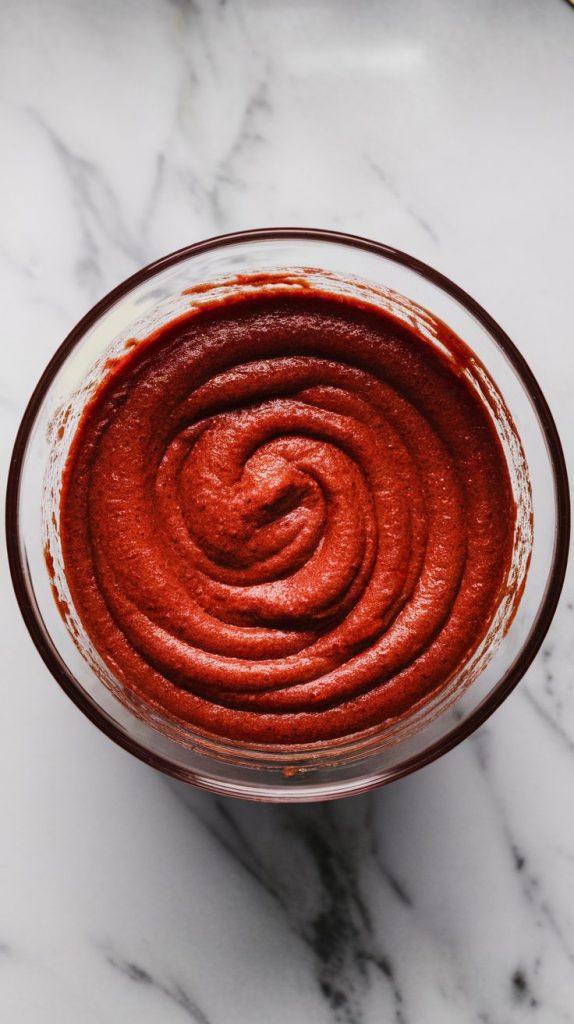
Step 3: Combine Wet and Dry
Pour the wet ingredients into the bowl of dry ingredients. Stir until just combined — batter should be thick and slightly lumpy.
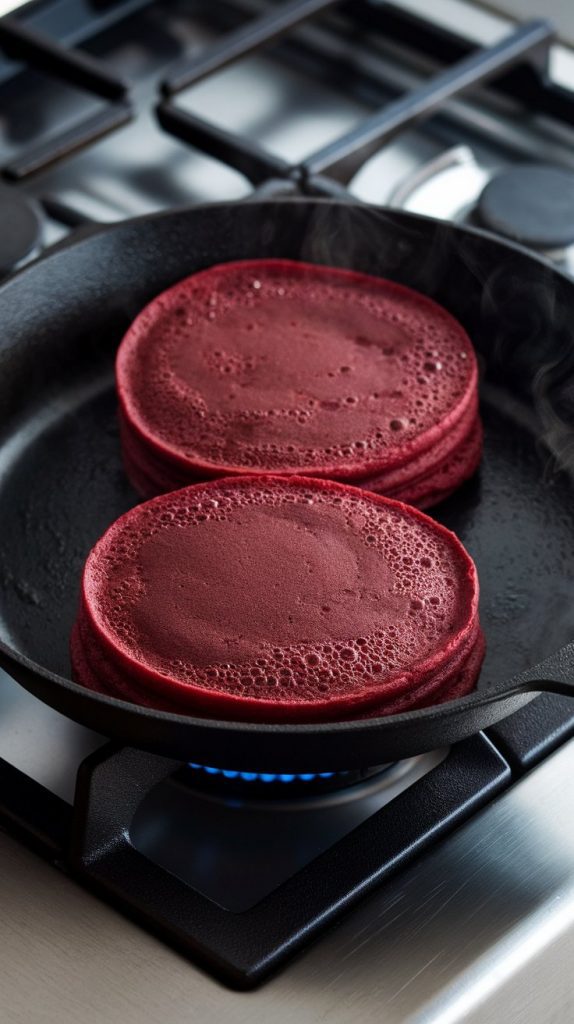
Step 4: Cook the Pancakes
Heat a non-stick skillet over medium heat. Lightly grease with cooking spray or a bit of butter. Scoop about ¼ cup of batter into the skillet. Cook for 2–3 minutes, or until bubbles form and edges are set, then flip and cook 1–2 minutes more.
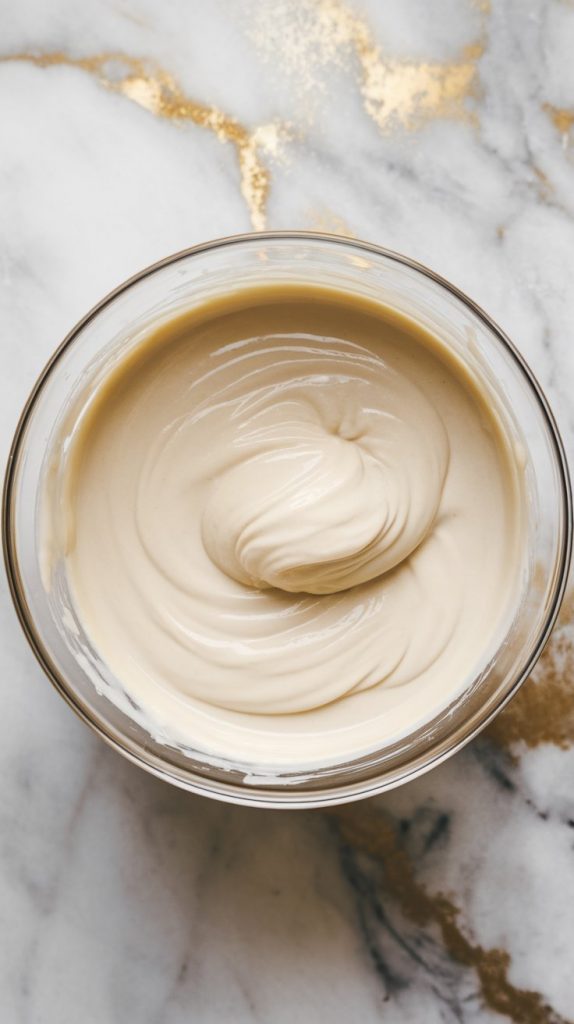
Step 5: Make the Cream Cheese Glaze (Optional)
In a small bowl, mix 2 oz softened cream cheese, ¼ cup powdered sugar, 1 tablespoon milk, and ½ teaspoon vanilla extract until smooth and pourable.
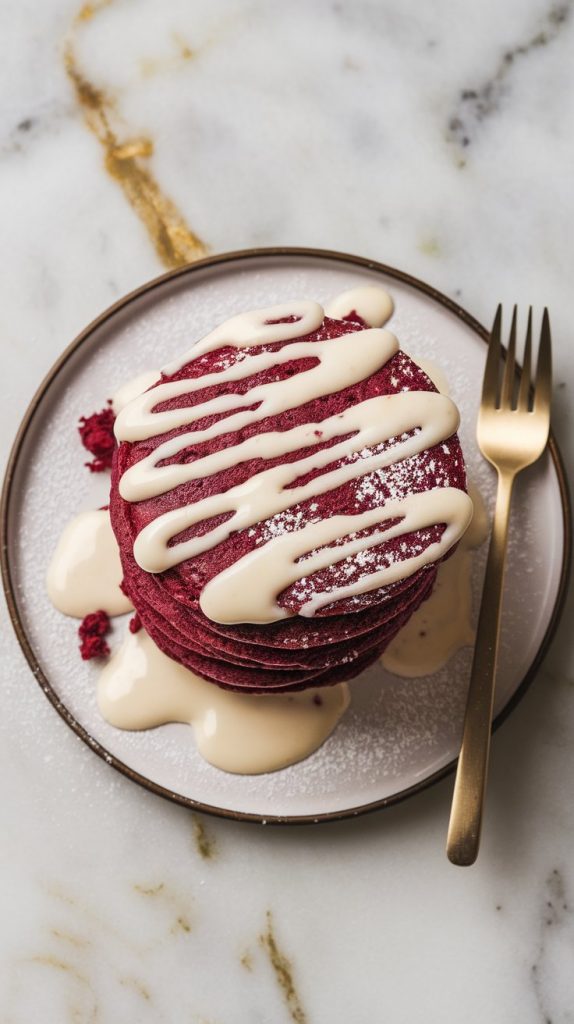
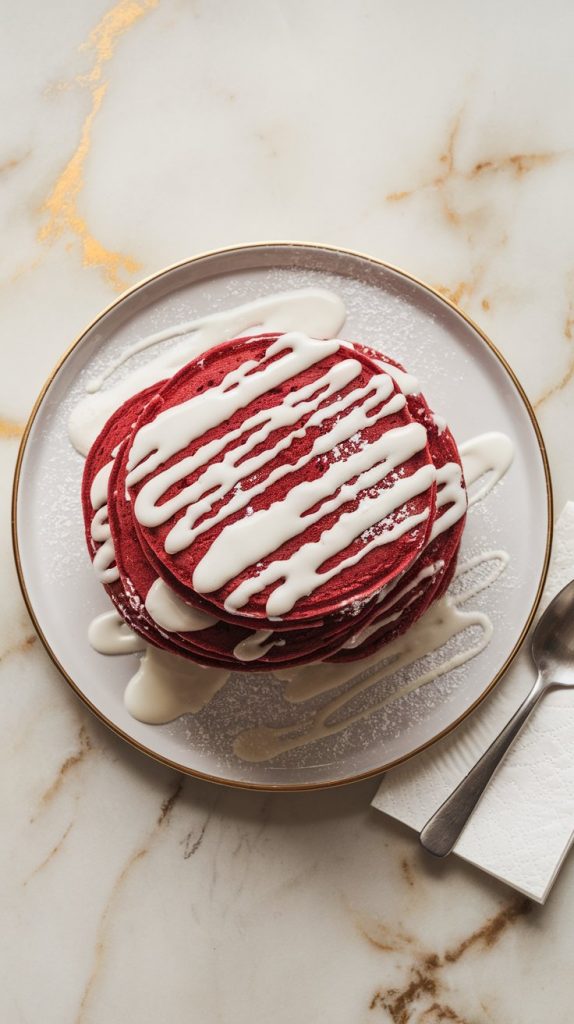
Step 6: Plate and Serve
Stack the pancakes on a round plate. Drizzle with cream cheese glaze or syrup. Dust with powdered sugar if desired and serve warm.
Leftovers and Storage
Let pancakes cool completely, then store in an airtight container in the fridge for up to 3 days. Freeze for up to 2 months with parchment between each pancake. Reheat in toaster or microwave.
Wrap-Up
These red velvet pancakes are like a warm hug in breakfast form. Perfect for brunch, holidays, or any time you want to treat yourself. If you give them a try, come back and let me know how it went — I’d love to hear your twist on it!
