
This Toasted Marshmallow Mocha is like your favorite campfire treat got a cozy café makeover. It’s warm, chocolatey, a little smoky-sweet from the toasted marshmallows, and finished with a creamy top that feels like a hug in a mug. It takes just a few minutes to make, and it tastes way better than anything you’d pick up from a drive-thru. Perfect for fall mornings, rainy days, or anytime you want something special without a whole lot of effort.

What You’ll Need
- 1 cup whole milk (or oat milk for dairy-free)
- ¼ cup strong brewed coffee or 1 shot espresso
- 2 tbsp unsweetened cocoa powder
- 1 ½ tbsp sugar
- ¼ tsp vanilla extract
- ¼ cup mini marshmallows (plus extra for topping)
- Optional: whipped cream and chocolate syrup for serving

Pro Tips
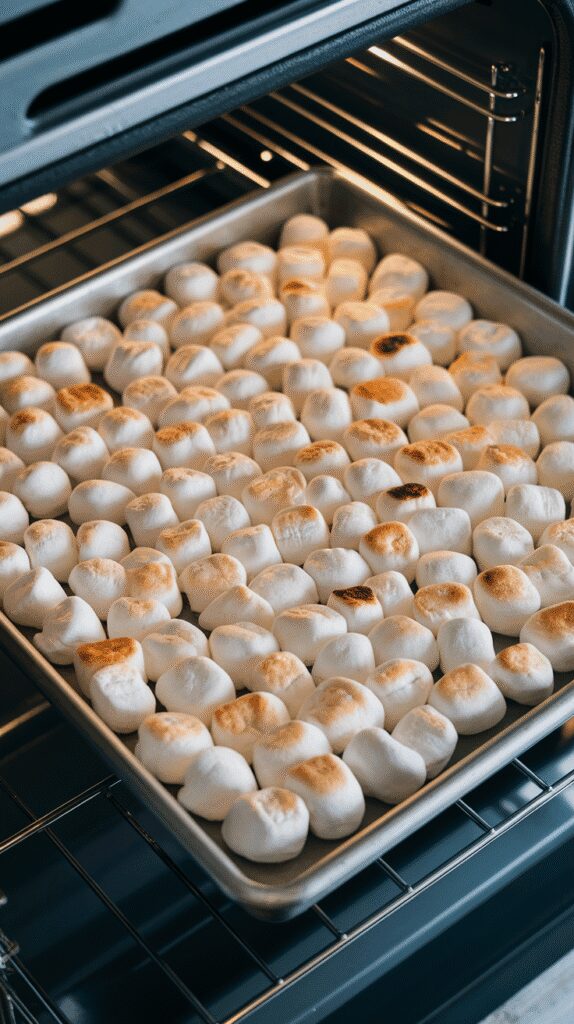
- Toast your marshmallows in the oven broiler or with a kitchen torch for that perfect golden top.
- Whisk constantly while heating to keep the cocoa smooth and creamy.
- For extra indulgence, add a splash of cream or a pinch of salt to deepen the flavor.
- Make it decaf by swapping in decaf coffee or espresso.
- Use good cocoa powder — it really makes a difference.
Tools Required
- Small saucepan
- Whisk
- Measuring cups and spoons
- Mug
- Oven broiler or kitchen torch
Substitutions and Variations
- Swap milk for oat or almond milk for dairy-free
- Add a shot of hazelnut or caramel syrup for a flavor twist
- Skip the coffee and use all milk for a hot cocoa version
- Top with graham cracker crumbs for s’mores vibes
Make Ahead Tips
You can make the mocha base ahead (milk, cocoa, sugar, vanilla, and coffee), store in the fridge up to 2 days, then heat and add toppings fresh.
Step-by-Step Instructions
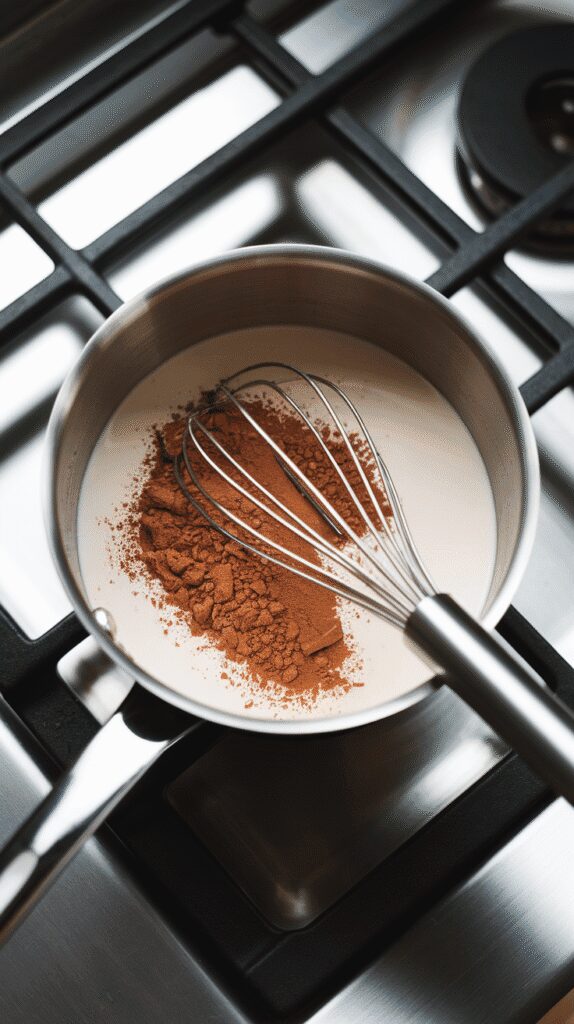
Step 1: Combine Milk, Cocoa, and Sugar
In a small saucepan, add 1 cup whole milk, 2 tbsp unsweetened cocoa powder, and 1 ½ tbsp sugar. Whisk together before heating.
Step 2: Heat and Whisk Until Smooth
Turn heat to medium and whisk constantly until the cocoa and sugar are fully dissolved and the milk is steaming but not boiling.
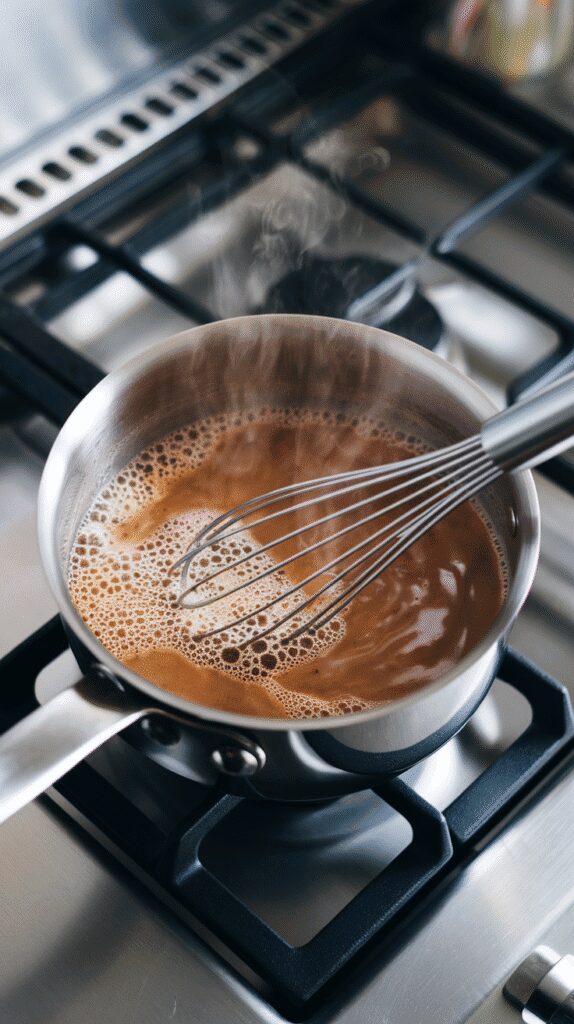
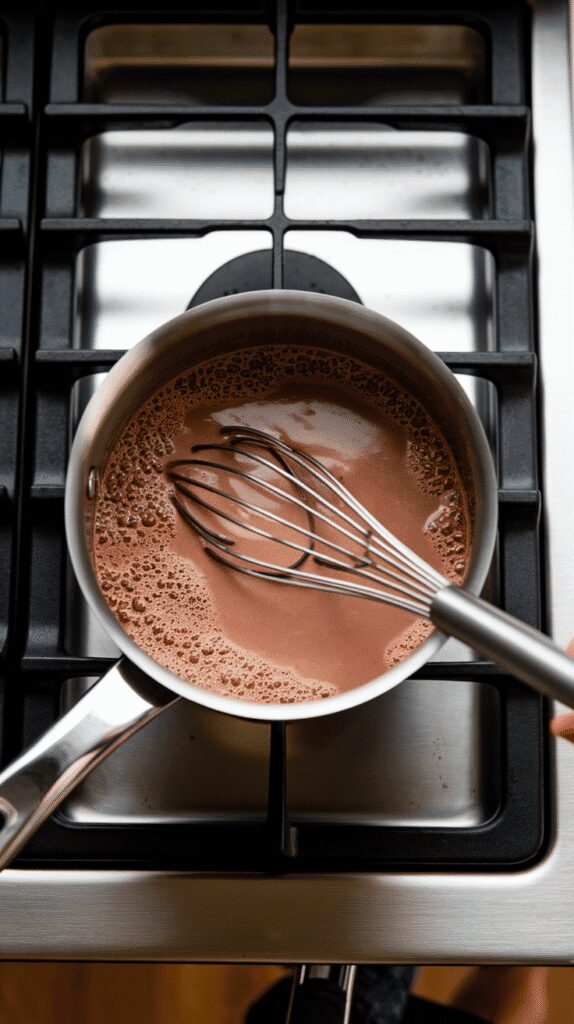
Step 3: Add Coffee and Vanilla
Pour in ¼ cup strong brewed coffee and ¼ tsp vanilla extract. Stir gently until combined and heated through.
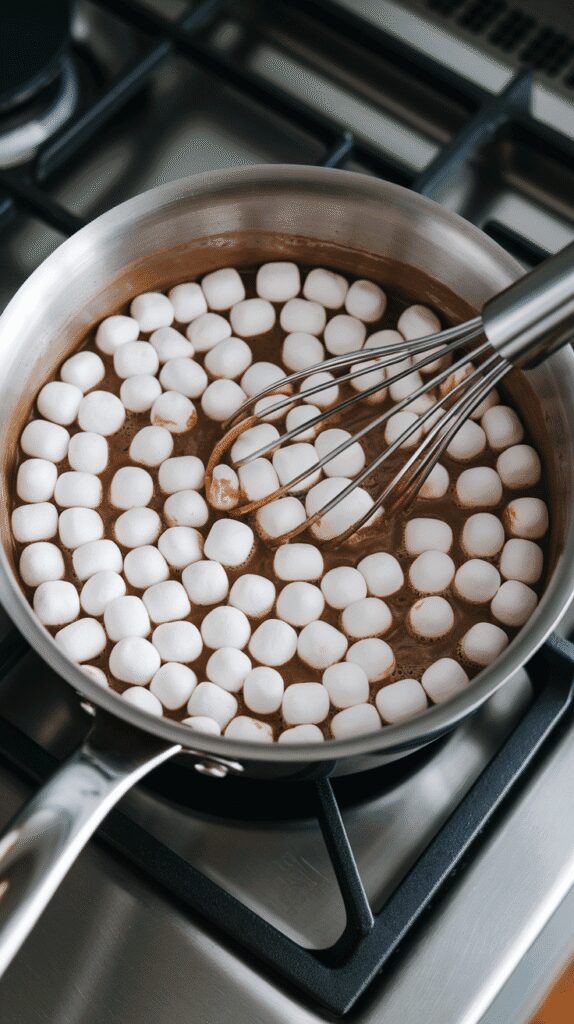
Step 4: Add Marshmallows and Stir to Melt
Add ¼ cup mini marshmallows to the hot mocha mixture. Stir until they melt completely and make the drink silky and slightly thickened.
Step 5: Toast Extra Marshmallows
While the mocha finishes, toast a small handful of mini marshmallows under the broiler for 30–60 seconds or until golden brown.
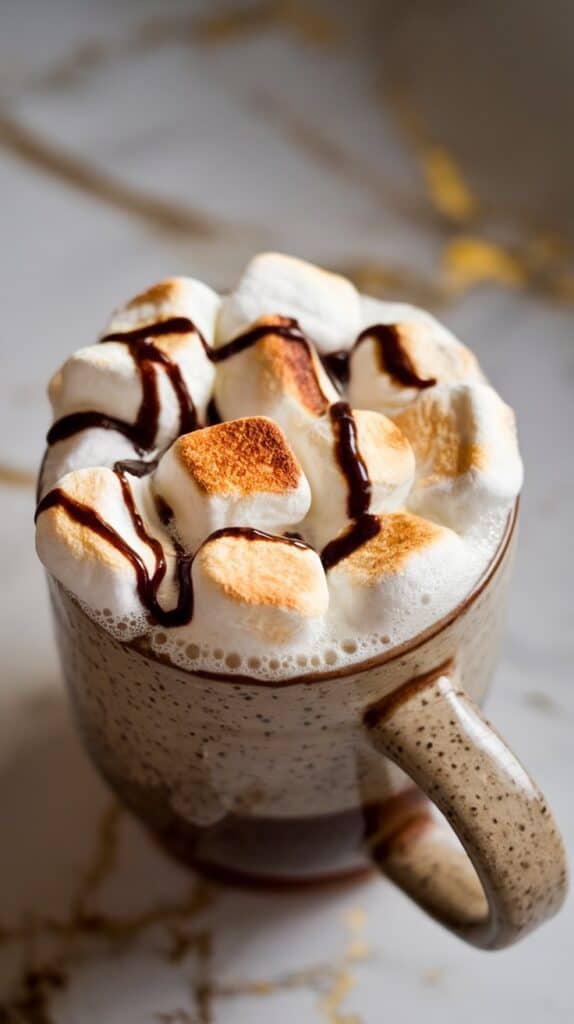
Step 6: Pour and Top
Pour the mocha into your favorite mug. Top with toasted marshmallows, and if you like, a swirl of whipped cream and drizzle of chocolate syrup.

Leftovers and Storage
Best enjoyed right after making. You can store the mocha base (without toppings) in the fridge for 1–2 days. Reheat gently on the stove or microwave before adding marshmallows.
Why I Love This Recipe
This drink brings back so many fall memories for me. It’s like sitting by the fire without having to leave the house. The toasted marshmallow flavor is cozy and nostalgic, and the mocha part? Pure comfort. I started making this on weekends and now it’s a weekly ritual.
- Rich and creamy with real cocoa
- The toasted marshmallow topping makes it feel extra special
- Easy to customize for different moods or ingredients
- You only need a few simple things to make it
- It’s basically a warm hug in a mug
Makes
1 serving
Total time: 10 minutes
Macros (approximate)
- Calories: 220
- Protein: 5g
- Carbs: 30g
- Sugar: 25g
- Fat: 8g
Based on whole milk, no whipped cream or syrup
Why This Recipe Works (Quick Science)
Heating milk with cocoa and sugar allows the fats to emulsify, giving you a silky base. Melting marshmallows into the hot liquid adds thickness and a natural sweetness from the gelatin and sugar. Toasted marshmallows on top introduce that Maillard reaction — aka the browned, caramelized flavor we all love in s’mores.
Common Mistakes
- Letting the milk boil — it can scald and change the flavor
- Not whisking enough — you’ll get cocoa clumps
- Adding marshmallows too early — wait until the drink is hot so they melt properly
- Over-broiling your marshmallows — they burn fast, so watch closely
What to Serve With
- Cinnamon toast or warm banana bread
- Shortbread cookies or graham crackers
- A salty snack like popcorn to balance the sweetness
- A cozy blanket and a good book
FAQ
Can I use hot cocoa mix instead of cocoa powder?
You can, but reduce the sugar — cocoa mix is already sweetened.
Can I double the recipe?
Yes! Just scale everything up and use a bigger pot.
Do I need a kitchen torch to toast the marshmallows?
Nope — just use your oven broiler for 30–60 seconds.
What if I don’t drink coffee?
Leave it out or sub with more milk. It’ll be more like a deluxe hot chocolate.
