
There’s something magical about making your own coffee creamer at home. This butterscotch version?
Game changer. It’s rich, buttery, sweet, and gives your morning coffee that cozy, coffee-shop feel—without ever leaving the house. If you’re a butterscotch fan (like me), you’re going to want to keep this on repeat.
Why I Love This Recipe
I’ve been a butterscotch lover since I was a kid—anything rich, buttery, and sweet always had my heart. Butterscotch creamer is like dessert in your coffee. The best part? You control the sweetness and there’s nothing artificial about it.
- It’s ready in 10 minutes
- Way cheaper than store-bought
- No weird preservatives
- You can customize the flavor
- Keeps in the fridge for a week

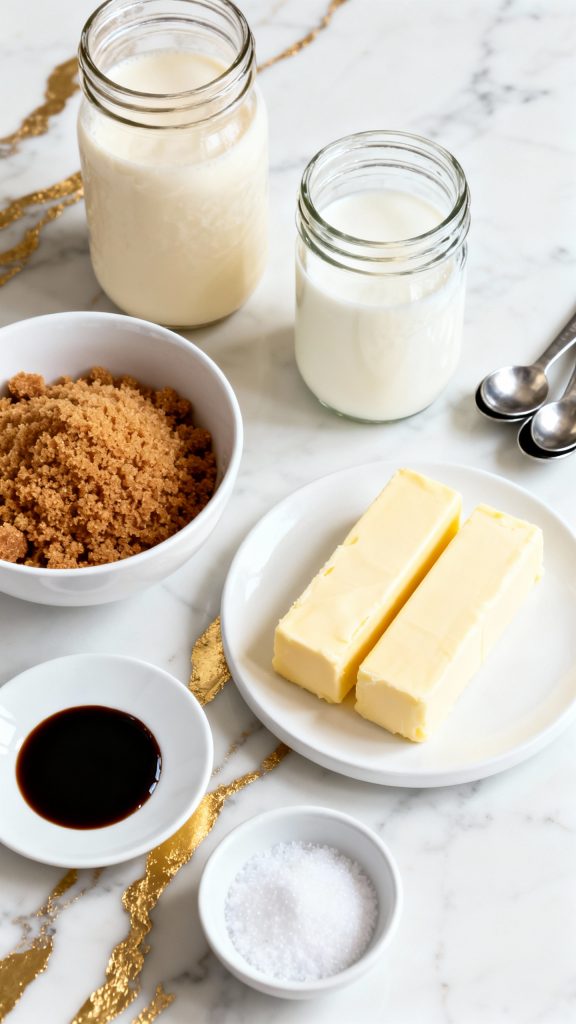
What You’ll Need
- 1 cup heavy cream
- 1 cup whole milk
- ½ cup brown sugar (light or dark)
- 2 tablespoons unsalted butter
- 1 tablespoon pure vanilla extract
- ½ teaspoon sea salt
Makes
About 2 cups (16 servings, 2 tablespoons each)
Total Time
10 minutes
Macros (per 2 tbsp serving – approx.)
- Calories: 80
- Fat: 6g
- Carbs: 6g
- Sugar: 6g
- Protein: 0.5g
Why This Recipe Works (Quick Science)
The secret to this creamer is heating the brown sugar with butter first. That quick caramelization step gives it a rich butterscotch flavor. The cream and milk blend in to smooth it all out, while the vanilla ties everything together. Salt enhances that buttery, deep-sweet profile.
Common Mistakes
- Overheating the sugar: It can burn fast. Stir constantly and keep the heat medium-low.
- Skipping the salt: Salt boosts the butterscotch flavor—don’t leave it out.
- Adding milk too fast: If you dump it in quickly, the hot sugar can seize. Go slow and stir constantly.
- Using cold milk or cream: It can curdle in hot sugar. Room temp is better.
What to Serve With
- Your morning coffee or cold brew
- Over iced coffee for a sweet treat
- Stir it into oatmeal for a flavor twist
- Mix into warm milk for a cozy drink
FAQ
Can I use non-dairy milk?
Yes! Use full-fat coconut milk or oat milk for best creaminess.
How long does this last?
Up to 7 days in the fridge in a sealed jar.
Can I make it sugar-free?
You can try using a brown sugar alternative, but flavor and texture will vary.
Can I double the batch?
Absolutely. Just use a bigger pot.
Pro Tips
- Stir constantly when heating the sugar and butter. It melts fast!
- Let your milk and cream come to room temp before adding.
- Taste before storing—you can add more vanilla or salt if needed.
- Store in a mason jar with a tight lid for easy shaking before use.
- Pour into coffee while it’s hot so it blends smooth and creamy.
Tools You’ll Need
- Medium saucepan
- Whisk
- Measuring cups and spoons
- Glass jar or bottle for storing
- Silicone spatula (optional)
Substitutions and Variations
- Milk: Use half-and-half or non-dairy options like oat milk or almond milk
- Brown sugar: Swap with coconut sugar or maple syrup for different flavors
- Butter: Use vegan butter for a dairy-free version
- Vanilla: Try maple or almond extract for a twist
Make Ahead Tips
- Make a batch and store in the fridge for the week
- Shake well before each use—it may separate a little when chilled
Step-by-Step Instructions
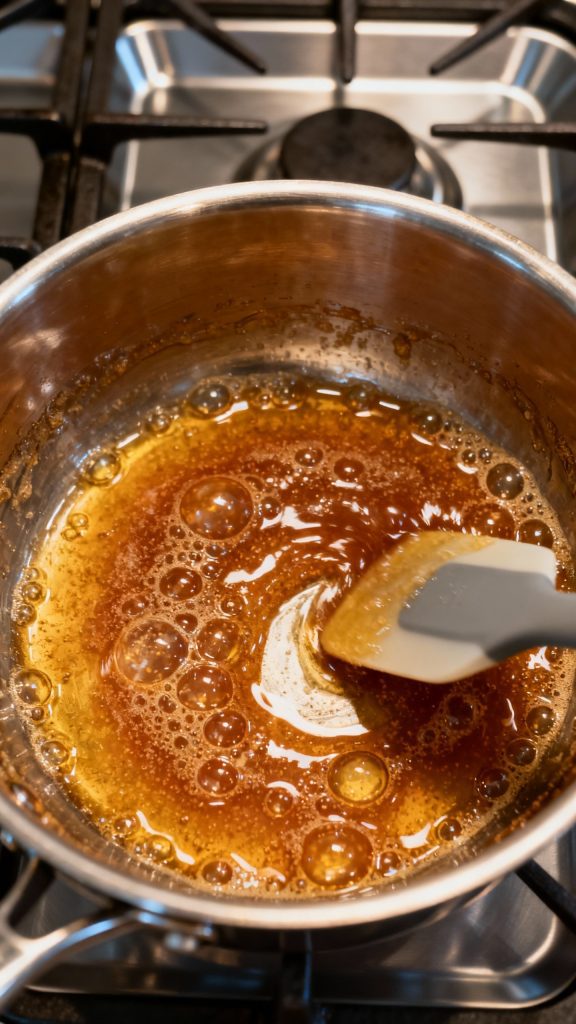
Step 1: Melt the Butter and Sugar
Add 2 tablespoons unsalted butter and ½ cup brown sugar to a medium saucepan. Melt together over medium heat, stirring constantly, until the sugar dissolves and the mixture is smooth and bubbly—about 2–3 minutes.
Step 2: Add the Cream and Milk Slowly
Lower the heat to medium-low. Slowly whisk in 1 cup heavy cream and 1 cup whole milk, stirring constantly. Mixture may bubble—just keep whisking until it smooths out.

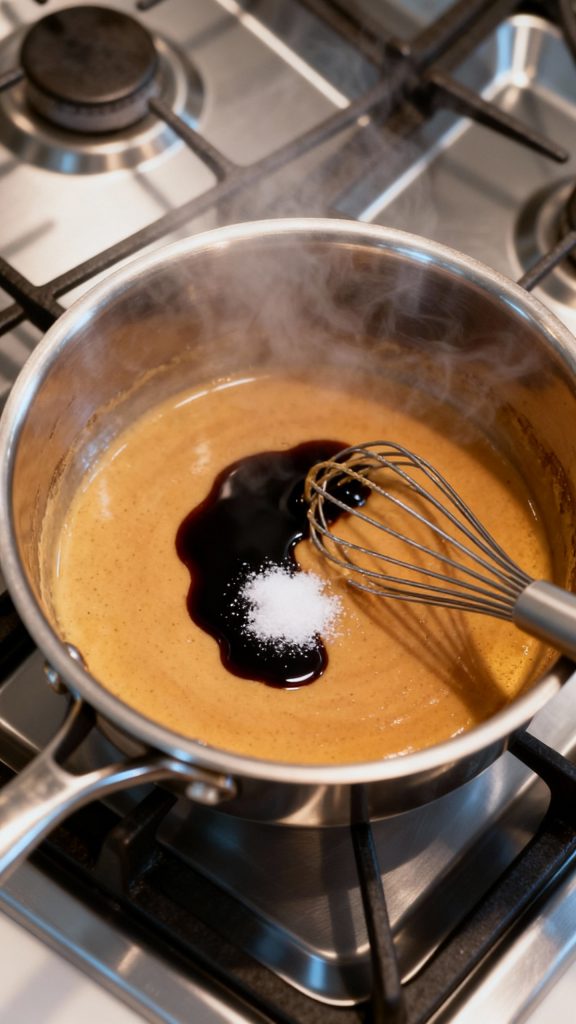
Step 3: Stir in Vanilla and Salt
Remove the pan from heat. Whisk in 1 tablespoon vanilla extract and ½ teaspoon sea salt. Stir well to combine.
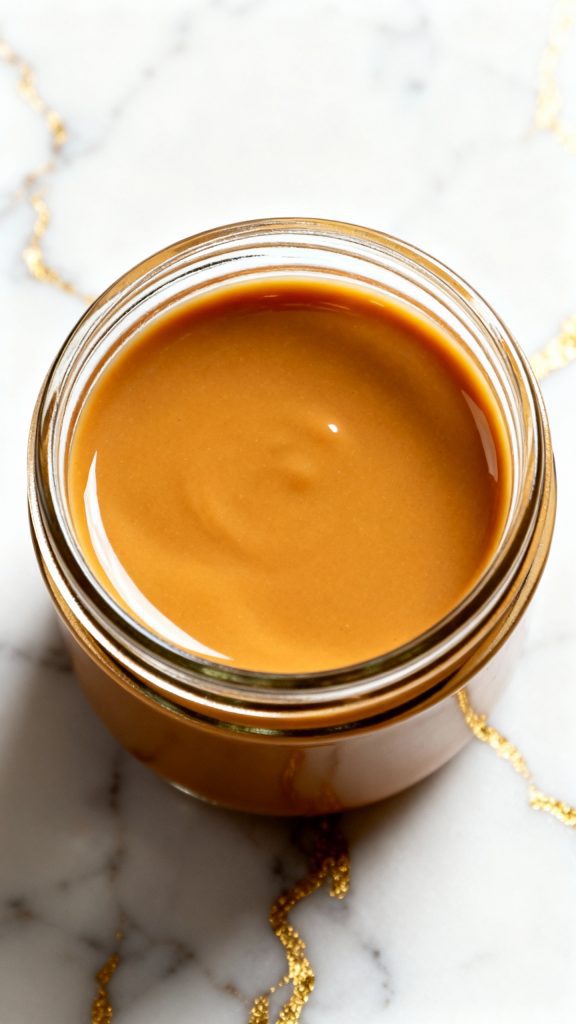
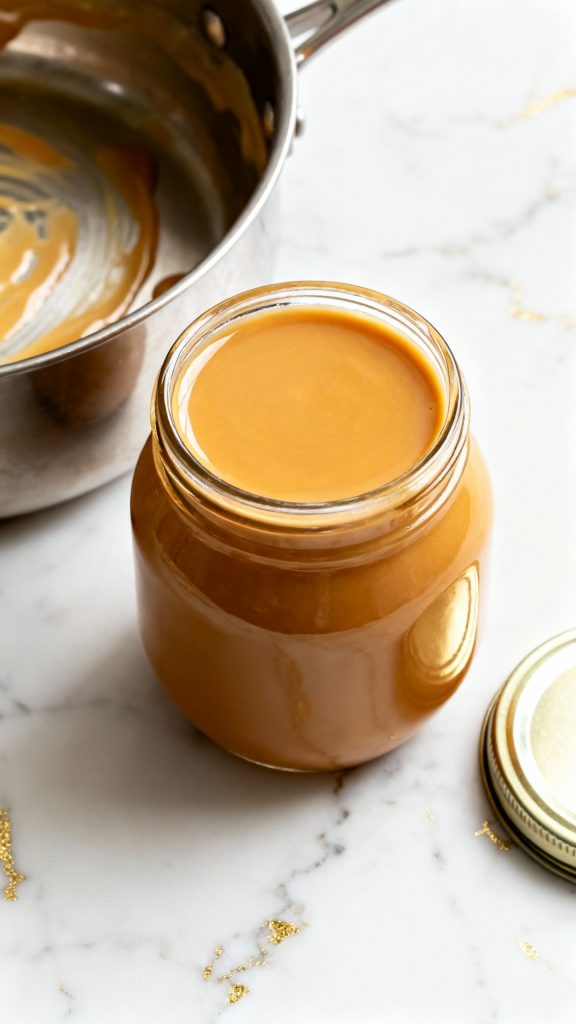
Step 4: Let It Cool, Then Store
Let the creamer cool for 10–15 minutes, then pour it into a glass jar or bottle. Seal and store in the fridge for up to a week. Shake well before using.
Leftovers and Storage
- Store in a sealed glass jar in the fridge for up to 7 days
- Shake well before using—it may separate slightly
- Do not freeze—it can change texture
- Reheat gently if it thickens too much (microwave or stovetop)
Final Thoughts
This homemade butterscotch coffee creamer is pure comfort in a cup. It’s fast, easy, and makes every sip feel like a cozy café treat. I hope it becomes one of your favorites too. Let me know how it goes in the comments—and if you try any fun twists, I’d love to hear about them!
