
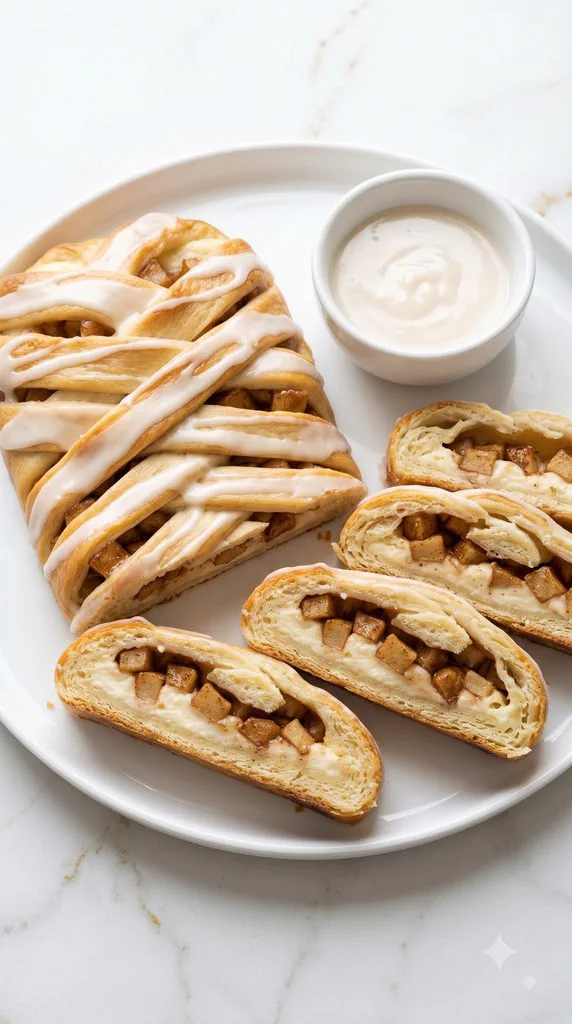
This Apple Cinnamon Cream Cheese Danish Braid is soft, buttery, creamy, and packed with warm cinnamon apples.
It looks like something from a bakery, but the braid is much easier to make than it looks.
The apples are cooked first so they stay tender and flavorful without making the dough soggy, following the core method of the recipe you shared.

Why I Love This Recipe
There is something special about pulling a braided Danish out of the oven. It looks fancy enough that people usually assume it took hours of complicated pastry work.
That is one reason I love this recipe.
The first time you look at the braid, all those overlapping pieces of dough can seem difficult. But once the dough is rolled out, you are really just cutting strips and folding them over the filling one at a time.
The filling is my favorite part. The apples cook with butter, cinnamon, and sugar until they become tender and glossy. Underneath them is a smooth cream cheese layer with just enough lemon and vanilla to balance the sweetness.
Then the vanilla drizzle goes over everything while the Danish is still slightly warm.
You get a little apple, cream cheese, soft pastry, and sweet glaze in almost every bite.
- It looks impressive without requiring complicated pastry skills.
- Cooking the apples first gives you a thicker filling instead of watery apples.
- Cream cheese adds richness and balances the cinnamon apples.
- The soft homemade yeast dough makes it feel more special than a shortcut pastry.
- You can serve it for breakfast, brunch, holidays, or dessert.
- It tastes wonderful warm, but it is also good at room temperature.
Recipe at a Glance
Servings: 10 slices
Yield: 1 large Danish braid
Prep Time: 30 minutes
Rise Time: About 1 hour 40 minutes
Cook Time: 20–25 minutes
Cooling Time: 15 minutes
Total Time: About 2 hours 50 minutes
Oven Temperature: 350°F (175°C)
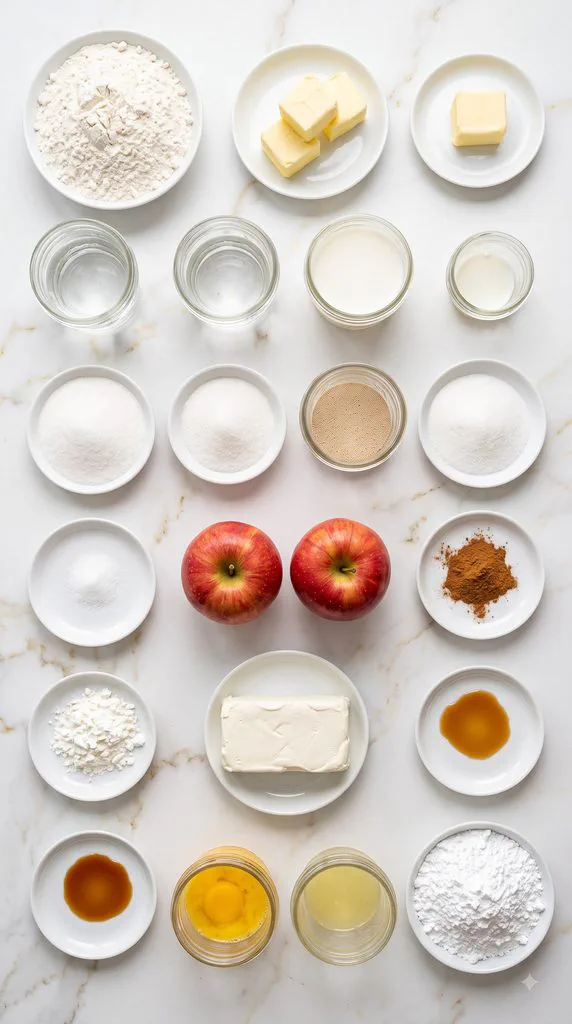
What You’ll Need
Sweet Dough
- 6 tablespoons unsalted butter, softened
- 1/4 cup water
- 1/2 cup 2% or whole milk
- 3 tablespoons granulated sugar
- 2 teaspoons active dry yeast
- 2 1/4 to 2 3/4 cups all-purpose flour, divided as needed
- 1/2 teaspoon salt
- 1 large egg, lightly beaten
Cinnamon Apple Filling
- 2 medium-large apples, peeled, cored, and diced
- 1 tablespoon unsalted butter
- 3 tablespoons granulated sugar
- 1 teaspoon ground cinnamon
- 1 tablespoon cornstarch
Cream Cheese Filling
- 8 ounces cream cheese, softened
- 1/4 cup granulated sugar
- 1 teaspoon vanilla extract
- 1 teaspoon lemon juice
Vanilla Drizzle
- 1 1/2 cups powdered sugar
- 5 to 5 1/2 teaspoons milk
- 1/4 teaspoon vanilla extract
Tools You’ll Need
- Stand mixer with dough hook
- Small saucepan
- Medium skillet
- Wooden spoon
- Large mixing bowl
- Small mixing bowl
- Whisk
- Silicone spatula
- Measuring cups
- Measuring spoons
- Rolling pin
- Parchment paper
- Baking sheet
- Pizza cutter or sharp knife
- Plastic wrap
- Cooling rack
- Round serving plate
You can also knead the dough by hand if you don’t have a stand mixer.
Why This Recipe Works (Quick Science)
There are a few small things happening here that make a big difference.
The yeast gives the dough its soft texture. As the yeast becomes active, it produces gas that gets trapped inside the dough. That’s what makes the braid rise instead of baking into a heavy pastry.
The apples are cooked before they go into the Danish. Apples naturally release moisture. Cooking them with 1 tablespoon cornstarch helps thicken those juices before they ever touch the dough. The source recipe also cooks the apples for about 5–7 minutes before assembling the braid.
The cream cheese needs to be softened. Room-temperature cream cheese mixes more smoothly with the sugar, vanilla, and lemon juice. Cold cream cheese can leave little lumps.
The second rise matters. After braiding, another 30–40 minutes gives the dough time to become light and puffy again before baking.
The glaze goes on after a short cooling period. If the Danish is extremely hot, the glaze melts and runs off. Slightly warm pastry gives you those pretty white ribbons of icing.
Pro Tips
- Don’t add all the flour at once. Start with the lower amount and add more only as needed. The dough should be soft and slightly tacky, not dry and stiff.
- Let the apple filling cool. Warm filling can soften the dough and make your braid difficult to shape.
- Roll directly on floured parchment. Once the braid is filled, moving it becomes much harder.
- Keep the apple pieces small. Small diced apples fit inside the braid better than large chunks.
- Don’t worry about a perfect braid. Once it rises and bakes, small differences between the strips become much less noticeable.
Substitutions and Variations
Apples: Granny Smith works well for a tart filling. Honeycrisp, Pink Lady, Braeburn, or Gala will make it sweeter.
Milk: Use either 2% or whole milk. Whole milk will give the dough a slightly richer flavor.
Extra spice: Add 1/8 teaspoon ground nutmeg to the apple filling.
Apple pecan: Sprinkle 1/3 cup chopped pecans over the apples before braiding.
Apple walnut: Replace the pecans with 1/3 cup chopped walnuts.
Caramel apple: Finish the baked Danish with a light caramel drizzle.
Pear: Replace the apples with an equal amount of peeled, diced firm pears.
Recipe and Instructions
Step 1: Make the Sweet Dough
Add 6 tablespoons softened unsalted butter, 1/4 cup water, 1/2 cup 2% or whole milk, and 3 tablespoons granulated sugar to a small saucepan.
Warm over low heat until the mixture reaches about 120°F. The butter should be mostly melted and the mixture should feel warm, not boiling hot.
Add 2 cups of the all-purpose flour, 2 teaspoons active dry yeast, and 1/2 teaspoon salt to the bowl of a stand mixer and whisk briefly to combine.
Make a small well in the middle.
Pour the warm butter and milk mixture into the flour. Add 1 large lightly beaten egg.
Attach the dough hook and begin mixing on low speed. Gradually add another 1/4 cup all-purpose flour.
Continue kneading for 7–8 minutes. If the dough remains very wet and sticks heavily to the bowl, gradually add up to another 1/2 cup flour, a tablespoon or two at a time.
Stop adding flour once the dough becomes smooth, elastic, and slightly tacky.
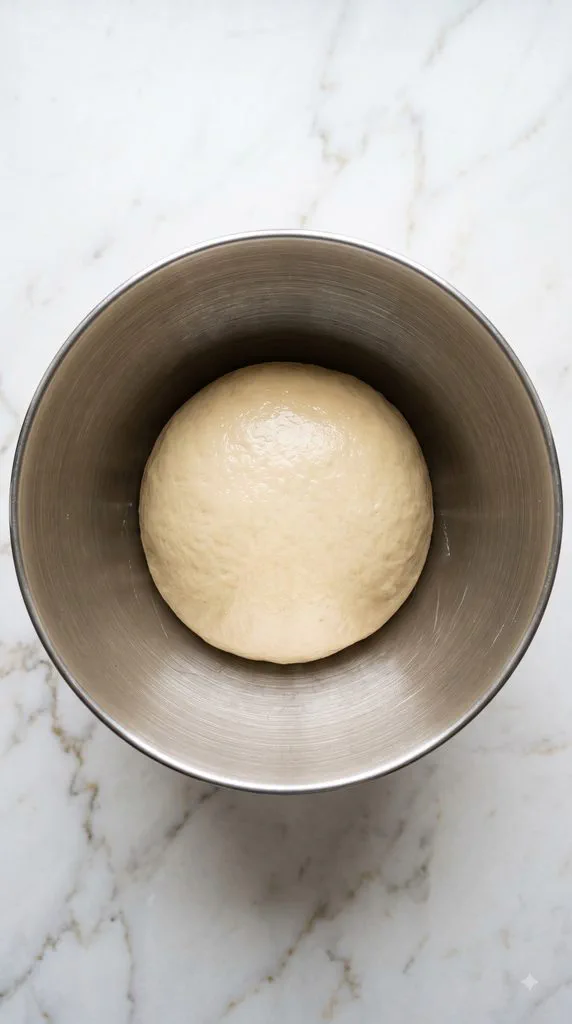
Step 2: Let the Dough Rise
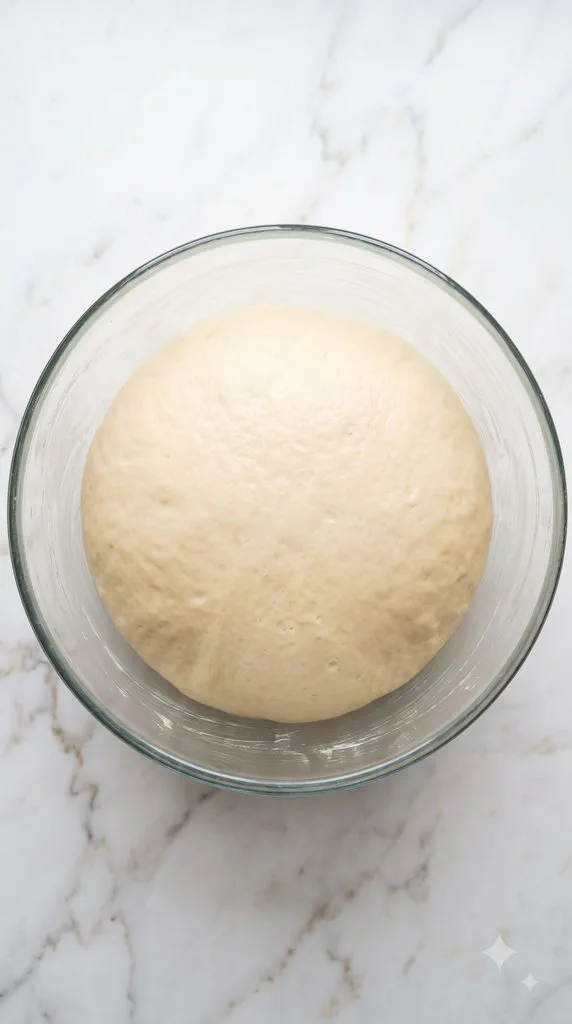
Lightly grease a large mixing bowl.
Shape the dough from Step 1 into a smooth ball and place it in the bowl. Cover loosely with plastic wrap.
Place it somewhere warm and let it rise for about 1 hour, or until the dough is roughly doubled in size.
Don’t worry if it takes a little longer. A cool kitchen can slow down yeast.
Step 3: Cook the Cinnamon Apple Filling
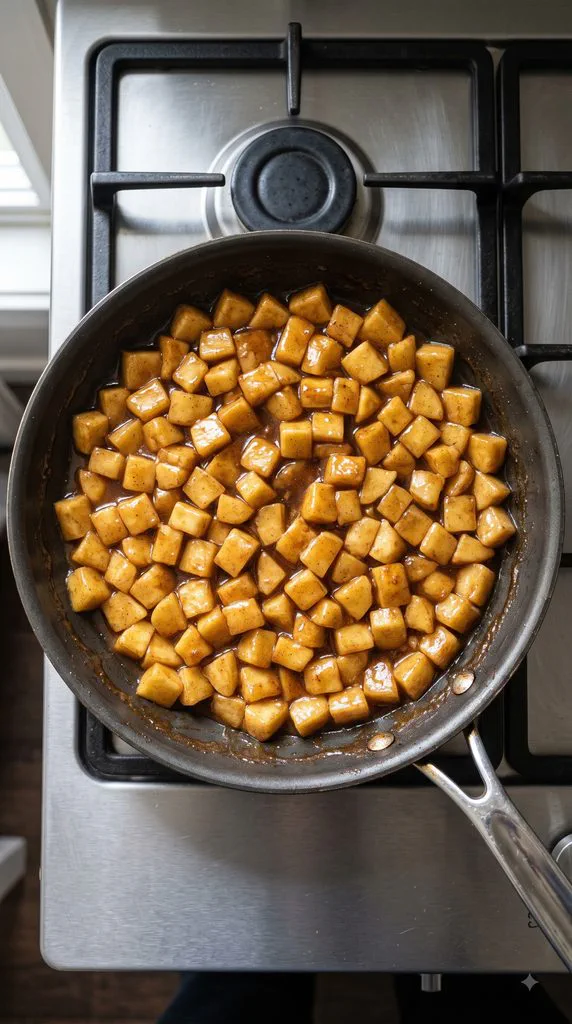
While the dough rises, peel and core 2 medium-large apples. Dice them into small, even pieces.
Place the diced apples in a medium skillet.
Add 1 tablespoon unsalted butter, 3 tablespoons granulated sugar, 1 teaspoon ground cinnamon, and 1 tablespoon cornstarch.
Cook over low to medium-low heat for 5–7 minutes, stirring regularly.
The butter and sugar will melt, while the apples release some of their juice. The cornstarch will thicken that liquid into a glossy cinnamon coating.
Stop cooking when the apples are slightly tender but still hold their shape.
Remove the skillet from the heat and let the apple filling cool before assembling the Danish.
Step 4: Make the Cream Cheese Filling
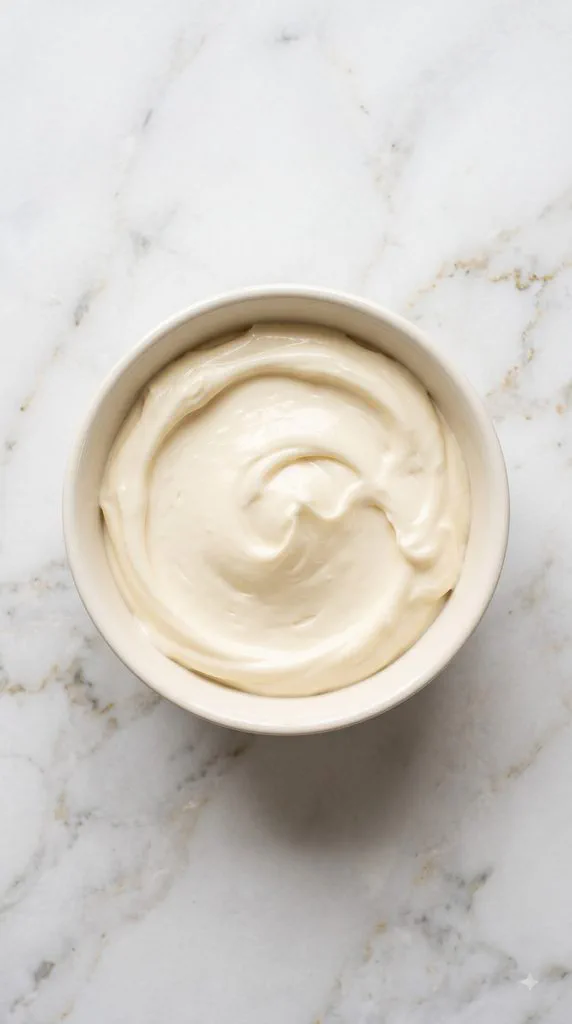
Place 8 ounces softened cream cheese in a small mixing bowl.
Add 1/4 cup granulated sugar, 1 teaspoon vanilla extract, and 1 teaspoon lemon juice.
Beat or stir until completely smooth and creamy. Scrape the sides and bottom of the bowl so there are no plain cream cheese pockets.
Set aside while the apples finish cooling.
Step 5: Roll and Fill the Dough
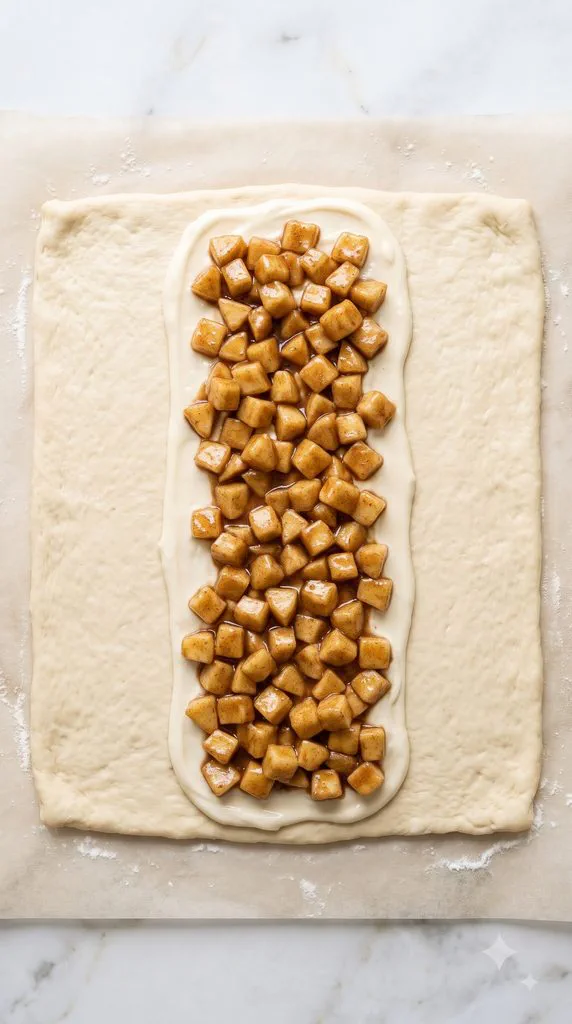
Place a sheet of parchment paper on your work surface and lightly flour it.
Put the risen dough in the center and gently press out some of the air.
Using a rolling pin, roll the dough into a rectangle about 12 x 10 inches.
Spread all of the cream cheese filling made from 8 ounces cream cheese, 1/4 cup granulated sugar, 1 teaspoon vanilla extract, and 1 teaspoon lemon juice down the center third of the dough.
Spoon all of the cooled apple filling made from 2 diced medium-large apples, 1 tablespoon butter, 3 tablespoons granulated sugar, 1 teaspoon cinnamon, and 1 tablespoon cornstarch over the cream cheese.
Keep the two outside sections of dough uncovered. You’ll need them to create the braid.
Step 6: Cut and Braid the Danish
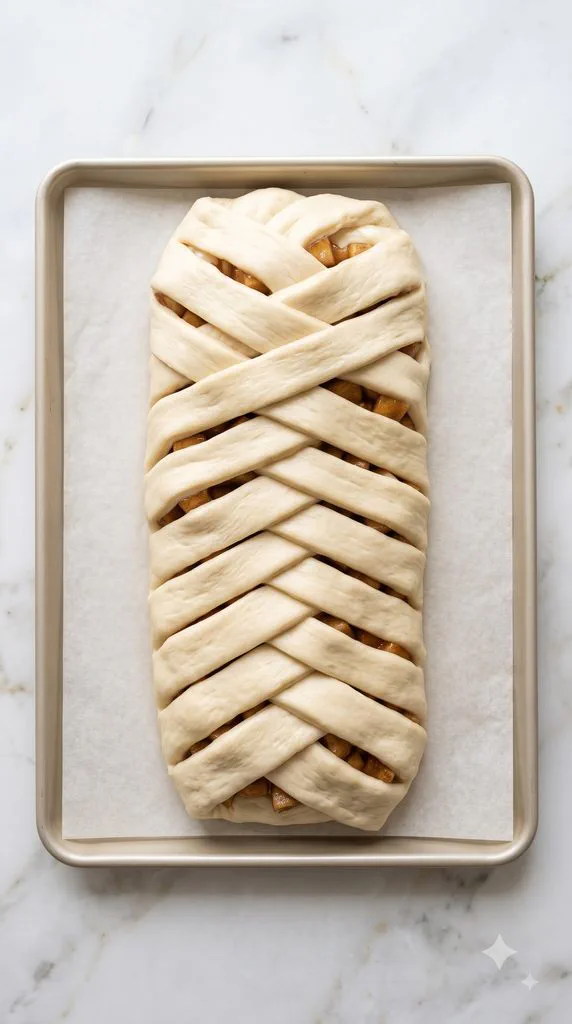
Using a pizza cutter or sharp knife, cut the uncovered dough on each side into diagonal strips about 1 inch wide.
Do not cut through the filled center.
Take one strip from the left side and fold it diagonally across the cream cheese and apple filling.
Take the matching strip from the right and fold it across the first strip.
Continue alternating left and right strips until the entire filling is covered.
Gently tuck the final strips underneath or press them into the dough so they don’t open during baking.
Step 7: Let the Braided Danish Rise
Keeping the braid on its parchment paper, carefully slide it onto a baking sheet.
Loosely cover the braid with plastic wrap.
Let it rise for 30–40 minutes. It should become noticeably softer and puffier.
While it rises, preheat the oven to 350°F (175°C).
Step 8: Bake the Danish
Remove the plastic wrap.
Place the baking sheet in the preheated 350°F (175°C) oven.
Bake for 20–25 minutes, or until the braid is puffed and golden brown.
Pay attention to the center of the braid as well as the edges. You want the dough around the filling to look baked rather than pale and raw.
Remove it from the oven and let it cool for about 15 minutes.
Step 9: Make the Vanilla Drizzle and Finish
While the Danish cools, add 1 1/2 cups powdered sugar, 5 teaspoons milk, and 1/4 teaspoon vanilla extract to a small bowl.
Whisk until smooth.
The glaze should be thick enough to stay visible on the pastry but thin enough to drizzle from a spoon.
If it is too thick, add the remaining 1/2 teaspoon milk and whisk again.
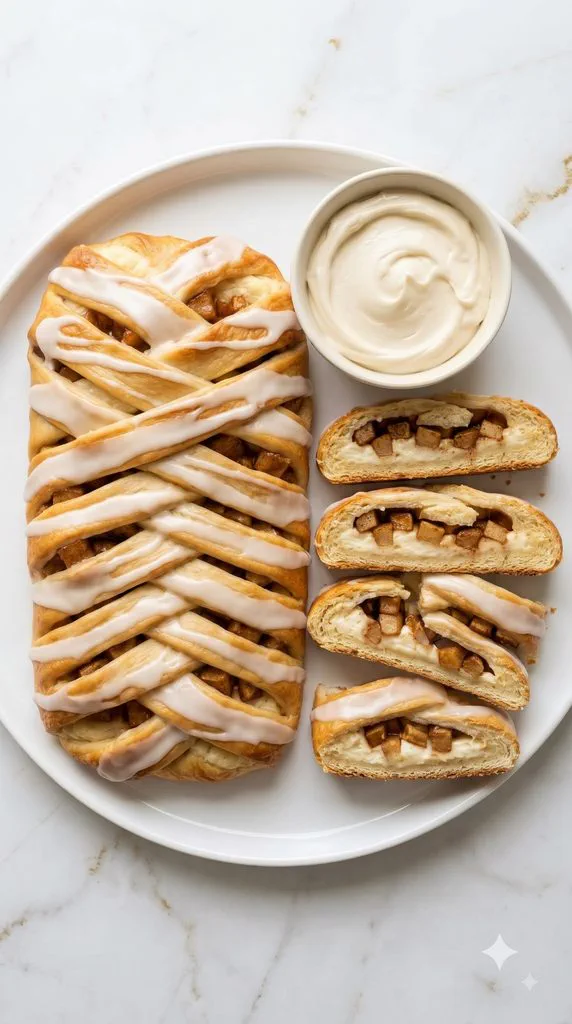
Transfer the slightly cooled Danish to a round serving plate.
Drizzle the vanilla glaze back and forth over the entire braid.
Slice and serve slightly warm or at room temperature.
Common Mistakes
Adding too much flour: This is probably the easiest way to end up with a dry Danish. Add the final flour gradually. Stop when the dough is smooth and slightly tacky.
Making the milk mixture too hot: Very hot liquid can damage the yeast. Aim for about 120°F.
Using hot apple filling: Hot filling makes the dough softer and harder to braid. Give the cooked apples time to cool.
Leaving the apple pieces too large: Big chunks make the braid bulky and harder to close. Small diced apples work much better.
Overcooking the apples: Remember, the apples are going into the oven too. Cook them only until they start becoming tender.
Skipping the second rise: The shaped braid needs another 30–40 minutes to become light and puffy.
Glazing a piping-hot Danish: The glaze will melt and disappear. Let the pastry cool for around 15 minutes first.
Make-Ahead Tips
You can make the cinnamon apple filling 1 day ahead. Cool it completely, transfer it to an airtight container, and refrigerate it.
The cream cheese filling can also be prepared 1 day ahead. Keep it covered in the refrigerator and let it soften slightly before spreading.
For the best texture, I recommend shaping, rising, and baking the actual braid on the day you plan to serve it.
What to Serve With
For breakfast or brunch, serve this Danish with:
- Fresh berries or sliced fruit
- Scrambled eggs
- Bacon or breakfast sausage
- Hot coffee
- Latte or cappuccino
- Chai tea
- Black tea
- Cold milk
If you’re serving it as dessert, a scoop of vanilla ice cream beside a warm slice is also delicious.
Leftovers and Storage
Because this Danish contains cream cheese, store leftovers in the refrigerator.
Let the braid cool completely, then place it in an airtight container or wrap it well. Refrigerate for up to 4 days.
For a warm slice, reheat it in a 300°F oven for 5–8 minutes. You can also microwave an individual slice for a few seconds, but the pastry will become softer.
For longer storage, wrap individual slices well and freeze them for up to 2 months.
Thaw overnight in the refrigerator, then warm before serving.
Macros Information
Based on 10 servings, one slice is approximately:
- Calories: 390
- Carbohydrates: 54 g
- Protein: 6 g
- Fat: 17 g
- Saturated Fat: 10 g
- Fiber: 2 g
- Sugar: 31 g
Nutrition information is an estimate. The final numbers will depend on the apples, cream cheese, exact amount of flour, milk, and how much glaze you use.
FAQ
What are the best apples for this Danish?
Granny Smith is a great choice if you like a tart apple flavor. Honeycrisp, Pink Lady, and Braeburn also work well because they hold their shape when cooked. You can also combine one tart apple with one sweeter apple.
Can I use instant yeast instead of active dry yeast?
Yes. You can use the same amount. Instant yeast may make the dough rise a little faster, so watch the size of the dough instead of relying only on the clock.
Can I make the dough without a stand mixer?
Yes. Mix the dough with a sturdy wooden spoon, then knead it by hand on a lightly floured surface for about 8–10 minutes, or until smooth and elastic.
Why is my dough sticky?
A slightly tacky dough is normal. If it is extremely wet after kneading, add flour 1 tablespoon at a time. Avoid adding a large amount at once.
Why didn’t my dough rise?
Your kitchen may be cold, or the yeast may be old. Give the dough extra time in a warm place. Also make sure the liquid wasn’t too hot when it was added to the yeast mixture.
Do I have to cook the apples first?
For this recipe, yes. Pre-cooking softens the apples and lets the cornstarch thicken their juices before the filling goes into the braid. That helps prevent a watery center.
How do I know when the braid is finished baking?
The top should be golden brown and puffed. Look at the dough near the center filling too. It should appear baked and lightly golden rather than pale and doughy.
Can I leave off the vanilla drizzle?
Absolutely. The braid is already sweet from the apple and cream cheese fillings. The drizzle adds a classic Danish-style finish, but it is optional.
Can I freeze the whole Danish?
Yes, although individual slices are easier to thaw and reheat. Wrap them tightly and freeze for up to 2 months.
Should I serve it warm or cold?
Slightly warm or room temperature is best. Warming it brings out the cinnamon and apple flavors and makes the cream cheese filling extra soft.
Final Thoughts
Apple, cinnamon, cream cheese, soft homemade dough, and vanilla glaze are hard to beat together. The best part is that the finished braid looks much harder to make than it really is.
Take your time with the dough, let the apple filling cool, and don’t worry about making every strip of the braid perfect. Once it rises and turns golden in the oven, those little imperfections become part of its homemade charm.
Serve the Apple Cinnamon Cream Cheese Danish Braid slightly warm, pour yourself something good to drink, and enjoy that first creamy, cinnamon-filled slice. If you make it, leave a comment and share how your braid turned out, any changes you tried, or any questions you have.