
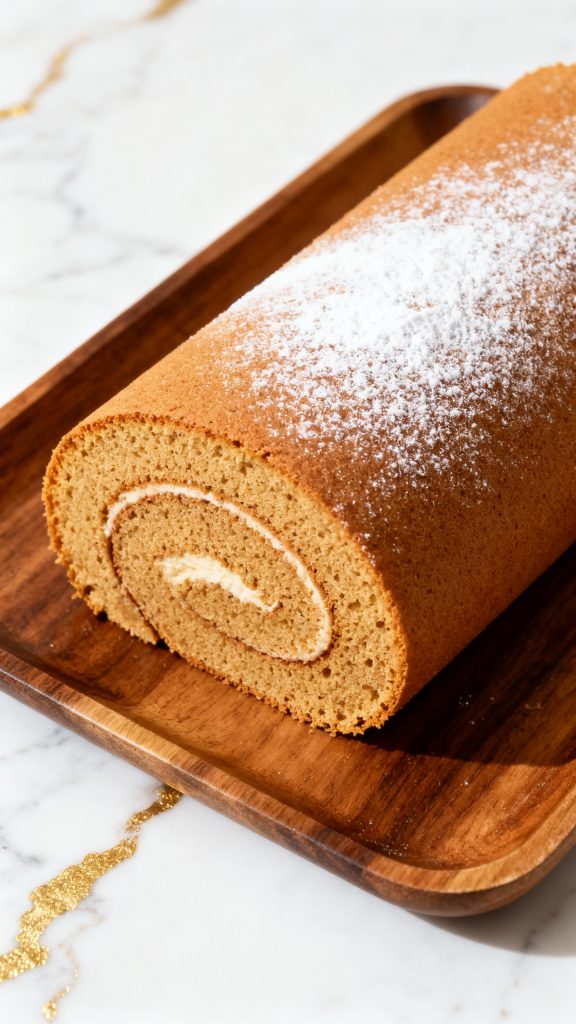
This gingerbread Swiss roll is one of those holiday recipes that looks super fancy but is secretly easy to make.
It’s soft, spiced cake wrapped around a fluffy cream cheese filling — like a Christmas dream you can slice! I make this every year when the air turns crisp and the cinnamon candles come out.
The best part? It’s just the right balance of cozy spice and creamy sweetness.

Why I Love This Recipe
I started making this roll when I wanted something a little fancier than cookies but still gave me that holiday spice fix. The first time I nailed it, my whole kitchen smelled like a Christmas candle — in the best way.
- The sponge is soft, springy, and rolls without cracking
- The cream cheese filling isn’t too sweet — just right
- You can make it ahead, and it tastes even better the next day
- It looks impressive but takes less than an hour start to finish

Makes
8–10 slices
Total Time
45 minutes
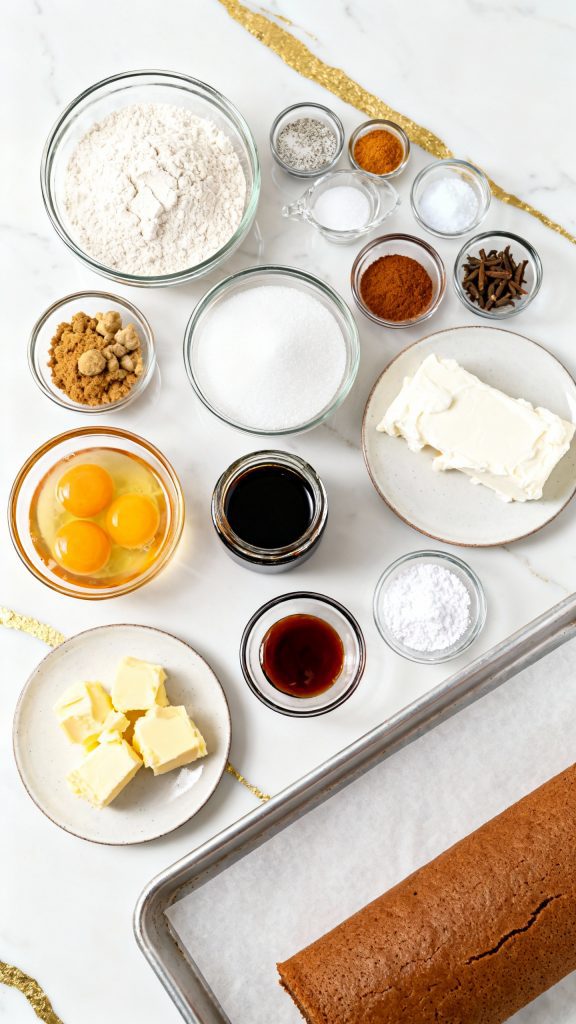
What You’ll Need
- 3/4 cup all-purpose flour
- 1/4 teaspoon baking soda
- 1/4 teaspoon salt
- 1 tablespoon ground ginger
- 1 teaspoon cinnamon
- 1/4 teaspoon ground cloves
- 1/4 teaspoon nutmeg
- 3 large eggs (room temp)
- 1/2 cup granulated sugar
- 1/4 cup packed brown sugar
- 1/4 cup molasses
- 1 teaspoon vanilla extract
- Powdered sugar for rolling
For Filling
- 8 oz cream cheese, softened
- 1 cup powdered sugar
- 6 tablespoons unsalted butter, softened
- 1 teaspoon vanilla extract
Tools You’ll Need
- Mixing bowls
- Whisk
- Electric mixer
- Rubber spatula
- Jelly roll pan (10×15 inch)
- Parchment paper
- Clean kitchen towel
- Sifter or fine mesh strainer
Pro Tips
- Roll the cake while it’s still warm to avoid cracks
- Use a clean towel dusted with powdered sugar for rolling
- Chill the cream cheese filling before spreading if it’s too soft
- Don’t overbake the cake — it only needs about 10–11 minutes
- Let it chill completely before slicing for those clean swirl cuts
Substitutions and Variations
- Swap cream cheese filling with whipped cream or mascarpone for a lighter flavor
- Add a tablespoon of orange zest to the filling for a citrus twist
- Use gluten-free 1:1 baking flour if needed — it rolls just fine
- Maple syrup can replace molasses, though the flavor will be lighter
Make Ahead Tips
- You can bake and roll the cake the day before, then fill and chill it the next day
- Filled and rolled cake can be wrapped in plastic and chilled overnight
- Freezes well: wrap tightly and freeze up to 1 month, thaw in fridge before serving
Step-by-Step Instructions
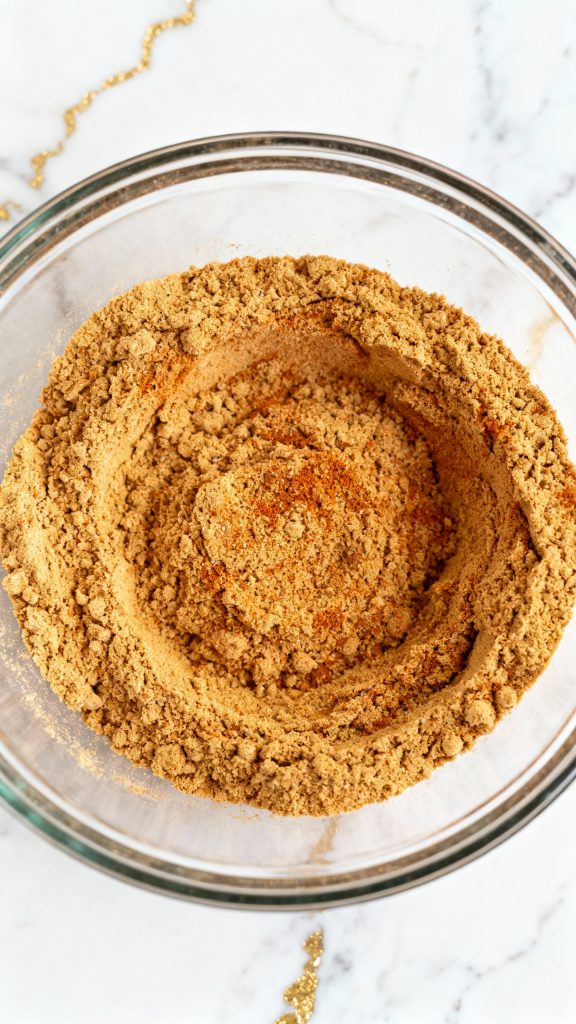
Step 1: Mix the dry ingredients
In a medium bowl, whisk together 3/4 cup all-purpose flour, 1/4 tsp baking soda, 1/4 tsp salt, 1 tbsp ground ginger, 1 tsp cinnamon, 1/4 tsp ground cloves, and 1/4 tsp nutmeg until evenly combined.
Step 2: Beat the eggs and sugars
In a large bowl, beat 3 eggs, 1/2 cup granulated sugar, and 1/4 cup brown sugar on high speed for 3–5 minutes, until thick, pale, and doubled in volume.
Step 3: Add molasses and vanilla
Gently mix in 1/4 cup molasses and 1 tsp vanilla extract to the egg mixture until fully combined.
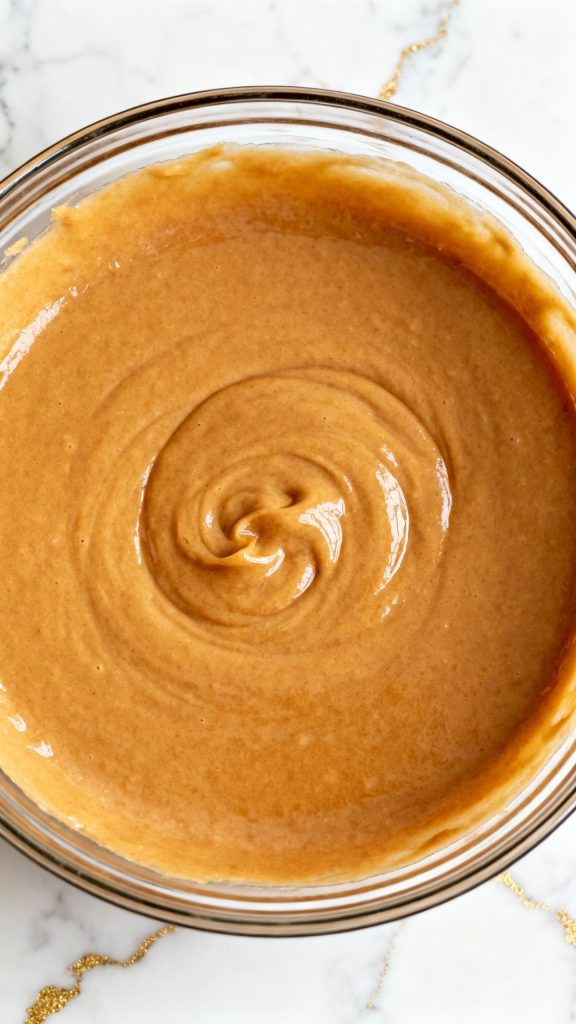
Step 4: Fold in the dry ingredients
Using a rubber spatula, gently fold the dry ingredients into the wet mixture until just combined — do not overmix.

Step 5: Bake the cake
Pour the batter into a parchment-lined 10×15 inch jelly roll pan and spread evenly. Bake at 350°F for 10–11 minutes, until the cake springs back when touched.
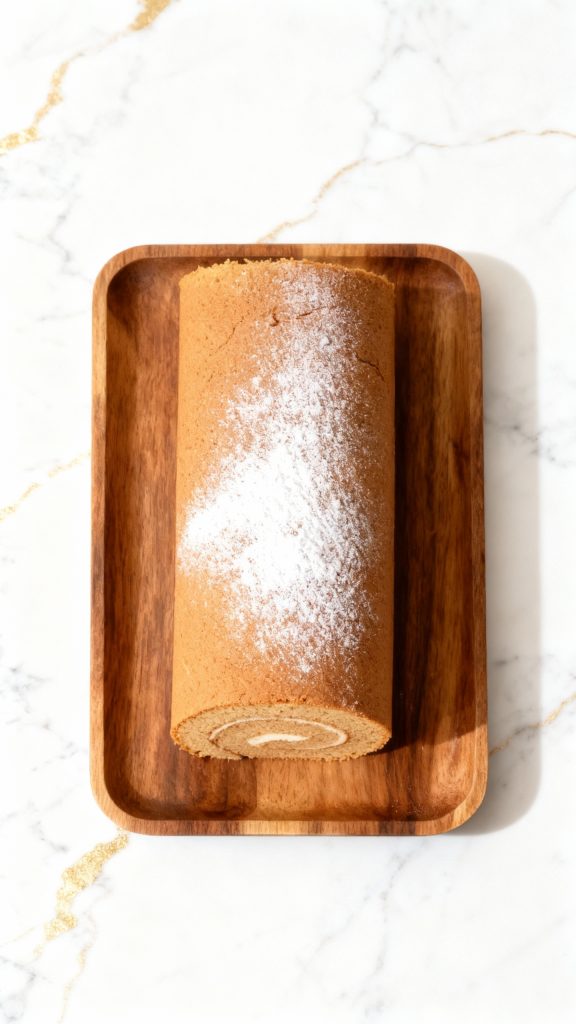
Step 6: Roll the warm cake
Remove the cake from oven and immediately turn it out onto a powdered sugar–dusted towel. Peel off parchment and roll the cake up gently with the towel inside. Cool completely.
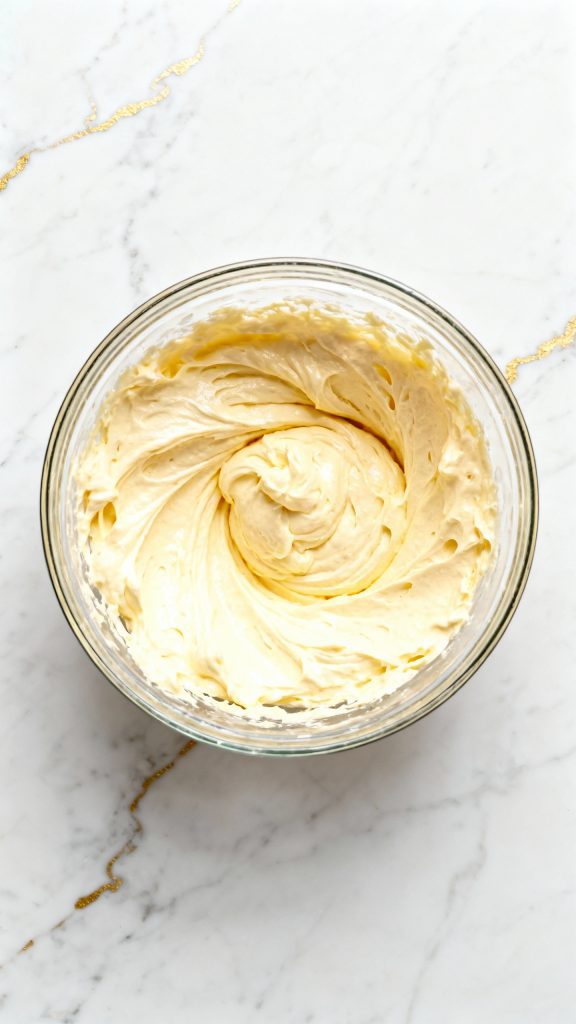
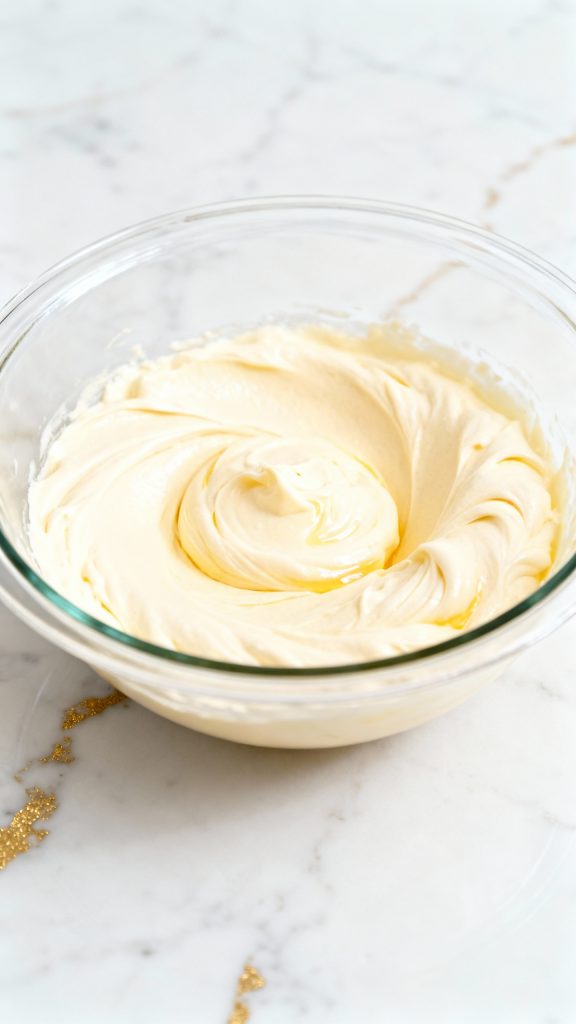
Step 7: Make the filling
Beat 8 oz softened cream cheese, 6 tbsp softened butter, 1 cup powdered sugar, and 1 tsp vanilla extract until smooth and fluffy.
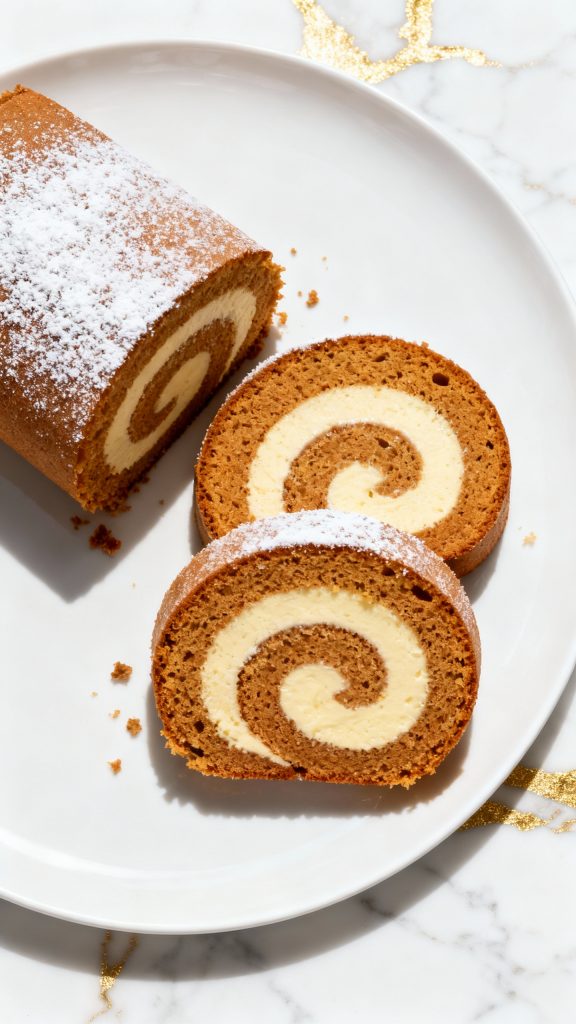
Step 8: Fill and re-roll
Unroll the cooled cake, spread filling evenly to edges, then gently roll it back up (without towel). Wrap in plastic and chill 30 minutes before slicing.
Step 9: Slice and serve
Dust with powdered sugar, slice with a sharp knife, and serve on a round white plate.
Leftovers and Storage
- Wrap leftovers tightly in plastic wrap and store in the fridge up to 4 days
- To freeze, wrap in plastic then foil — thaw in fridge overnight before serving
- Slices can be stored individually with wax paper between layers
Macros (Per Slice, Approximate)
- Calories: 280
- Protein: 3g
- Fat: 14g
- Carbs: 36g
- Sugar: 27g
- Fiber: 1g
Why This Recipe Works (Quick Science)
The eggs are beaten for several minutes to incorporate lots of air. This gives the sponge cake its soft, light structure without using baking powder. The molasses adds moisture and deep flavor, while the acidity helps the cake stay tender. Rolling it while warm sets the shape and prevents cracks later.
Common Mistakes
- Overbaking: Dries out the cake and makes it crack
- Not rolling while warm: It has to be rolled while soft or it’ll break
- Using cold filling: Can tear the cake — let it soften just a bit
- Spreading filling on a warm cake: It’ll melt — wait until it cools!
What to Serve With
- A hot cup of chai tea or spiced latte
- Fresh berries or poached pears
- A drizzle of caramel sauce for extra indulgence
- Lightly sweetened whipped cream on the side
FAQ
Can I make this without a jelly roll pan?
You can, but a smaller pan may make the cake too thick and hard to roll.
How do I keep the cake from cracking?
Roll it while warm and don’t overbake. Use a towel and roll gently.
Can I freeze it?
Yes! Wrap it tight and freeze up to a month. Thaw in fridge.
Can I use store-bought cream cheese frosting?
Sure! Just make sure it’s spreadable and not too runny.
Hope you love this festive, cozy cake as much as I do. It’s a little project with a big wow factor. If you try it, leave a comment and let me know how it turned out — or ask anything you’re unsure about!
