
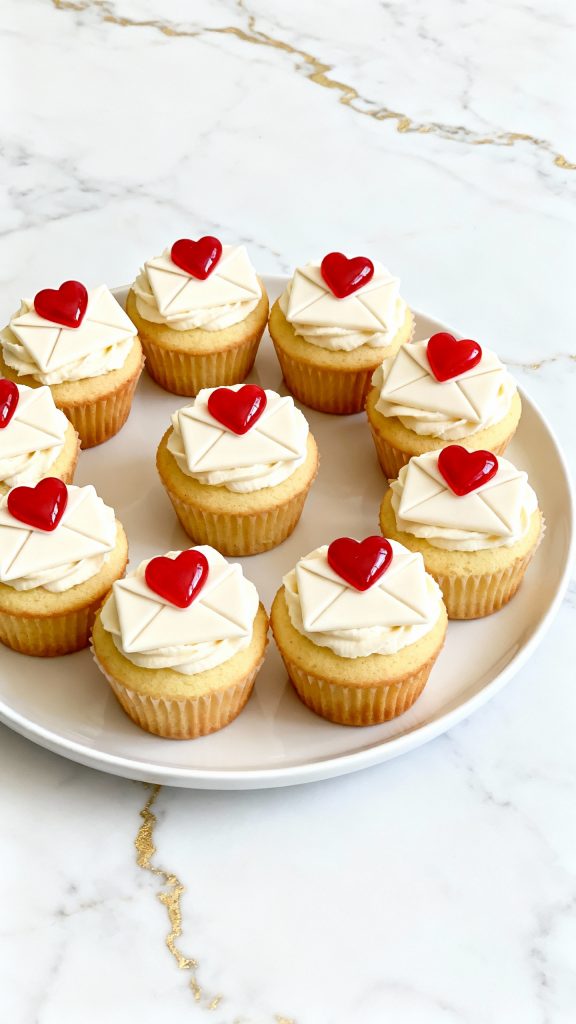
Sweet, soft, and a little romantic—these Love Letter Cupcakes are everything I want in a dessert.
Fluffy vanilla cake filled with strawberry jam and topped with silky buttercream “envelopes” that look like mini letters sealed with love (aka red candy hearts).
These are a hit at Valentine’s Day, anniversaries, or any day you feel like showing a little extra love.
They’re super fun to decorate and even more fun to eat.

Why I Love This Recipe
These cupcakes remind me of when I used to bake love-themed treats for my friends in school. I’d always try to make something that looked extra special but was secretly easy to pull off.
- The filling is a surprise and makes each bite special.
- The envelope-style frosting looks fancy but is super simple to do.
- You can decorate them however you want—hearts, sprinkles, or even little initials.
- They make people smile—every time.
Servings & Time
Servings: 12 cupcakes
Prep Time: 20 minutes
Cook Time: 18–20 minutes
Cool + Decorate Time: 30 minutes
Total Time: ~1 hour 10 minutes
What You’ll Need
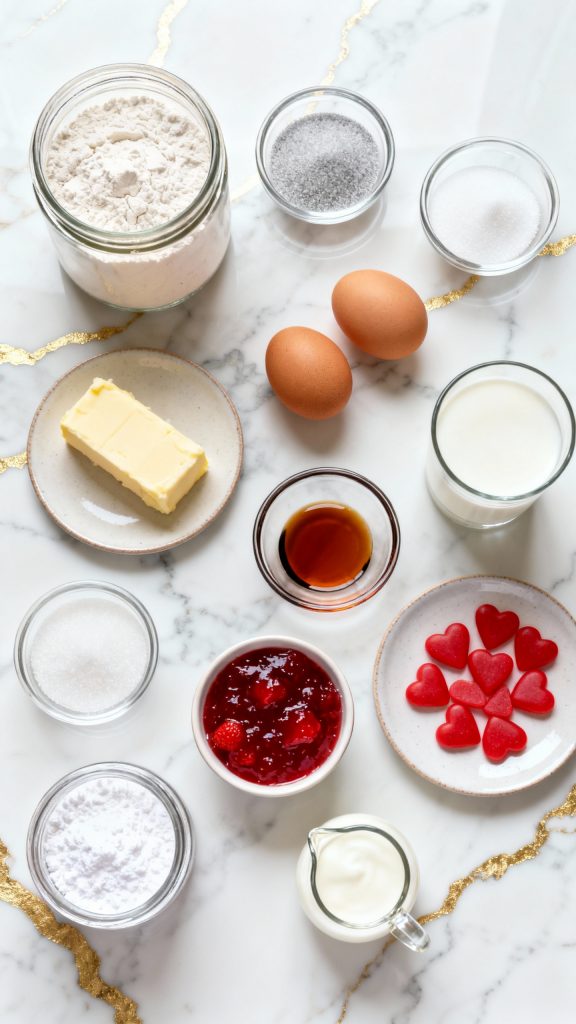
- 1 ½ cups all-purpose flour
- 1 ½ tsp baking powder
- ¼ tsp salt
- ½ cup (1 stick) unsalted butter, softened
- ¾ cup white sugar
- 2 large eggs
- 2 tsp vanilla extract
- ½ cup whole milk
- ½ cup strawberry jam (for filling)
For the Frosting:
- 1 cup (2 sticks) unsalted butter, softened
- 2 ½ cups powdered sugar
- 1 ½ tsp vanilla extract
- 1–2 tbsp heavy cream or milk
- Red candy hearts or red M&Ms for decoration
Tools:
- 12-cup muffin pan
- Cupcake liners
- Medium mixing bowls
- Hand mixer or stand mixer
- Spatula
- Piping bag + flat piping tip or zip-top bag
- Spoon or cupcake corer
- Cooling rack
Why This Recipe Works (Quick Science)
- The combo of butter and sugar creates a fluffy, tender crumb when beaten together (it traps air!).
- Baking powder gives lift for that perfect dome.
- Milk adds moisture and makes the batter smooth.
- The strawberry jam center adds both texture and flavor contrast.
- The buttercream has just enough sugar to hold shape but stay creamy.
Pro Tips
- Don’t overmix the batter—stop as soon as it’s smooth.
- Let the cupcakes cool completely before cutting and filling.
- Use a zip-top bag if you don’t have a piping bag.
- If the buttercream is too soft to pipe, chill it for 10 minutes.
- Store cupcakes unfrosted if making ahead.
Substitutions and Variations
- Swap strawberry jam with raspberry or Nutella
- Use gluten-free 1:1 flour blend for a GF version
- Add ½ tsp almond extract to the batter for extra flavor
- Try chocolate cupcakes with cherry filling for a twist
Make Ahead Tips
- Cupcakes can be baked and stored (unfilled, unfrosted) for 2 days at room temp or 1 week in the fridge
- Frosting can be made and chilled for 3 days—just re-whip before piping
- You can fill and frost the day before serving, just store in an airtight container
Recipe Instructions
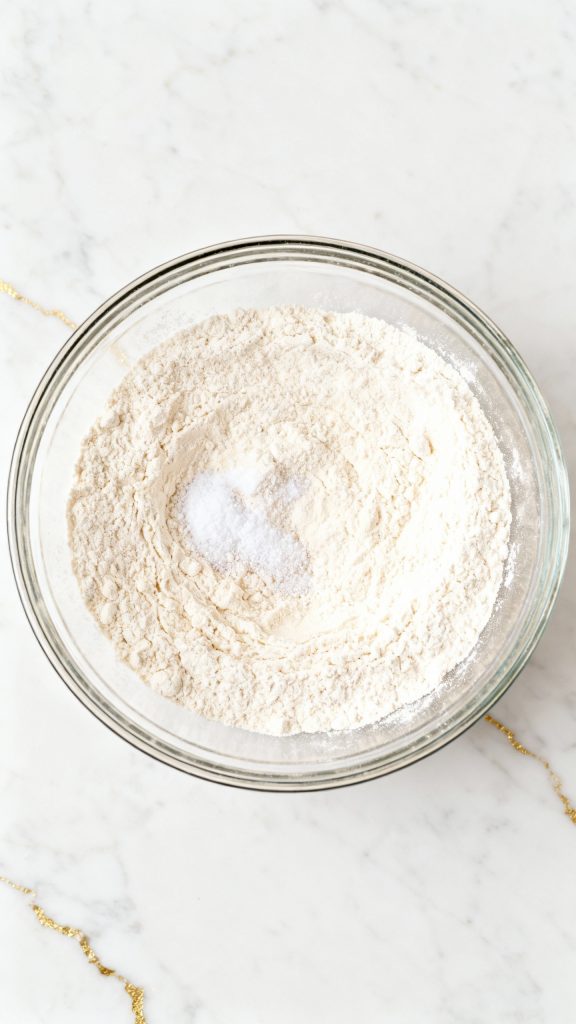
Step 1: Mix Dry Ingredients
In a medium bowl, whisk together 1 ½ cups all-purpose flour, 1 ½ tsp baking powder, and ¼ tsp salt.
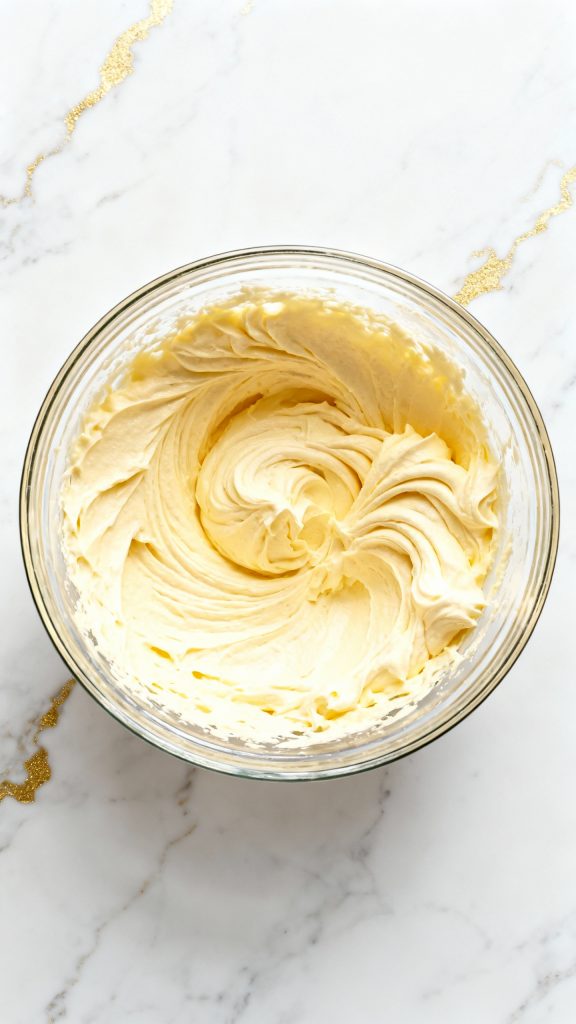
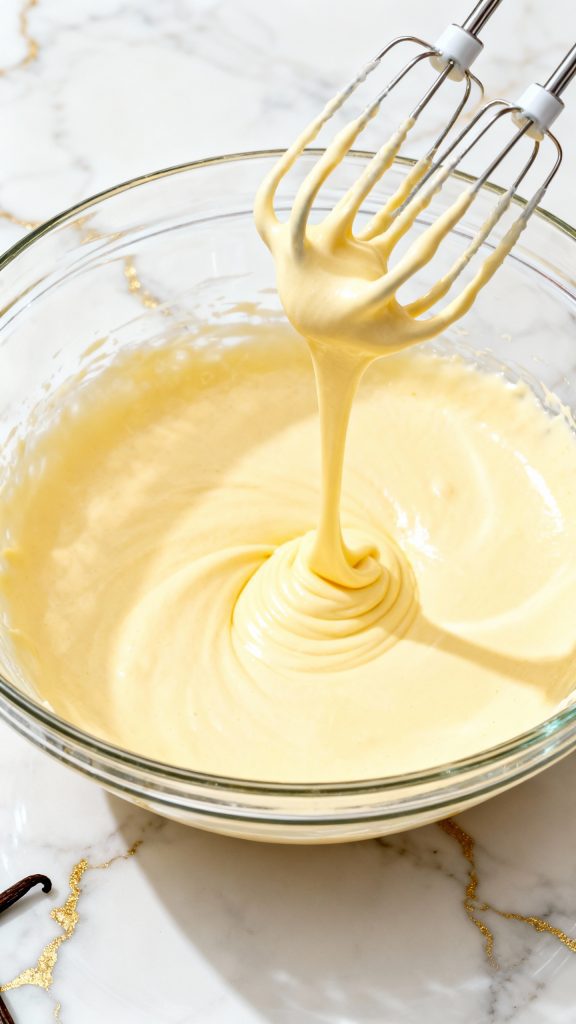
Step 2: Cream Butter & Sugar
In a large bowl, beat ½ cup softened butter and ¾ cup sugar with a hand mixer on medium speed until light and fluffy (about 2–3 minutes).
Step 3: Add Eggs and Vanilla
Add in 2 large eggs, one at a time, beating well after each. Then add 2 tsp vanilla extract and mix until combined.
Step 4: Add Dry + Milk
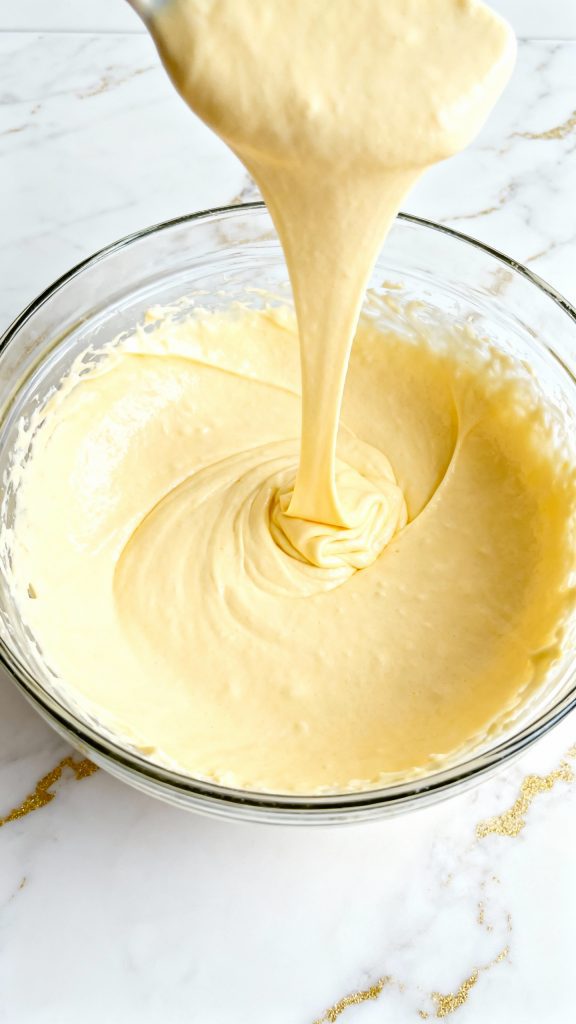
Alternate adding the dry mix and ½ cup whole milk to the wet ingredients. Start and end with dry. Mix just until smooth.
Step 5: Fill Cupcake Liners
Line a muffin pan with 12 cupcake liners. Divide the batter evenly between the cups (about ⅔ full).
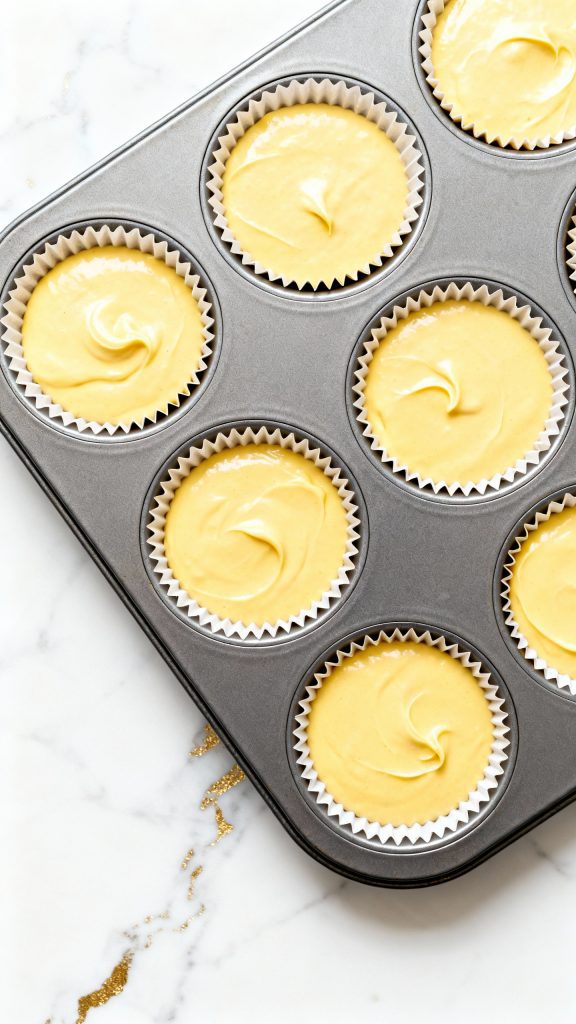
Step 6: Bake
Bake at 350°F (175°C) for 18–20 minutes until a toothpick comes out clean. Let cool in pan 5 mins, then transfer to rack.
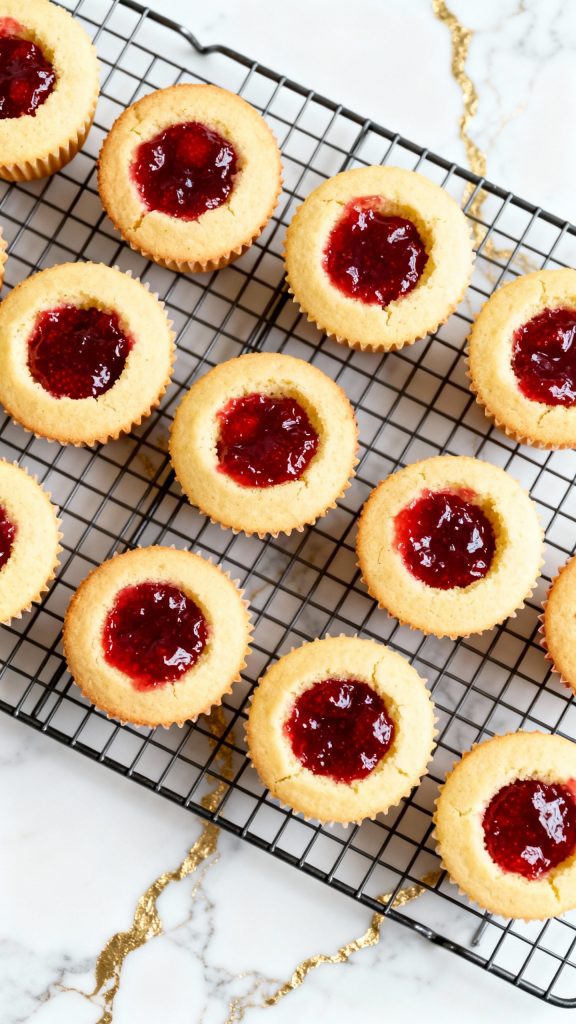
Step 7: Core & Fill
Once cooled, use a small spoon or corer to remove the center of each cupcake. Fill each with about 1 tsp strawberry jam.
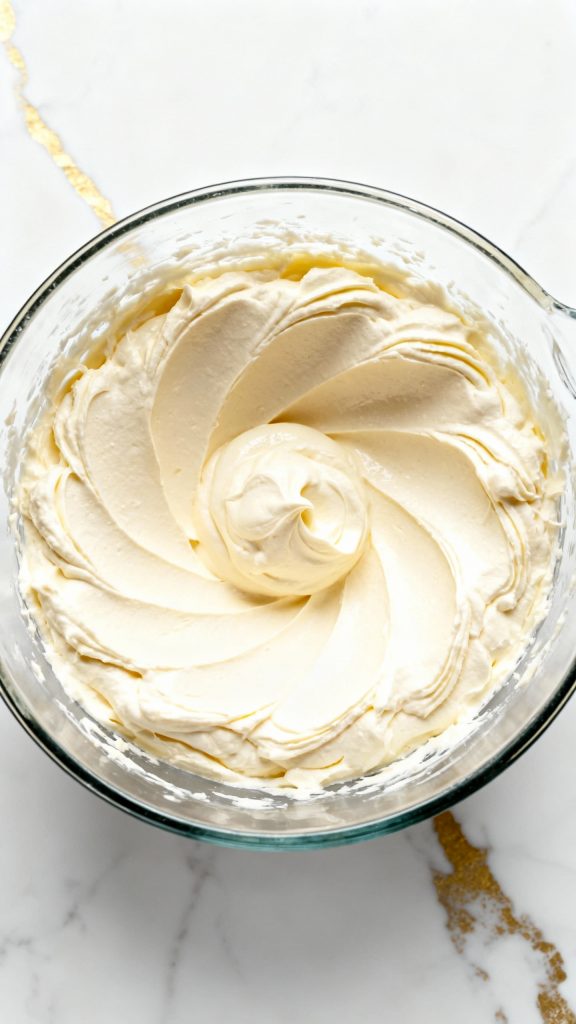
Step 8: Make Buttercream
In a bowl, beat 1 cup softened butter until smooth. Add 2 ½ cups powdered sugar, 1 ½ tsp vanilla, and 1 tbsp cream. Beat until fluffy.
Step 9: Frost the Cupcakes
Use a piping bag (or zip-top bag with the tip cut off) to frost each cupcake with a generous swirl or smooth layer of buttercream on top. You can spread it with a spatula or pipe it on however you like—just make sure it’s a nice surface for your fondant envelope topper.
Step 10: Decorate with Fondant Envelope
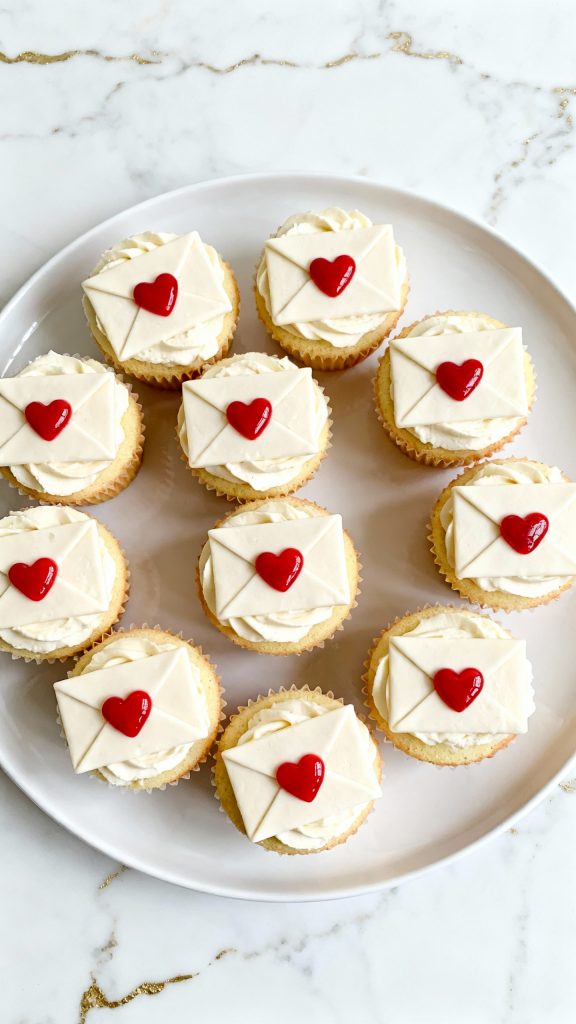
Place a fondant envelope on each cupcake (you can learn how to make one with white fondant here by using an envelope cookie cutter) and candy hearts. Serve and enjoy!
Leftovers & Storage
- Store decorated cupcakes in an airtight container at room temp for 2 days
- For longer storage, refrigerate up to 5 days
- Freeze unfrosted cupcakes for up to 1 month (thaw before filling/frosting)
Common Mistakes
- Overbaking: Dry cupcakes happen fast—check at 18 mins.
- Too much batter in liners: Fill only ⅔ full so they don’t overflow.
- Frosting too runny: Add more powdered sugar or chill for 10 mins.
What to Serve With
- A cold glass of milk
- Hot cocoa or coffee
- A fruit platter
- Vanilla or strawberry ice cream
FAQ
Can I use store-bought frosting?
Yes, but homemade holds shape better for the envelope look.
Can I skip the filling?
Yep! You can leave the centers whole or just use a drop of frosting instead.
Can I make these gluten-free?
Use a 1:1 gluten-free flour blend—just don’t skip the salt or baking powder.
Final Thoughts
These Love Letter Cupcakes are the perfect little treat to show someone you care—with frosting and jam! Whether you’re baking for a holiday, a celebration, or just because, these cupcakes bring a little sweetness and a lot of love.
Give them a try and let me know how yours turn out—I’d love to hear what filling you used or how you decorated yours!
